Wargaming from Hertfordshire & Beyond!

Friday, 2 September 2022

Star Wars – Escape From Tatooine Campaign, Mission 4: Rebels Hire Off-Planet Transport

Having ambushed the Empire’s prison transport and freed the captured Princess Leia and the Astromech droid R2-D2, who has the stolen Death Star plans hidden in his memory banks, the Rebels must now escape from Tatooine. They believe they will find off-planet transport, plus a “trustworthy” pilot, in the spaceport town of Mos Eisley. Leia has been advised to seek out a rogue smuggler called Han Solo who owns a converted freighter called the Millennium Falcon.

Rebel informants have discovered that Han, and his co-pilot Chewbacca, have recently been accused of smuggling and imprisoned by the Empire Commander governing Mos Eisley.

To escape Tatooine, the Rebels must first jailbreak Han and Chewbacca, then fight their way to the Millennium Falcon.

The Rebel’s Alien Incursion Team has secretly infiltrated Mos Eisley and has reported that Darth Vader and a Death Trooper team have now arrived on Mos Eisley to continue the search for the stolen Death Star plans. This will make the Rebel’s task a lot harder.

OBJECTIVE

Part A: The Rebels must rescue Han and Chewbacca from their cells in the Prison.

Part B: All named characters must then reach the Hanger containing the Millennium Falcon. The hanger must then be defended until the Falcon has been readied for take-off (requiring a Task Roll of 12).

The Empire must try and prevent the Rebels from rescuing Han and Chewbacca, and from reaching and taking-off in the Millennium Falcon. The Empire must kill/capture as many named Rebel characters as possible. Any characters “killed” will be revived in Bacta tanks before being imprisoned. (The Rebels will be back to rescue them.)

THE PATROL PHASE


The Patrol Phase ended with the Rebels having 3 Jump-Off points in the north of Mos Eisley, 2 in the residential area, and 1 in a cacti area to the north of the prison.

Han & Chewbacca are in two prison cells.

The Empire had 3 Jump-Off points in and around the market area, each representing the position of a Stormtrooper patrol, and a fourth at their Barracks.

The Empire’s Security Trooper squad start the game already deployed in the Prison Zone.

FORCES


The Empire force consisted of:
Darth Vader (Force User Ranking Senior Leader),
1 Imperial Officer and 1 Stormtrooper Lieutenant (Senior Leaders),
1 Death Trooper team,
1 Security Trooper squad,
2 Stormtrooper squads,
1 Green Stormtrooper squad,
1 Stormtrooper team (JL + 1 trooper with heavy blaster),
1 Incinerator team (2 troopers with flame throwers).

The Rebel force consisted of:
Princess Leia and Obi-Wan Kenobi (Senior Leaders),
1 Rebel Officer (Senior Leader),
Luke Skywalker, R2-D2 and C-3PO,
1 Rebel Alien Incursion team,
3 Pathfinder squads,
1 Desert Trooper squad.

BATTLE REPORT

The Empire started, deploying a Stormtrooper squad in the north of the market area, and another from their barracks which moved behind the set of barricades south of the prison.

The Rebels then deployed a Pathfinder squad into the cacti north of the prison which opened fire on the Security Guard squad guarding the prison.


A second Pathfinder squad deployed north of the market and advanced south towards the Stormtroopers. The citizens in the market started to look nervous. Perhaps tomorrow would be a better day to do their weekly shop.


Sustained fire from the Rebels wiped out one Security Trooper team and broke the other, leaving the prison unguarded.

This allowed the Rebels to deploy their Alien Incursion team and advance them towards the prison to try and release Han & Chewbacca. Unfortunately, with the front of the prison covered by a squad of trigger-happy Stormtroopers, no one was willing to volunteer to break cover and try and open Han and Chewbacca’s cells. If only they’d remembered to bring R2.

With a Rebel squad now positioned to the north of a narrow palm tree grove, and a Stormtrooper squad to the south, neither of which fancied advancing into close combat, a stand-off developed.

To try and break this stand-off, a Stormtrooper squad deployed and advanced from the south of the market, encouraged by Darth Vader, who was escorted by a Stormtrooper team (well a Junior Leader plus one Stormtrooper – but still technically a team).


Meanwhile, in the east, the Rebel and Stormtrooper squads both go on overwatch, waiting for the other to make a move.

To try and swing the odds in their favour and break the stalemate, the Rebels deploy Leia and a Pathfinder squad into the palm grove NW of the market, and Obi Wan and another Rebel squad with R2-D2 into the cacti north of the prison.

Several exchanges of fire followed, with shock taken by both sides, but minimal kills, mainly due to poor dice rolls and fool hardy Junior Leaders stepping in front of the enemy blaster fire.

R2-D2 was ordered to advance towards the prison, keeping out of LoS of the Stormtrooper squads, whilst the Incursion team advanced behind the prison to try and outflank the Stormtroopers.

 
In the face of plummeting Force Morale (now down to 5, they would soon start losing Command dice!!), the Empire decided to change their tactics and pulled one squad back into cover of a nearby market stall and moved another into the arch on the east side of the market to lay covering fire against the Rebels in the cacti.

Seeing this squad exposed at their rear, the Rebels deployed a Rocket Launcher team at the rear corner of a building in the north.


With the Stormtrooper squads now retreated into the market, Leia decided to lead her squad in a dash down the east of the hanger to try and get behind the Stormtroopers.


Darth Vader was now wondering what had happened to his infamous Death Troopers, and his dreaded Incinerator team. He suspected they were still in the barracks having a nice cup of tea with Lieutenant Williams. Something they may, or may not, live to regret.

After 4.5 hours of gaming, the game was adjourned, to be continued.

What will happen in next week’s thrilling instalment?

Will a Rebel Trooper finally find the courage to open Han & Chewbacca’s cells, or is it all down to plucky little R2-D2?
Will the Death Troopers forgo a second cuppa and join in the action?
In their haste to escape the planet, will the Rebels leave without the young Jedi Padawan Luke Skywalker and his Protocol droid C-3PO, who are hiding somewhere in the city?
Is Han sober enough to fly the Falcon?
Will Obi Wan be struck down in a lightsabre fight with Darth Vader and “become more powerful than you could possibly imagine”?
Tune in next week for answers to these questions, and more!

Rob

Thursday, 1 September 2022

Space Station Zero - A solo/co-op game of space exploration

Introduction 

Ok, most people have probably heard of Space Station Zero by now, but for those who haven't (Tony) it's a new science fiction skirmish game for solo or co-operative play.  Your crew is stranded in the docking bay of a vast and ancient space station with on hope of rescue and no way home.  Given the choice between dying of home brewed alcohol or exploring the station you have decided on the later.  The game has been written by Snarling Badger Studios (Adam Loper and Vince Venturella) who previously released the Skirmish set Reign in Hell.

The game is design to be played on a fairly small surface, ideal for those with little room, and with any miniatures you happen to have lying around.  The suggestion is that you play on a 22" by 30" area (which just happens to be the same size as a GW Kill Team board).  Personally I used the recently  released Stargrave figures from Northstar Miniatures for my crew and some GW Necrons for some ancient Sentry Robots but you can use anything you have.  There is no requirement for your crew to be human, so if you want to create a crew using GW Tyranids then go for it (Good luck remembering which one is the medic though)!

Creating a crew


The first step in the game is to create your crew which comprises either 4 Elite Explorers, 6 Regular Chaps or 8 Novices plus their Commander.  There are six different types of ship you could have arrived on (Medical, Warship, Transport, Science, Pirate or Explorer) and which type you choose will restrict your selection of crew member professions.  Being from a medical ship means you'll have to have several Medical Officers for example and will have the option of a Chief Physician (not available to anyone else). It will also affect your Commanders skills and equipment choices for the whole crew.  You will also gain an 'edge' which is the unique advantage which sets your crew apart, again there are a lot of option to choose from (Nanotech in your blood that helps you heal - fine, Power Armour all round - sure, Harmonious Culture where members in close proximity buff each other - naturally (we've all seen Star Trek)).  Choose wisely though as you will be facing a selection of challenges in your explorations which will not all be alien robots with guns, being unable to defuse a bomb because you've got no science skills in your group could lead to your campaign ending suddenly with a bang - literally.

Game Rules


The game mechanics have a few interesting twists.  Firstly the game uses D12's (that's twelve sided dice for those who don't know), which is not an option you see very often.  Secondly you succeed in your rolls by rolling even numbers with odd numbers being fails.  For basic checks any even numbers will do but as tasks get harder you start excluding the lower even numbers making successful rolls harder to come by.  Fortunately rolling a double 12 is counted as a Critical Success with the number of successes being doubled as a result.  For balance rolling a double 1 counts as a Critical Failure and leads to an automatic failure of the roll.  To give our heroes a slight advantage if you roll both a double 1 and a double 12 the double 12 wins out and the double 1 is ignored.  For some tests the players just need to roll a stated number of successes to pass a test, at other times the players will be making an opposed roll against an enemy with the difference in successes rolled by each party giving the result - for combat this difference is the damage inflicted.

Battle Report


So time to dive in and see if the water is warm!  For my team I decided on an average crew of 6 spacefarers together with their Captain.  My ship was an Exploration vessel and the teams edge was a Harmonious Culture.  To avoid gratuitous Star Trek references the Ship was the Orville with Captain Mercer, First Officer (Soldier) Grayson, Chief Engineer (LaMarr), Medical Officer Finn, Scientist Isaac, Security (Soldier) Kayali and finally Ace Pilot (Malloy).  In the absence of the appropriate Wiz Kids figures, I used various Stargrave figures the represent the crew.

The first scenario is Docking Bay Access Port which is the default start for the campaign of exploration.  It comes with two random challenges (from a list of four options).  A random roll gave me Poison Gas Leak and Ancient Sentries, ironically because every YouTube video I've watched of the game have these two challenges in play.  I set up the board by placing markers for the gas leaks, six Necrons for the ancient sentries, liberally scattering terrain across the board and positioning my crew in their starting zone.

The board in all its glory - the crew entered from the left.

Captain Mercer, Scientist Isaac and MO Finn took the right of the board (bottom in the photo above) with Grayson, Kayali, LaMarr and Malloy on the left.  Due to the gas leak each crew member had to check against breathing in the gas at the start of each of their activation's. Although this was unlikely to kill anyone outright the damage started building up quickly and demonstrated that the clock was definitely running.  Closing in with the sentries my crew demonstrated a complete lack of weapon proficiency with a single point of damage on two sentries being all I had to show after the first turn.

Captain Mercer and his crew view the approaching robots with alarm

Turn two went better with sentries starting to fall to somewhat better weapons fire while one getting in combat with the doctor regretted its life choices after being destroyed in hand to hand combat.

Commander Grayson and team push toward the left most vent.

Turn three saw the remainder of the sentries destroyed but Scientist Isaac took a lungful of gas too many and died.  The remainder of the team closed in of the vents with duct tape at the ready.  With the absence of active enemy the remaining turns saw the crew progressively sealing off the gas vents to finish the game, although not before pilot Malloy also keeled over after one failed poison test too many.

Grayson and Kayali seal the final vent to complete the challenge.

With the scenario successfully completed it only remained to raise the dead and assign the experience.  Isaac was able to make a full recovery but Ace Pilot Malloy was found to be 'dead and gone'.  Fortunately my Captain had taken a Stabilisation Module allowing me to re-roll the damage effect - nope still 'dead and gone'.  A reminder that the game has its brutal side with permanently dead members being irreplaceable during the campaign and the chance of out of action crew members being dead being higher than is usual in other skirmish campaign games.

First Impressions


The game was easy to play and only took a short time to play despite being my first game.  It was easy to set up and presented few problems finding suitable miniatures or terrain (ok that might be because I've been gaming for around 40 years and have accumulated a lot of stuff) but I suspect it will create few challenges for most players.
Ironically the choice of D12's is likely to present the main problem for newer players, I had a bag of 50 or so D12's on hand but I suspect a lot of new players may struggle to put together the 8 or so needed to play the game.  For what is probably intended to be a 'gateway game' into the hobby this was an unusual choice although it allows for the adoption of the interesting dice mechanics discussed earlier.  I suspect for young players lacking the physical D12's there is a suitable app which will suffice.
Overall the game works well and provides sufficient challenge to keep you on your toes.  I suspect it will prove difficult as crews get whittled down over progressive challenges but only time will tell.

Chris

Monday, 29 August 2022

Bolt Action; "A Care in the Community Project"

 Yesterday Simon continued his charitable work giving Chris another Bolt Action run-out in readiness for the Bolt Action tournament at Lost Ark on September 18th. This game would see Chris’ “undead” Japanese fighting a US army force commanded by Simon. Why “undead”...look at the unhealthy pallor of the Sons of Nippon skin. Even Chris acknowledged that something had gone wrong.

Unlike the game vs Tony two weeks ago, this time Chris did seem to have a basic grasp of the rules albeit had left his QRS at home plus had omitted some important information from the force data sheets. Not a disaster but very annoying and sloppy. If Chris had paid more attention to what he had to bring rather than the mega-bag of Costco crisps that he brought all would have been well.

Back to the game. Again, unlike the Tony game this one did have a semblance of logic. Five objectives were allocated across the table and then the players diced for which side to take. The US entered the table with infantry squads pushing up both flanks, the C/O and the MMG taking the centre and a third squad and Sherman being held in reserve. The M8 armoured car rumbled forward in support of the Yanks right flank. Chris responded with infantry squads right, left and centre; a tank, A/T rifle team and field gun on his left and his MMG covering the right.


First blood went to the Japanese as the MMG and infantry fire hit the US squad advancing through the tea plantation. The US replied with MMG and rifle/BAR fire in reply. Both sides saw men go down. The M8 was soon in trouble. It wiped out the A/T rifle team but was hit and disabled itself. The crew however could fight on and managed to direct machine gun fire at Chris’ “elite” squad advancing through the centre.

Both tanks then entered the fray to support opposite flanks. Chris’ tank plastered an American squad lurking in a palm grove but stayed close to the table edge, whilst the M4 advanced onto the table destroying Chris’ MMG team and then proceeding to shoot up the mortar/infantry squad hiding in yet another palm grove.


In the centre the US air observer successfully called in an airstrike before dying as Chris veterans conducted a Banzai charge. Eight onto one was never going to end well. Things went less well for another Banzai charge which misjudged its distances and ended up in the open with the M4 able to pour enfilading HE and machine gun fire into it. Exit a Japanese squad. However, Chris was enjoying greater success on his left. The crippled Greyhound armoured car was finally knocked out, and the flanking US infantry squad broke and ran.

By the end of turn 4 Simon had seen enough. Despite holding a strong position and likely to hold 3 out of the 5 objectives if the remaining turns played out, he let Chris claim a morale-boosting victory. After all, its not that often that Chris is ever victorious, and he has to learn graciousness in victory. Cries of “Victory for the Emperor” may not be appreciated on the 18th.

So what did “honest Simon” make of his second foray into Bolt action. It was better than the game vs Tony in that the scenario actually had a purpose. However, maybe it is just blind prejudice, but the game system still leaves one cold. Also, the idea of Japanese fighting 1944 Germans in the desert does make me very depressed. It is almost as bad as gaming with un or half-painted figures. I hope Lost Ark has mandated that all figures have to be nicely painted. Oh no….. That means Chris’ Japs will be excluded!

Simon

"Poland 1939; Mayhem in Myslenice"

Our indefatigable correspondent had hardly any time to rest after last Sunday’s trip to “somewhere in the Middle East, when he was ordered to Poland in the dark days of September 1939. With the Nazi hordes pouring across the frontier and ominous signs of troop movements across the Russian border, General Maczek’s elite 10th Mechanised or “Black Brigade” is attempting to re-group south of Krakow to continue an effective defence. At 09.00 hours on September 5th, the German armour of the 2nd Panzer resumes its attack towards the village of Myslenice. Waiting for them are Vickers “E”s and cannon-armed TKS Tankettes, together with one of the two TKSD tank destroyers assigned to the Brigade.

Knowing that time was not their friend, Dave’s Panzer IIIs and IV advanced quickly taking advantage of the cover provided by the dried upriver bed. Chris’ PzIIs appeared more sluggish. Maybe they were wary of the solitary tankette that appeared to be facing them.

As ever with this period the early exchanges of gunfire proved inconclusive, until one of the Vickers took a round that set it on fire.

That seemed to open up the northern flank for the Germans who resumed the advance. However, Phil’s tiny TKS lurking on the edge of the forest proved almost impossible to spot, being both small and low profile.

The effectiveness of its 20mm automatic cannon however belied the vehicle’s diminutive size, and soon the mighty PzIV was burning. The other German tank commanders began to look nervously around them.


Chris’ Panzer IIs proved slow to act, courtesy of damage caused by the TKS and the second Vickers E. This allowed the Poles to concentrate on Dave. Although he managed to charge his PzII off the table in accordance with his orders both Panzer IIIs took fire and were destroyed.

In both cases the Poles benefitted from fortuitous “double six” hits which gave them additional strike dice. Rob’s roll of three 5s and two fours when his TKS fired into the flank of the lead MkIII was the last straw for the demoralised Germans.

The day belonged to the redoubtable 10th Mechanised.


The scenario was adapted from one covered in “Skirmish Campaigns” book ”Poland ’39, the Black Brigade”. A few more vehicles were added and obviously infantry and artillery ignored for a game of WAT. The 20mm TKS again proved its worth, reminiscent of the historical exploits of Cadet Roman Edmund Orlik. On September 18th he destroyed two Pz35(T)s and a Panzer IVD, and on the 19th a further seven 35(T)s. One of the great “what ifs” of the campaign must be “what if the Poles had rebuilt more than 24 TKS with the 20mm cannon….?

Simon

Friday, 26 August 2022

The Men Who Would Be Kings: Sudan

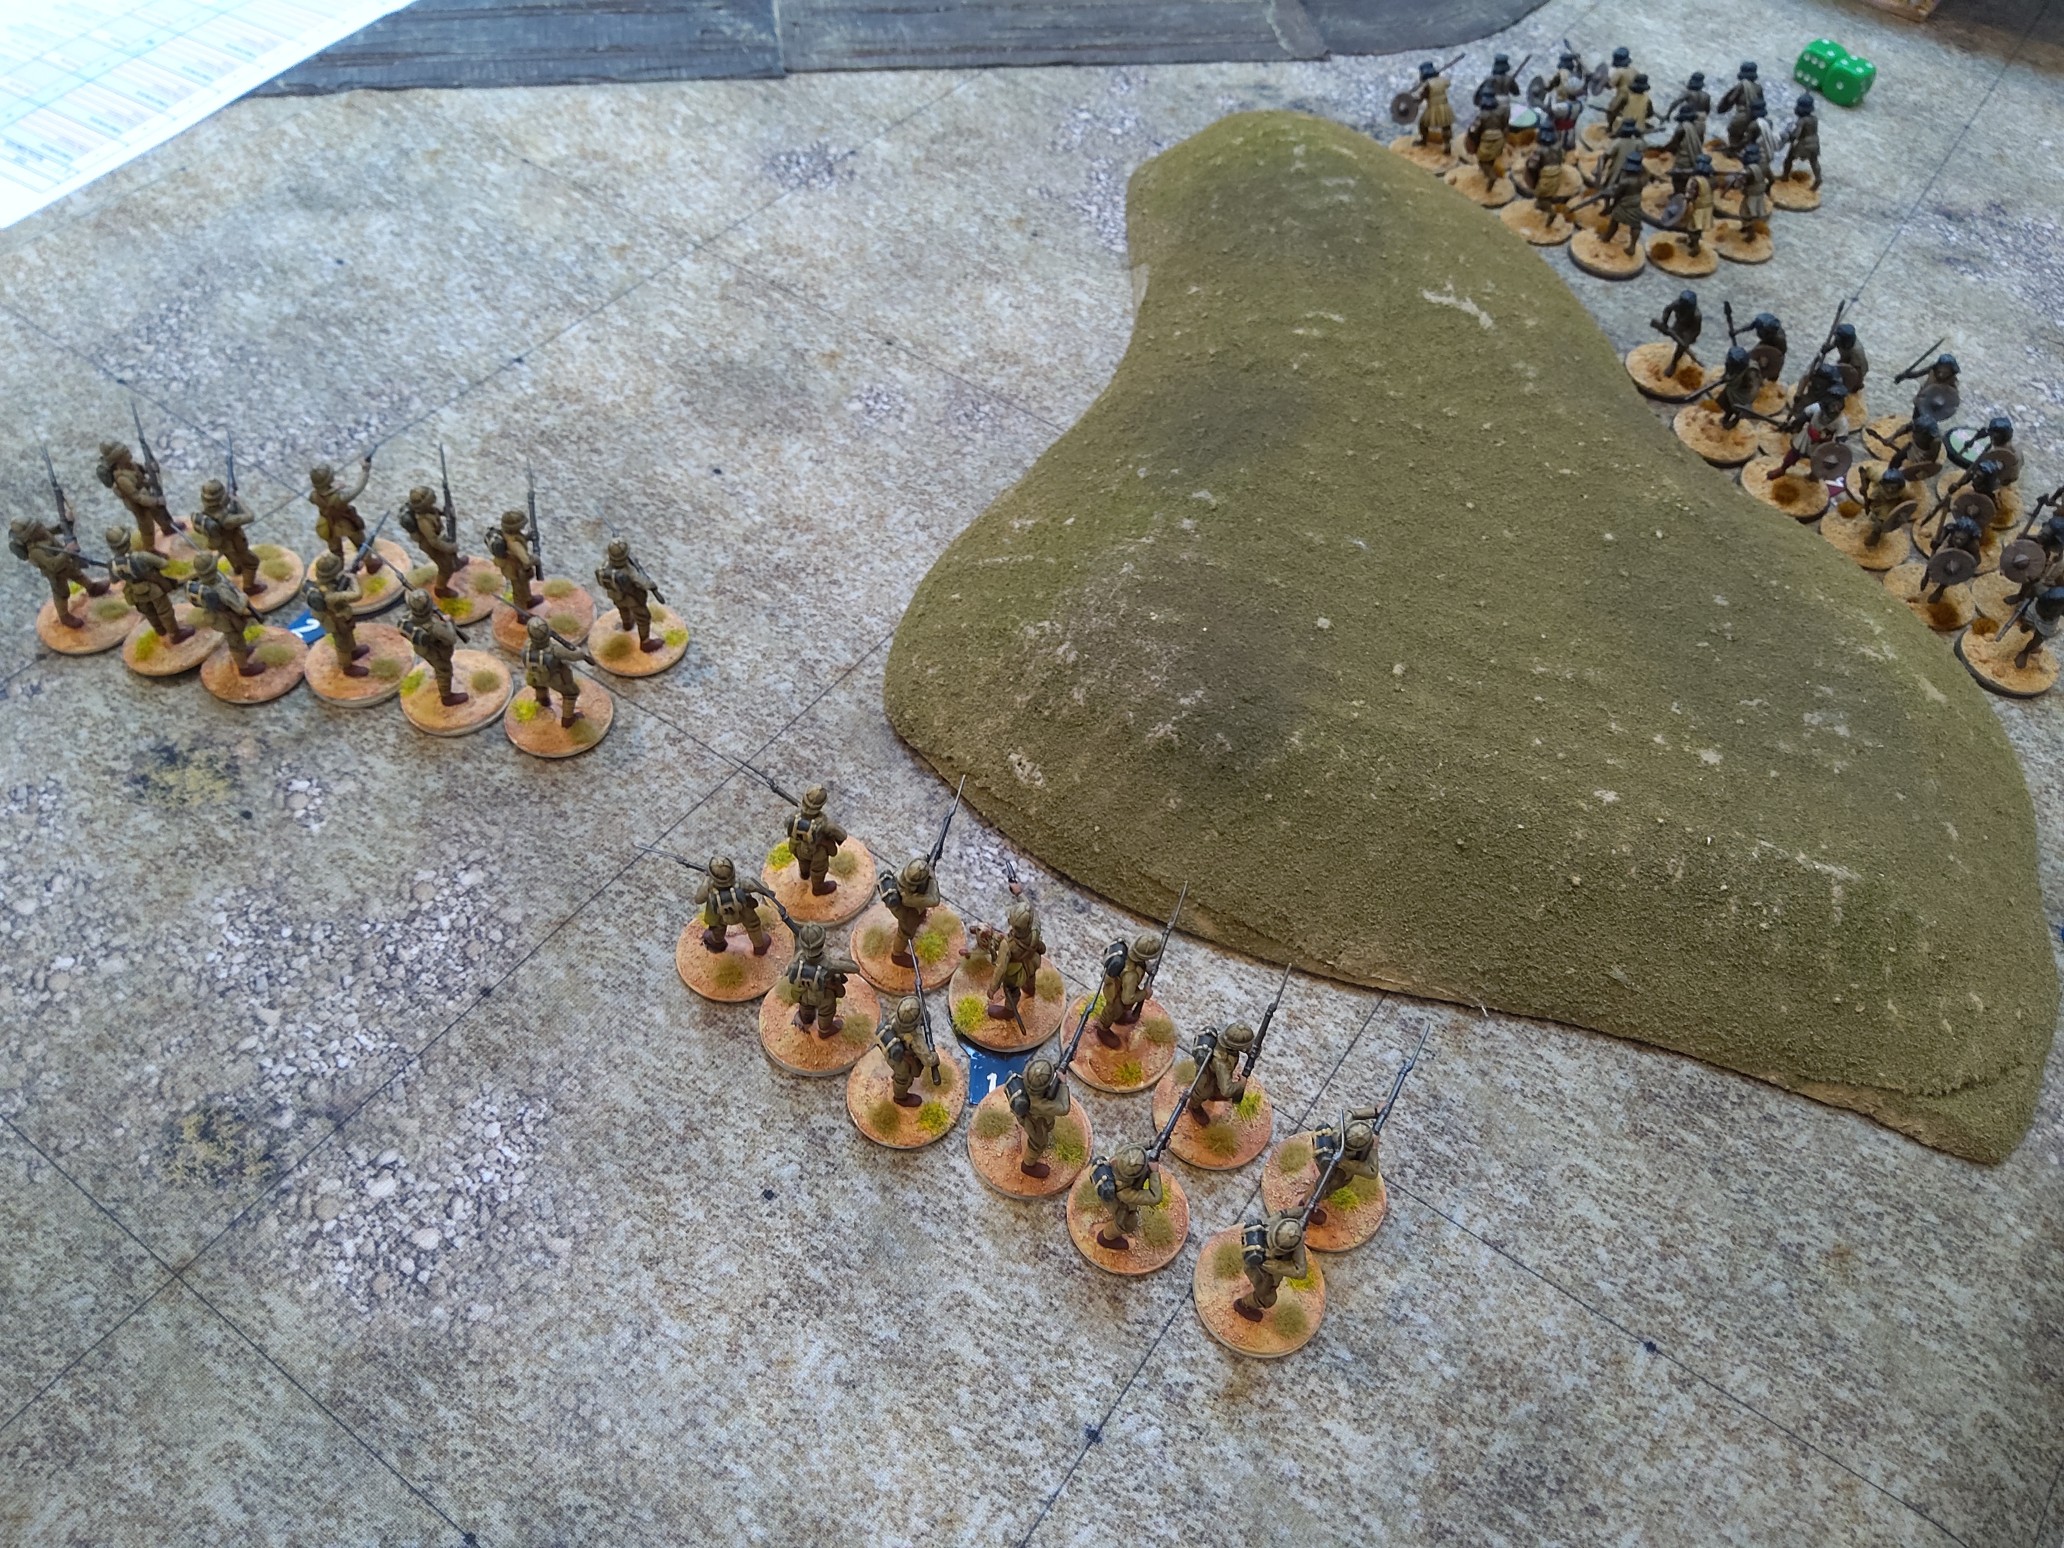
Two back-to-back games of scenario E, from Dan Mercey’s “The Men Who Would Be Kings” rules and they could not have been much more different.

Scenario E: “Run for the Hills”, had an attacking Beja force of 5 tribal infantry units, vs, a British “Defender”, comprising 3 Elite Line Infantry units. The British deploy against one short table edge and have to reach the other end of the table. The Beja can deploy along either/both of the long table edges, but 50% of their units in each table half, in this case 3 in left half & 2 in right half. The Beja force always activates first each turn.

Game 1: A forward deployment by the Beja forces, saw one Beja unit rush straight into melee with the left-hand British unit, in this case, a Royal Navy landing party, while a second unit trotted into a central palm grove, ready to rush the central British infantry unit.

Sadly for the Beja forces, they lost the melee with the Royal Navy and where thrown back. The poor souls then had to suffer the indignity of alternately rallying, then being shot & pinned again, by the surviving Naval infantry!


In the centre, the Beja unit in the palm grove waited for further support to arrive, before dashing out to engage the British. Sadly for the Beja force, they did not make contact and the Martini-Henry rifles, made short work of this Beja unit and it’s supporting unit. At this point, the other two Beja units slunk off into the haze!

Game 2: This time the Beja forces deployed much further back, so the leading units could trot back over the hill, to join their comrades, already lying ambush.

The British deployed in a 3 sided box/wedge formation, with the Naval party to the left. The British line infantry moved forward, ‘at the double’, down the right flank, while the Naval Landing party worked around the left of the central palm grove / rocks.


The movement by the Naval party, caused the Beja units on that flank to move out from behind the hill, to threaten the Naval unit. Rather than face this directly, the Naval party filtered through palm grove to join onto the left of the other 2 British units.

These British units then entered Close Order, ready to ascend the hill and flush out the Beja forces ahead of them. Sadly, the British had left a gap to their right, wide enough for one Beja unit to flow through and outflank the Close Order British line.

Threatened with being outflanked, the British had no option but to break Close Order formation and rush the Beja unit directly ahead of them, bayonets fixed, in the hope of break through!

Sadly, although courage was not lacking, numbers were! First the right hand British unit went down under a welter of Beja spear thrusts. Then the Naval detachment was swamped by first one, then another Beja charge. Finally Colonel Coredun was left facing down 3 separate Beja charges. The last but one leaving him standing alone! The last that was heard of him, was his revolver clicking and him yelling “Come on you hairy ba**ards, finish it!”.

Kiss Me Hardy: Journey Home


The French frigate Hermione is battling back from the Eastern Mediterranean and is finally in sight of the port of Tooloos. The frigate is carrying vital despatches about the war in Egypt. However, the Royal Navy close-in blockade force (the frigate Surprise & Brigs Defender & Growler) has spotted the Hermione and are moving to intercept. The French port patrol, consisting one frigate (Nemesis) & two brigs (Genie & Pandour), is moving out to support Hermione. 

While Hemione sets a brisk pace, on a WNW heading, Nemesis and the Brigs Genie & Pandour, work around the island in the centre of the harbour entrance, to support her.

However, the British Brigs, Defender & Growler, surge Northward, in an attempt to prevent the French forces from combining. Meanwhile, the frigate Surprise, runs to East of the brigs, with the aim of engaging Herminone.

Defender scores first blood, savaging Nemesis’ rigging and slowing her down. Nemesis is also forced to run further South, away from the coming fight, by the brigs Genie & Pandour, elbowing their way through, to get at the British! Dark thoughts on the bridge of Nemesis!

Defender & Growler run down on the French brigs, while Surprise tries to maintain the weather gauge on the fleeing Hemione and she gradually starts to overhaul the French frigate. Soon they are trading blows.

Defender breaks between the French brigs and then bravely heads for the much larger Hermione. Genie is badly mauled by Surprise, so Genie attempts to ram Surprise, to try to prevent Surprise pursuing Hermione, but all she succeeds in doing, is losing her bowspit.

Defender, seeing that Surprise is being delayed by Genie, bravely sets out to grapple and board Hermine. Pandour, caught in the middle of a ship melee, pulls off an amazing tack and then starts to swing around the rear of the grappled Defender/Hermione, to stop Surprise from joining the fight. However, she just receives a savage mauling from Surprise’s larger guns, for her trouble!

Meanwhile, Defender’s boarders have succeeded in taking Herione’s upper deck (8 dice vs 8 dice, due to Defender’s elite crew). The boarding action hangs in the balance briefly (29 points each), before Defender’s crew, cheered on by Surprise laying alongside Hermione’s starboard side, carried Hermione’s gun deck. Game over!

Monday, 22 August 2022

Somewhere in the Middle East; The Present day.

Somewhere in the Middle East a town goes about normal business. However, things are about to change.


French diplomacy at its best. A junior diplomat codename “Grenouille” is in negotiation with a local warlord concerning the release of some Western hostages. His less-public mission is to sell said Warlord some ex-French army VAB armoured personnel carriers and out-of-life MILAN missiles. The local Al Qaeda group have got wind of this and decide to intercept the French. After all, they prefer the offer from the British for some clapped-out Saxons as an RPG7 makes a bigger mess of a Saxon than a VAB complete with an RWS!

The French army team under command of Sous-Lieutenant Chevrechaude wait nervously outside the mosque.

Their mission is to escort “Grenouille” back to the safety of the French military compound and a helicopter ride out. Troops take up overwatch positions peering down the road and down the maze of alleyways.


Already they can hear the ill-disciplined Al Qaeda troops moving through the buildings towards them. 


Sergeant Cotedeboeuf lets rip with his Minimi as he spots an opponent.

However, such a fleeting glance means a miss and AK47 rounds come back in his direction, hitting and scoring a critical hit. He will be dead in minutes without medical attention. His fireteam move into action. The squad medic tries in vain to staunch the wound, whilst another trooper guns down a hapless insurgent.

The firefight continues with the insurgents trying to outflank the French plus cross the road to provide enfilading fire.

More Al Qaeda die and their fireteam is suppressed, dramatically reducing their combat effectiveness. They are “hors de combat” as the French would say. Sergeant Cotedeboeuf breathes his last and Chevrechaude, Grenouille and the lifeless Sergeant’s body are bundled into the vehicle to manage the extraction. The second Al Qaeda fireteam armed with an RPG7 and RPD or RPK light machine gun move round the corner to engage the French close to the Mosque, only to remember that an LMG can’t move and fire. Merde! French small arms fire rips down the alleyway and the insurgents dive for cover.

With 50% of the insurgents dead and a French blocking force in place to prevent a counter-attack it is decided to call it a day. Grenouille escapes to complete his morally dubious weapons deal. His next assignment is to sell out-of-life MICA missiles to an island off the South coast of China. They are reportedly feeling under threat and need anything they can get.

This was out 2nd outing with Spectre v2. It played well but we barely scratched the surface of the “chrome” contained in the rulebook. No vehicles, snipers, drones or the rest of the paraphernalia seen on a 21st century battlefield. That is still to come. Can’t wait!

Simon