Wargaming from Hertfordshire & Beyond!

Saturday 31 December 2016

The Battle of Chalons

Thursday December 29th witnessed the much anticipated re-fight of Chalons (or Catalaunian Fields") from 451AD, fought between the forces of civilisation ( Roman & Visigothic) and the forces of barbarity ( Huns and their Germanic allies).

Miraculously everyone made it to the club by roughly the agreed start time despite some very late nights/early mornings.

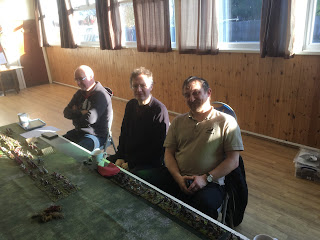
The Roman line up saw Fred K as Aetius, assisted by Dave B as King Theodoric and Chris B as Prince Thorismund (these are the very happy chaps in the first picture!). Attila was appropriately played by Tony M with Greg H as Valarmir, King of the Ostrogoths and Eileen B as Ardaric, King of the Gepids (certain members of this line-up were too horrific to photograph!).
 

The battle saw Chris' Visigoths facing Eileen's Gepids on the Roman left flank. True to form the Romans let their allies bear the brunt of the fighting, as Chris laid into his wife (simulated on the table, of course!). This was never going to end well domestically, particularly as Chris was truly exultant every time he killed a unit of his wife's army! After an hour of solid beating it looked as if the Gepid flank would collapse, yet somehow it held.
 

That meant the Romans would have to fight after all; not in Fred's plan. Tony's Huns behaved in a truly Hunnic fashion but in reality made little impact on Dave's Roman/Visigothic command. Fred led his veteran Romans into an attritional battle in the centre and eventually the Romans ground-out a hard-fought victory.
 

The actual fighting took close to four hours so it was well worth making use of the all-day club game facility.

I think everyone enjoyed it to some extent, and once again "To the Strongest" game a very enjoyable game. There is no news yet of the post battle Visigoth /Gepid relations!
 
Simon.

Friday 4 November 2016

Battle of Dertosa 215BC: To The Strongest Ancients


Hannibal was kicking his heels in southern Italy, so the time had come for a Roman counter-attack in Spain.  A rapid Roman offensive across the Ebro caught Hasdrubal Barca off guard and now the glorious Roman army was besieging Dertosa. Hasdrubal rushed to relieve the siege and so the opportunity avenge the deaths of the elder Scipios 4 years earlier presents itself.

Well, as expected the Romans lost the scouting contest and so deployed the centre of the Roman triple line. The Carthaginian’s responded by deploying the massed citizen spear blocks, supported by Spanish infantry. Then it was down to just seeing how much overlap the Carthaginian’s managed to achieve around the outnumbered Roman cavalry.

Battle opened with the Carthaginian  left wing surging forward to try to envelop the Roman right, while their left wing had a bit of a false start and the citizen spear indulged in a half hearted shuffle forward.

The confident Roman legionaries marched forward to engage the Carthaginian centre, while the wings mounted a holding action. However, very quickly the numerous Carthaginian cavalry started to flank the hard pressed Roman cavalry.

No matter, thought the Roman commander, “we can still crush their centre, before our wings collapse”. But, no matter how hard the Roman Hastati tried, these Carthaginian citizen spear just would not die! Save after save was coming out of the bag and when hits were finally achieved, they were quickly rallied off.

Meanwhile the Roman left wing was starting to run into trouble, being out flanked by the Numibian light cavalry and the Roman right was being assailed almost in front of their own camp!

Then at the darkest hour one of the Carthaginian citizen spear blocks pushed its way through the Roman first line. Things were looking very bleak indeed!

But then the Romans found a weak spot, the Spanish infantry! They managed to break these allies.  Then quickly routing a supporting elephant unit, which fled through a group of slingers, squashing them into the turf.

Finally things were looking up for the Romans, but too late. God had called time and despite being less then enamoured with the beardy wonders on the Carthaginian side, was forced to grudgingly accept this as a marginal victory for Carthage. The beardy wonders immediately claimed an overwhelming victory, desperate for any popular acclaim, while the Romans were left to ponder their tactics!

Another fun game using the ‘To The Strongest’ rules, that remained ‘in the balance’ right until the end. What more can you ask of an evening’s gaming.

Saturday 22 October 2016

Bolt Action returns to Black Wolf

After the recent 'Weird War' appearance of Bolt Action at the club a couple of weeks ago, this latest game was rather more conventional. The game was a meeting engagement, with 3 US Shermans (Tony's models, carefully prepared by Fred) supported by 2 infantry squads vs a Panther and 3 German squads, plus a few extras.
The game opened with both sides bounding forward to cover near the centre of the table and then getting bogged down into a firefight stand off in the middle of the table.

The menacing Panther mowed down a US Bazooka crew who bravely attempted a frontal shot from the hedge line. However, as the Panther had used its 'Ambush' dice, the supporting US Sherman rushed up, on top of the fallen bodies of the bazooka crew, to have a pop at the Panther. These two tanks then proceeded to demonstrate their collective ability to miss the proverbial 'barn door' in a series of missed shot exchanges.

The right hand German infantry squad then attempted to storm the house at the far side of the village, only to get pinned down in the middle of the street.
The Yanks then attempted to flank the Panther to the right, while the left flank German infantry was redeploying to support the centre attack. However, the Germans weren't that easily fooled and rushed back, popping off both panzerfausts and brewing up the flanking Sherman.


Meanwhile, the 3rd Sherman snuck forward and managed to knock out the Panther, unseen from the central hedge line. But their celebrations were short lived as the German Panzershrek redeployed to the edge of the wood and flamed the offending Sherman.


So ended the game. A marginal victory to the Germans and a salutary lesson in not using armour in an OK Coral shoot out mode!


Personally, I prefer Chain of Command for this scale of game, as it offers mechanisms to break these firefight stand-offs and also a bit more period flavour, but each to their own.

Tuesday 18 October 2016

Postcript to the Battle of Ludford Bridge

Following the break in the early string of Yorkist victories, with defeat at the battle of Ludford bridge, there are rumours of dissent within the Yorkist command. Edward claimed that Warwick had sent him out to die, after Warwick apparently ordered him to attack across the bridge, but then failed to fully support him (something about Warwick’s horse not being happy about being on bridges!).
After a furious row with Warwick, Edward stormed to his father’s sickbed, only to find his father dead and Elizabeth Woodville sobbing over the body, still clutching a bottle of Warwick Industries healing potion. “But he only had a bruise after being hit on the head with a longbow shaft”, exclaimed Edward. However, it was later claimed that the potion had somehow reacted with a cut inflicted by a fault in York’s Warwick Industries supplied suit of armour.
Investigations into the allegations of Warwick seeking to extend the war, in order to gain further orders for Warwick Industries, have faltered recently. The investigator was found at the bottom of Warwick castle moat, after apparently making use of the new Warwick Industries iron swim trainer ankle weight accessories unsupervised!

Upon the death of his father, Edward has now assumed the command of York’s Battle and relationships with Warwick were said to be ‘frosty’, especially after Warwick claimed to have found a new claimant to the throne, one apparently still able to ‘fit in his boots’!?

Friday 14 October 2016

Ludford Bridge, 13th Oct 2016

 
The 3rd battle in the ‘To The Strongest’, Wars of the Roses mini campaign and crunch time for the Lancastrian cause. Lose this one and the crown would fall to York!

Well things did not start well for the House of Lancaster. The Lancastrian commander, Percy (Phil) was clearly suffering from something eaten the night before! His whole command was deployed further back than it should have been (York Stratagem card) and worse still, the brand new, expensive cannon had no clear sight of the enemy (waste of 7 points there!).

The Yorkist wings opened the battle, with Baron Greystoke (Mal) and York (Chris) pressing forward strongly. The Lancastrian left looked like crumbling under Greystoke’s onslaught, until some fortunate archery and a flanking charge by Somerset’s (Simon W) knights, rolled up the Yorkist left, demoralising the command.

York’s attack on the Lancastrian right opened well, by driving out some Lancastrian javelin men, hiding in the woods at the bend in the river, then softening up Stanley’s (Simon Q) archers & billmen with some excellent archery. York then pushed his prized continental pike block across the river and deep into the Lancastrian lines. However, soon the pike block was stalled in gruelling melee with Stanley’s cavalry at the rear of the Lancastrian lines. Things could have swayed either way until a group of Stanley’s archers, having emptied their quivers to no effect, fell upon the exposed flank of the pike block. Swinging wildly at the unshielded flank of the pike block, with bow, knife and fist, the pike block was forced almost to the point of breaking and York himself badly wounded and forced from the field, thereby stalling the whole Yorkist left wing.
 

Meanwhile in the centre things had developed. Warwick (Tony) was over-heard whispering in the Yorkist young pretender’s ear, “you go straight over the bridge, we are all right behind you”, and then proceeded to sit with his archers on the river line, just watching the young pretender and his knights swathing through Percy’s men.  In fact, there are rumours that Warwick actually ‘threw’ the battle, due to financial interests in the medieval armaments industry and hence a desire to prolong the war! But, he had clearly failed to tell his young pretender of this plan, who were soon ploughing through a block of Scots spearmen at the very back of the Lancastrian lines! The progress of the Yorkist knights being greatly assisted by Percy’s continued intestinal problems! (or a plague of 1 activation chits!).

But in the end, the mounting casualties from sustaining the relentless Yorkist attacks were beginning to tell and they just ran out of victory medals! So overall, another historical result and another excellent ‘To The Strongest’ game, which remained in the balance almost until the last chit pulled. Onward to Northampton!

Saturday 8 October 2016

Spanish Sharpe Practice 2


This Thursday saw the Spanish guerrillas making an appearance on the table, using the Too Fat Lardies Sharpe Practice 2 rules. We played “sweep the table”, with the French foraging for supplies and the Spanish guerrillas trying to stop them.
 
The French dragoons dashed forward, catching Julian Sanchez’s lancers at the stand. However French dice rolling was not great and the Dragoons lost by 1 and got pushed back. Meanwhile, the French light infantry dashed forward to occupy the central farm (and seize some pigs!). However two groups of Spanish Militia rolled forward and delivered two very effective volleys, driving the French light infantry from the walls. Meanwhile Sanchez’s lancers charged the recoiling Dragoons, routing them.

With the Dragoon’s routed and the Light infantry retiring, the main French column, still labouring at the rear (suffering from some appalling activation chit pulling), decided to about-face and retire. So ended the first Sharpe Practice 2 outing for the Spanish.

Lessons learned: Militia seem too powerful. Yes, they can be hard to manoeuvre and once you start them firing, they won’t stop. However, 10 muskets per group make them quite effective. The French ‘light column’ needs more   leaders. With only 3 leaders, when one is attached to the Dragoons and one to the light infantry, then the 3 groups of regular infantry have to be led by one leader.

Elsewhere in the club, we had Konflikt ’47, which appeared to be receiving a mixed reception. The was also a very pretty WW1 tank game underway.


Sunday 2 October 2016

Glenn’s Last Raid – Savage Worlds Based Zombie Game

The zombie horde had not had an outing at Black Wolf for a while, so time to try out the new Deep Cut mat and a couple of terrain pieces.

The scenario was that one of our Walking Dead style gang, Glenn, had snuck into the city on a solo salvage mission after a cache of guns and ammo hidden in a survivalist’s basement. Glenn has some pretty unique skills in terms of sneaking his way past the Zs, as well as opening locked doors without making a lot of noise! Glenn located the house and recovered the stash, however then things went wrong, as Glenn was ambushed by some thugs with handguns. He took a bullet to the leg, but managed to hobble into a nearby shanty town, pursued by a group of Zs and the thugs. He managed to hide in an old school bus (purchase from a recent holiday) and called for back-up.

So, the scenario was intended to open with a the heroes sneaking out of a nearby subway exit, silently overcome the couple of zombies in the street and undercover of the group’s able sniper, mount an extraction mission to rescue Glenn from the Zombies and the handgun touting thugs.

Well, like all my zombie games, nothing ever goes to plan. No, our heroes emerge from the subway like a horde of Arnold Schwarzeneggers from the film “Commando”. Well, even the Zombies were complaining about the noise! Within a few turns Zombies were streaming onto the street from Zombie Spawn points, attracted by all that gunfire. Soon our heroes were retreating back up the street in a wonderful recreation of the film Zulu, gunning down the oncoming Zombie horde, but not fast enough.

By this time Glenn had had enough and snuck out the back door of the bus and away from the few Zombies left near the bus and the handgun touting thugs. The thugs then simply crept out of the  garage they were hiding in, scooped up the bag of ammo that Glenn had dropped and legged it, happy boys!

So, as usual, not something one expected, but that is half the fun. Besides the new mat and the New York School bus, the game also allowed me to get the new TT Combat ‘Abandoned Apartment’ in the photos.  Nice model, cheap, but nicely done.

Sunday 4 September 2016


Battle of Blore Heath, 18th Aug 2016

Sadly, for the House of Lancaster, a rather historical result. The brave forces of the ‘red rose’ suffering the 2nd defeat of the Wars of the Roses campaign and losing their young pretender in the process.
The battle did not start well for the House of Lancaster, with a night-time mix-up in the deployment of the commands, with the left and right wings becoming swapped over (the Jack of Spades Stratagem). This left the Duke of Somerset’s (Simon) and Percy, Earl of Northumberland’s (Phil) in some disarray with (as it turned out) a fatal gap between Somerset’s command and Norfolk’s (Rob) central command.

Battle was opened with Baron Greystoke’s (Mal) knights on the Yorkist right wing charging forward against the crossbowmen of Somerset’s command, but these elite armoured knights were surprisingly held at the stream by these brave crossbowmen.

While the Lancastrian leadership, Howard (Rob), floundered with a late breakfast(!), Percy’s (Phil) command advanced cautiously on the Lancastrian right flank, until encountering a screen of Yorkist cavalry  and skirmishers holding the stream line. A half-hearted skirmish continued here for some time, until eventually Percy managed to force a block of Scots spearmen across the stream.

Meanwhile the Lancastrian centre, under Howard slogged across the stream, pushing a mixed Yorkist bow and bill force, under Hastings (Dave) and Warwick (Tony) backward in a bloody struggle. Just as it looked as if Howard’s foot knights might surge to victory, the Lancastrian cause suffered a double blow. First the Lancastrian “young pretender” fell, mortally wounded an then Howard himself fell wounded.


As the Lancastrian centre stalled, Warwick surged across the stream, into the gap between the Lancastrian centre and left wing. Encountering only a little of last minute resistance, Warwick’s men drove through to seize the Lancastrian left flank camp.

As news of the loss of the Lancastrian camp spread, Baron Greystoke’s mounted knights eventually broke the crossbowmen on the Yorkist right and started the roll-up the Lancastrian left flank. This was the last straw for the Lancastrian forces and morale collapsed. Soon Lancastrian men were streaming to the rear.
Another fine game using Simon Miller’s ‘To the Strongest’ rules. A special mention must go to the fearsome Yorkist continental mercenary pike block however. Although not completely swayed by a failed Lancastrian attempt to bribe them to leave the battlefield, they did only succeed in entertaining the Yorkist followers with a fine display of counter-marching along the Yorkist rear, thereby having absolutely no influence on the battle!