Wargaming from Hertfordshire & Beyond!

Thursday 30 December 2021

Fort Viagra is running low on supplies

The forward American outpost, at Fort Viagra, is running very low on supplies. The British have achieved naval superiority on the lake and are maintaining an effective series of ‘hit & run’ raids on the US supply columns.

RN Marine Captain Poop-Decker, of his Majesty’s ship, HMS Impossible, has landed a force of marines and linked up with a local volunteer group and allied native braves and is now seeking to seize and destroy yet another US supply wagon.

Major Dickie Head, of the local US Regular forces, has received a tip-off from the local militia leader, Lieutenant Al Wesaloser, and has been ordered to reinforce the supply wagon escort, with regular US troops. He hopes to put an end to these damned Limey incursions!

The objective of the US forces is escort the wagon, from the deployment point on the West of the table, to the road exit point, on the East side of the table. Losing the US deployment point has no effect on the US force morale. The wagon can be destroyed by any unit, completing a Task of 8, while adjacent to the wagon, uncontested. The bridge can also be destroyed by any unit completing a task of 18.

The US wagon moves either on the US Leader 1 activation, or at the end of turn, at a speed of 2D6. In open ground the cart bogs down if a double 1 is rolled. The wagon may not enter any terrain features, except the ford or the bridge. Crossing the ford by the wagon is treated as a Major Obstacle (roll 2D6, discard the higher). The wagon will bog on any double rolled for movement in the ford.

The river may be crossed by infantry. The unit must start adjacent to the river and must spend a full turn to cross to the other bank. Infantry treats the ford as a minor obstacle (roll 2D6 and discard the lower).

In the first turn the Americans managed to deploy their entire force with Major Dickie Head marching along the road, escorting the supply wagon. Captain Dixie Normous lined the fence line with his light infantry.


Captain Poop-Decker deployed his marines and started to head towards the bridge to cut off the Americans.


Chief Chew Mynutts scouted ahead of the marines hoping to occupy the rough ground. Unfortunately the American lights were in range and started to pick them off...


Resulting in them retiring across the river to the relative safety of Pense’s barn.


With good use of command cards  Major Dickie Head managed to get the US regulars across the bridge and form line, pouring fire into the marines, who turned tail and headed back the way they had come.


At this point events started to turn against the Americans, with first the US volunteers, under Lieutenant Al Wesaloser, realising they had left their canteens at home and stopped for a drink at the river. Next a group of US regulars, who were engaged in a firefight with some British scouts in the Eastern woods, found that they had dropped their powder flasks in the river, reducing their firepower. Finally the rest of the US regulars had been blazing away for so long that they had managed to foul their barrels. I think the Sgt Major will have some words with those lads later.

The Indians in the cornfield were doing their best against the US regulars but this firefight was only going to go one way...


Especially since the US lights had crossed the river.


The final straw was when the group of US regulars charged the scouts, wiping them out, and capturing their leader, Drew Ablank. Chief Chew Mynutts looked around and realised he and his men were all alone, with Captain Poop-Decker having retired with his entire command. Now would a British court of enquiry take any notice of his report on the actions of Captain Poop-Decker?

Saturday 18 December 2021

1940 and the battle of Stonne

With Christmas fast approaching in 2021, our hardy reporter reported for duty back in May 1940, still tired from his exertions in the Levant several weeks before. The 15th of May 1940 saw the Germans breaking out of their Meuse bridgehead and starting to swing northwest to encircle the Allied armies. The small village of Stonne stood in the path of the 10th Panzer Division. Facing them were the French 3rd DCR (Armoured Division). The Germans swept forward with two Panzer Mk IIIs and a Panzer Mk II in the South, and a Panzer Mk IV and Mk III in the North.

The French were more cagey, and their small, slow H39s crawled into defensive positions with the mighty Char B seemingly in reserve. Or was it...??
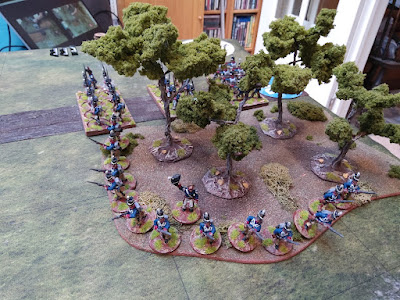

First blood went to the Germans as they reduced one of Phil’s H39s by several command dice, and it wisely took cover to try and repair itself. One of Rob’s H39s lurking in a cornfield likewise suffered damage but was kept running. The first actual kill went to the French as one of the Mk IIIs advancing along the southern axis took a catastrophic shot.

This reduced the odds to 1:1 in numbers, but arguably the Germans had some advantage due to the damage inflicted on the H39s.

Gradually the H39s got themselves back into action but then disaster. Although pretty much pinned by Dave’s armour Greg advanced into the open and fired a side shot into a H39. Result one “brewed up” French vehicle.

But with Greg’s remaining Mk III sitting in the open he was attacked by Rob’s H39 and Char B which rumbled into action.


Despite a valiant attempt to destroy the Char B the “heavy armour” proved its worth and another Mk III became a fireball.

In the North Dave’s Mk IV showed what a truly poor tank it was in 1940. Thin armour and a low velocity 75mm gun made him very wary, and Phil decided to send his now repaired H39 on the offensive. How un-French! Dave’s Mk III soon joined the list of wrecks...

and the with 3 French tanks still running including the Char B and only the weedy Mk II and Mk IV being left for the Germans the umpire called it as a French victory.

I have seen since that Rob apparently thought he had a Char D1. How wrong he was. Quite how he mistook the 14 ton D1 for the 28 ton B1Bis is quite beyond me. I think he needs to go on a 1939-40 tank recognition course! Rob, never mistake a Matilda I for a Matilda II. I guess your knowledge of Tigers and Panthers is a tad better...

Simon

Friday 10 December 2021

Into the Valley of Tears rode the T55s

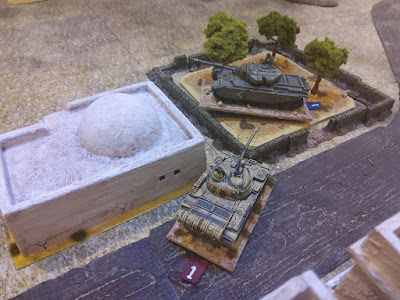
Last night we played a game of What a Tanker based on the Arab/Israeli wars. The objective of the game was for the Syrians to capture the orchard and cross-roads.


The Israeli tanks quickly got into defensive positions...


Whilst the Syrians advanced cautiously.


But not cautious enough as the first T55 brewed up from a lucky shot by the Sho’t Cal in the scrub.


This took the heart out of the Syrian advance and they now became even more cautious, rarely showing themselves. With the Syrians being too cautious for the IDF they decided to advance.


The Sho’t Cal on the hill managed a couple of shots at the Syrians but failed to hit anything.


Throwing caution to the wind and with lucky dice rolls the Syrians advanced into the village.


It now depended on who got the initiative first. Luckily it was the IDF and the Super Sherman got a flank shot into the T55. Boom.


Tony raced his T55 across the open ground to start a game of cat and mouse with Dave’s Sho’t Cal. Luck was with Dave as he managed a rear shot, causing two dice of temporary damage.


Rob advanced his last T55 and managed a shot at the Super Sherman. Lots of dice were rolled and the IDF drew a breath of relief as only one hit was achieved which the thin armour managed to shrug off.


Unfortunately for Rob, Greg’s Sho’t Cal got behind him and quickly dispatched the tank.


It was all down to Tony and his damaged T55, but seeing as the objectives were now impossible to achieve the game was called.

Saturday 4 December 2021

Hittites look to get revenge on the Sea Peoples

Thursday, December 2nd, a day that will live in Infamy. So wrote our veteran correspondent after witnessing the re-match between Hittites and Sea Peoples reprising the game played on October 21st but with players switching sides. Thus Phil, Rob and Tony took command of the Hittites, with Dave trying to control Chris in leading the mighty Sea Peoples. Both sides played their Stratagems, with the Hittites pushing three units forward to seize the hilly and difficult terrain and hopefully anchor their weak left flank. Dave craftily forced Rob’s Hittite centre command back one box meaning Rob’s General left the field of battle and would have to draw a chit to return  How Philistine!


The Sea Peoples marched into battle. With lots of deep warrior units subtlety is not their top priority. The leftmost units of chariots rolled forward and Chris’ centre positively sprinted towards the Hittite spearmen.

Dave’s right wing stayed curiously stationary thanks to an early “1” chit. Undaunted by the seeming cowardice of the General, Rob’s chariot-heavy command rolled forward to meet their Philistine counterparts.

Phil pushed the left forward trying to get his raw Syrian archers into the fray, whilst Tony paraded the Hittite right around the table. 

Almost immediately the Sea Peoples’ left was in trouble. Their outnumbered chariots quickly saw one unit die thanks to a lance attack and a hail of javelins. The other followed soon after meaning that the flank had been turned and the General relocating to a unit of javelinmen now holding a palm grove.

The centre fared no better with the massed Syrian archers belying their raw status to pour a deadly arrow storm onto the Sea Peoples deep warriors.

A double disorder quickly resulted in a veteran warrior unit being removed from the table, resulting in a dangerous gap between the Sea Peoples left wing and centre. Not that there was much left on the left wing. Desultory manoeuvring continued on the Sea People’s right/Hittite left as the deep units found the terrain challenging. The only exchange of missile fire saw a Sea People’s light archer unit die under a volley of arrows launched from the palm grove on the table edge.

Another Sea People’s warrior unit bit the dust as did another unit of light archers. Twelve out of fifteen victory medals had now been handed over to the incredulous Hittites. Chris tried to break through in the centre but the gesture was futile. How typically Chris! Outnumbered and outflanked this unit was finally eliminated by the humble Hittite spearmen who had taken such a beating a month before. Revenge was sweet!


Whilst everybody focussed on the good luck of the Hittites and their Syrian allies in their missile chit pulling, the after battle analysis of the table is also interesting. The Hittite massed chariotry did exactly what they were meant to do. This time were a real “schwerpunkt”, unlike a month ago where they were broken up in “penny packets” like the French armour in 1940. Also, the Sea Peoples didn’t get 47 points, or nearly 33% of their combat troops into the fight. Their warriors on the right were held up by 20 points worth of raw troops and two units in the centre stayed pretty much rooted to the camps. Hindsight is a wonderful thing.

Simon

Thursday 2 December 2021

War of 1812 - Aldridge's Barn Raid

The Yankees are building a new naval vessel on the lake and much needed fittings are being brought up by wagon, from the South. Unfortunately one of these wagons has suffered a broken axle and needs to be repaired. Even more unfortunately, damned Brits appear to have found out about this and the location of the fittings! Damn spies! The ships fittings have been unloaded into a barn of a farm, while the cart is being repaired.

The British objective is to burn the barn containing the ship’s fittings (a Task of 11). It is assumed that all attacking units are equipped with lighting implements and spirits. The aim of the US forces is to stop them and secure the Barn, and drive off the British.


The British managed to get their moveable deployment point advanced quite far, much to the disappointment of the American players. From there the Indians deployed behind the house, looking to sprint across the road to torch the barn.


However, the Americans arrived in force…


and their column quickly advanced along the road, cutting off the Indians from the barn.


The British started to form line under harassing fire from the American light infantry, with their column rapidly advancing towards the British. However, they were now taking casualties from the Indians.


The British, opened fire with a devastating volley and along with the Indian harassing fire caused the head of the American column to break.


The British, now having formed line were having the better of the firefight with the American lights although casualties were still being taken.


The remainder of the American column pulled back and formed line but the Indian blood was up and they continued their harassing fire into the flank.


The last of the American column was holding out, just, but was up against the British line and some scouts. Things were looking desperate, with the American militia arriving to attempt to drive off the pesky Indians.


However, the British line now wheeled and with a final volley routed the last on the American light infantry from the field, breaking their morale.


A fairly decisive game with the skirmish troops having the better fight. It was agreed that the American column had advanced too far, resulting in the Indians being able to fire into their flank. Although, it is likely that the Indians would still have moved to get behind them.

Saturday 20 November 2021

2nd Panzer try to take the Bridge at Celles (again...)

Last night our travel-stained war correspondent reported for duty in a freezing Belgium. The so-called battle of the Bulge is reaching its peak and a crisis for the Allies, as the German lead elements close in on the precious bridges over the Meuse. Battlegroup Bohm of the 2nd Panzer Division has been ordered to break through the allied lines and seize the bridges, in readiness for Kampfgruppe Cochenhausen to advance northwest towards the coast. Facing them are the old Shermans of the 29th Armoured Brigade, 11th Armoured Division who have been hastily rushed back to the front to try and halt the German advance.

The battle commenced with two Panthers prowling westwards across the wintry landscape to the North and South of the Ferme de Mahenne.

The British took up defensive firing positions in the village of Foy Notre Dame and the copse to the south. Phil’s Panther crashed through hedges and took up a firing position facing the village. It was soon engaged by a Firefly with its mighty 17pdr. The result was a miss. The next turn the Panther returned fire. Cue one dead Firefly.

The weaker 75mm armed Shermans retreated into the village hoping to get lucky and find a way of obtaining a flank shot on a Panther.

The second Firefly played hide-and-seek with Greg’s Panther, hitting twice but the Panzer shrugged off the single loss of a temporary dice by judicious use of the “What a Tanker Card”. With the other Shermans trying to hide, Phil’s Panther raced into the centre of the village to kill the remaining Firefly with a flank shot. Ouch!


Matters were looking distinctly sticky for the British. Dave’s 75mm Sherman was next to go as Phil smartly manoeuvred his Panther round one of the buildings to send a round into the rear engine compartment. Boom!

The final action of the evening saw Rob’s M4 with a Panther to its front and another to its rear.

This was never going to end well. Some strange noises coming from St Neots as “Honest Simon” drew the 1st chit of what would prove to be the final turn. Phil’s Panther applied the coup de grace to the hapless British. A 4-0 German victory!

Once again the battle showed the superiority of the German armour. Even the defensive advantage of the British proved to be of no major benefit, especially as the German “fast” attribute let them manoeuvre quite adeptly in the urban environment”.

Simon