Wargaming from Hertfordshire & Beyond!

Saturday 15 November 2008

Black Wolf – Napoleonic Principles of War Competition Finale

The winner of the 2008 Black Wolf Napoleonic POW Competition is Ian Rawlings. He defeated Kevan Smith by 75 points to 72 points in the Grand Finale played on the 1st /2nd November at a secret location in Stevenage.


Picture: Ian with the BW trophy after ‘a near run thing’

The Grand Finale pitched the winner of the pre-1811 league (Ian) against the winner of the post-1811 league (Kev) in a final based loosely on Waterloo. Each competitor had ca 85-90 points of POW armies at their disposal, though curiously both armies both had a strength of 326 points.
Ian had drawn the French. Marshal Ney was his commander on the day with Napoleon taking a back seat. In gaming terms Napoleon was a staff officer in charge of the Grande Batterie but also capable of influencing The Guard, (but no-one else!). Ian had taken the option of splitting the Guard into two with Duhesme acting as a Divisional General in charge of the Young Guard.
Kevan had the British and Allies. This was a complicated army with nearly every type of system, infantry type and shooting ability present. Wellington in charge.
There was an off-table ‘race to the battle’ between Grouchy and Blucher. Only one would arrive – not that Ian knew this. Kevan started the game outnumbered but would reach parity once the Prussians arrived. The Prussians would arrive at any time, the later they arrived the more aggressive and more likely to be toward Papelotte and the French line of supply. In gaming terms both players rolled a die with Kevan having a distinct advantage for the first 6 turns. Kevan’s troops also having the better terrain and ensconced in buildings.


Map: Deployment and terrain

The map was pre-designed. The number in brackets showing the die roll for that terrain feature. Hence Hougoumont was very strong. La Haye Saint was not, especially as it lined a road with an open door!
The British and Allies had to deploy behind the red line. A Dutch Division had to deploy on Hill 2 in plain view. Kevan had the option to deploy up to a division in Hougoumont and one brigade in La Haye Saint (LHS). All the allies were on hold orders except one division. Kevan had the Union Brigade, a Dutch Division, the Guards, and the 2nd and 3rd Divisions. Kevan placed the 2nd and 3rd on the ridgeline with 2 brigades in reserve. The guards were in Hougoumont and the Union brigade between LHS and Hougoumont on engage orders. Kevan was forced to allocate VPs to the enemy LoS, Papelotte, and hills 3 and 4.
The French had to deploy behind the blue line, but were restricted to the central 4ft. Ian had three infantry divisions, a lancer division, a dragoon division, a cuirassier division, the Guard and a grand battery. The Cuirassier Division had to be on hold orders on their LoS. The French had to allocate VPs to LHS, Hougoumont, and Hill 3, and optionally hills 4 and 2.
The French opened the battle by sending all three infantry divisions and GB through the centre and the two cavalry divisions on a right hook.
Somewhat surprisingly to all concerned ( a 10 on a D10!) the Prussians arrived on turn 1.
(Behind the red line to engage to the British line)
The French Cv destroyed some German conscripts and broke through the very thin ‘red’ line. The recently arrived Prussians then dealt a severe blow to the two French Cv Divisions. The Dragoons scattered but one of the squadrons of Lancers escaping the carnage. However despite their ‘free rein’ elected not to capture Brussels (-50VPs!!!) but preferred to attack the British on hills 3 and 4.
The rest of the battle was mainly a tussle between besieged British and Allies on the ridge from assaults on all sides from the French. La Haye Saint was soon lost. The British and Hanoverians dealing out as best they could but the fire from the grande batterie was devastating: on one turn Ian was rolling on 150pts of damage!! – he rolled a 6 – ha ha ha! (4 points of damage to Ian, 8 to the enemy)
The Union brigade had surprising success against the Cuirassier division eventually scattering it and capturing the enemy line of supply.
At the end of the game hills 3 and 4 were bitterly contested. Hougoumont was still in British hands, La Haye Saint in French hands, and the Union Brigade were on the way to Paris.
Each competitor had been forced to allocate Victory Points to features on the battlefield.


Picture: The situation on the ridge and Ian trying to hide the British Cavalry on his LoS.

Kevan had lost 28% of his army, Ian 25%. The result of the battle depended upon Victory Points. Ian had strategically ignored Hougoumont (-10 VPs) but had captured LHS (+10 VPs) and contested Hill 3 scoring +15 points but lost his LoS (-15) giving a total of 75pts.
Kevan had placed most of his hopes on holding hills 3+4, which he disputed but could claim no points for. He had been forced to put 5 points on Papelotte which he did not capture, and 5 points on the enemy LoS which, surprisingly, he did capture. This gave Kevan a total of 72pts.
Ian, and the French won Waterloo!!


But surely 75 to 72 is ‘a near run thing’.


Thanks to everyone involved in the competition; Chris, Conor, Kevin, Peter, and Ryan.


Seán Slater


PS A difference of 3pts is usually a draw, but this is the finale!! Next year more competitors please!

Wednesday 5 November 2008

WW1 Battlefield Tour – October 2008

After a protracted planning period, finally kicked into action by youngest son missing out on a school trip to the First World War battlefields, the Threlfalls packed-up up kit bags and headed for the continent.
This being a family visit, the itinerary was not too ambitious and spread over 3 full days, but allowing a day to travel out and back. Anyway, below is a short summary of the trip, which I hope might help / inspire others to embark upon the path of remembrance.

Monday: Caught the 11 o’clock ferry to Calais.


First stop was La Coupole V2 launching site, near St Omer. OK, not really WW1, but it made a good stopping off point and represents the staggering industrial scale, which the Nazi’s applied to constructing the ‘V’ weapon launching sites against England. The Museum also contains a rather harrowing holocaust exhibition and displays of Allied air missions, in the area. Well worth a visit. Then it was on to Albert, in the Somme, to get something to eat (but no chance of that on a Monday evening in France!?).
Our accommodation was with the really welcoming Sarah and Peter Wright, at Trones View, literally a ‘stones throw’ from Delville Wood. Sarah and Peter could not have made us more welcome and provide a really good English breakfast. We could not recommend them more highly, for a visit to the Somme area. Check out their web site at;
http://www.tronesview.com/

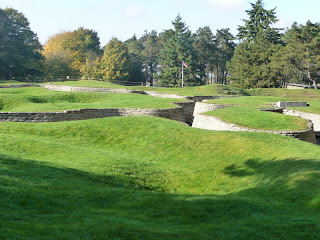
Tuesday: First stop was the Newfoundland Memorial park, near Beaumont Hamel. The park is beautiful and the semi-preserved trench / shell holes, give an excellent feel for the action. The story of the Canadian Newfoundland regiment’s tragic losses and courage is moving.


Next stop was the Thiepval memorial to the 73,000 Commonwealth ‘Missing’ during the Somme campaign. The new visitor centre is very good and the memorial, a very dignified and thoughtful place.


Then it was on to Pozieres. The Australian’s fought hard for this village, as recorded by the 1st Division memorial and the Windmill memorial. Opposite the Windmill memorial, is another memorial commemorating the first use of tanks.


We then moved on to Lochnagar Crater, now a privately owned memorial, showing just what 60,000lb of ammonal can do! After this we called in at Mametz, to get a feel for the nature of the Somme battlefields. From the town cemetery, one can see the Devonshire’s CWG Cemetery and visualise what the German machine gun, sited in the cemetery, could have done to the exposed lines of British troops walking over the crest line in the distance (near the current CWG Cemetery). Even more sad when the British commander had predicted this!?

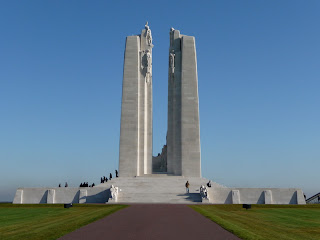
Wednesday: We said goodbye to Sarah and Peter and headed north, toward Ypres. The plan was to take-in Vimy ridge en-route. It was a sunny day, with a clear blue sky, making the twin sparkling white towers, of the Vimy Ridge Canadian memorial, very beautiful, as well as very moving. The preserved observation trenches and German front line section, complete with shell and mine craters, really brings home the ferocity of the bombardment and reinforces my admiration for the Canadian planning of the operation, to take this hill.


After lunch in Arras, we moved on to the German Cemetery at Neville St Vaast. We were the only visitors and staring out across the 37,000+ burials, even with the sunlight shining through the crosses, was just very sad.


We then moved on down the road, to the Commonwealth cemetery, at Cabaret Rouge. Again we were the only visitors (quite different to Tyne Cot next day!) and even the occasional passing car, does not detract from the sad peacefulness of the place. The large proportion of “unknown soldier of the great war” stones and multiple burial stones, gives on a feel for the brutal nature of the conflict. Our last port of call, before leaving the Arras area, was the French cemetery at Notre Dame Lorette. The chapel and ossuary / lighthouse are very fine buildings and the views from the cemetery, give one a very good idea of the tactical and strategic significance of the two ridges (this and Vimmy ridge opposite).


We then headed off to Varlet Farm, our accommodation for the next two nights. Charlotte Cardoen-Descamps runs Varlet Farm and besides offering a fabulous continental breakfast, excellent accommodation and a vast knowledge of the WW1 sites of the area, is just a really nice person. On her advice we popped into Ypres for the evening ‘last post’ ceremony and a meal in town to follow.


Details of Varlet Farm can be found at;
http://www.varletfarm.com/en/index.htm

Thursday: Now following Charlotte’s plan (in place of mine), we headed off toward Passendale town, marking the peak of the Allied 1917 advance. From Crest Farm and the Canadian memorial, one can appreciate the ‘high ground’ (all 25m of it!!) and the nature of the terrain, which can quickly turn to mud, as it did back then.
We then went on to Tyne Cot cemetery. The new visitor centre is very good and the cemetery itself probably a ‘must do’ (containing nearly 12000 burials (8000 unidentified!) and the wall with over 35,000 names of the missing in the campaign, or for whom there was no room on the Menin Gate!!), it is just that it is a bit ‘busy’.

After calling in at the Passendale memorial museum (in Zonnebeke) and the local chocolate factory(!), we then called in at Hooge crater. This little private museum (opposite the cemetery), has a very extensive collection of WW1 items and equipment (but just don’t visit on a day with ‘museum fatigue’!). About a 100 yards up the road, is the actual site of Hooge Crater, now a muddy pool in the grounds of a hotel. At the far side of the crater (lake), there are some recreated trenches, Sadly these were flooded, but perhaps gave more of an idea of the famous Passendale mud!?
It was then on to the Canadian memorial at Vancouver Corner. The ‘Brooding Soldier’ marks the spot where the Canadians and British stood against the first German gas attacks. Our last call of the day was the recreated Yorkshire Trench. This short section of recreated trench, sits somewhat incongruously in the middle of an industrial estate, but gives a good idea of the construction of a typical trench section. Then it was back into Ypres for a spot of shopping and a look at the Menin gate in the daylight.
We would recommend a visit to the First World War battlefields. One can read the books, but only by standing in front of the thousands of graves and having driven through fields, where it is rare to be out of sight of a CWG cemetery, can one get a grasp of the scale of the loss of life and wasted opportunities.

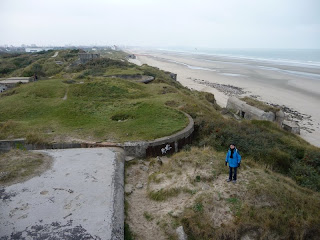
Friday: A relatively short drive back up to Calais, for the early afternoon ferry, was broken by a visit to Dunkirk. The is not much to see of those fateful days in 1940, but standing atop of the crumbling “Atlantic Wall” defences, looking out over the dunes, one can still picture the desperate scenes of the evacuation.
Phil T

Further pictures can be found at;
http://www.flickr.com/photos/phil_t_photos/sets/72157608680424628/

Tuesday 9 September 2008

Club Night, 4th Sept

Just a few pics from the selection of games going on last Thursday.
1st up, Jim and Phil in a Napoleonic naval game, using Jim's rather fine 1:1200 miniatures.

The French wait at anchor.

The Royal Navy arrives.
...and forces the gap between the French line and the fort
The game closes with the British being forced too far downwind, while the battered, but unbowed French weigh anchor. A win for Jim's French.

Simon's Kings African Rifles participate in Pete's Crossfire lookalike, ww1 African game.
The German Navy in the African jungle.
The King's African Rifles try to dislodge the Germans.
...but are driven off with significant loss.

Meanwhile, Ian and Colin conducted the first of the Principles of War, Napoleonic league games.

Saturday 30 August 2008

CASEVAC Precinct 13


“What the hell went wrong”, mused Cpl. Buck?”, as he stated blankly out through the gore splattered, tangled remains of the Huey helicopter’s windshield? The plan had been good; land in the nearby freight yard; the SWAT team to set-up a covering fire zone, while drawing away the ugly crowd of zombies gathered around the police station. Once the coast was clear, the police, including their stretcher case, would then slip out of the back door, down the back alley and over to the freight yard, into the waiting helicopter, all the time covered by the SWAT fire-team and the SWAT sniper, from his vantage point on top of a container in the freight yard.
However, things started to go wrong from the start, when one of the trapped police officers, possibly spooked by the appearance of zombies outside the toughened glass police station windows, fired. This weakened the glass and attracted more zombies. Before long, they were flopping in through the shattered window in pairs, while the five police officers, arrayed in an arc around the room, blazed away at the hideous forms.


The pile of gory bodies mounted, while the ammo dwindled Then suddenly, one of the gory, stinking forms, managed to stagger through the murderous fusillade of lead and jumped straight onto the unconscious form of Officer Nordberg, as he lay strapped to the stretcher, at the feet of the sweating police officers. This zombie was quickly despatched, but not before it had torn the throat out of the helpless Nordberg. So much for the CASEVAC!?
Outside, things weren’t going much better. Sniper ‘TJ’ in place, Alex and Hondo dashed through the freight yard gates and across the street. However, before they had got beyond the middle of the street, a spine chilling howling erupted from their left. Rage zombies, four of them! These mindless killers tore down the street. Alex turned and squeezed off two long bursts from her MP5, but the only result was that one of the Rage zombies appeared to stagger slightly. The SWAT sniper did better, dispatching one of the monsters and knocking another down.


However, before Alex could fire again, two of the Rage zombies were on her, tearing at her clothing and flesh. The fight was pretty one-sided, but finished even more abruptly when, a short three round MP5 burst from Hondo, narrowly missed its intended target and struck the hapless Alex instead.
Hondo did not have time to curse his luck, as a group on shambler zombies were now closing in on him, from the direction of the police station. Hondo sprinted around the block of flats, arriving back in the street opposite the freight yard, only to be met by the sight of another disaster unfolding! A handful of shambler zombies had now appeared within the freight yard. The SWAT sniper, ‘TJ’, was distracted by a clawing on nails on the rough metal sides of the container below him. He glanced over the edge, shocked to see a small child zombie figure.


He snapped up his L96A and fired, destroying that pathetic soft toy clutched in the small hand, but missing its real target. As he took more careful aim, one of the other figures lurched over toward Deke, over at the freight yard gate. Deke turned, firing into the shambling form, but seemingly without effect? Deke prepared to fire again, but suddenly the howling form of a Rage zombie crashed into the heavy metal gate behind him. As he snapped round, he was winded by MP5 slugs pounding into his body armour. Hondo had seen the Rage zombie streak across the street, toward the back of Deke. Instinctively Hondo fired off a short 3 round burst, but instead of hitting the intended target, the bullets struck the unfortunate Deke instead. Deke was completely stunned, not knowing which way to turn. A growling to his front warned to the next danger; the shambler clutching at his front. Before, he could raise his weapon, the swaying form lunged forward, sinking it teeth into Deke’s neck with an amazingly accurate bite.


Hondo was now in a state of shock, his team dying around him. He stared blankly at the zombies staggering toward him down the street and failed to hear two more emerging from a dooway behind him. He struggled briefly, but then just let out a long howling, hopeless scream, as the cold fingers pulled at his flesh. The SWAT sniper, ‘TJ’ watched in horror through the scope of his rifle. Unable to bear it anymore, he fired, not into the shambling forms, but into Hondo, thankfully cutting off that terrible scream.


Down at the police station, the pile of stinking, rotting flesh inside the smashed window was mounting, the floor strewn with empty shell cases. The trapped officers could hear the rescue mission collapsing, over the crackling radio. They decided to make a break for it. Buck pulled open the back door of the police station and dashed out, closely followed by Pat and Lacy. However, before Chuck and Chris could reach the door, more ghastly figures staggered into the open doorway, while two more crashed through the open window in front of them. Their overworked guns spoke again, but were too few now and the pair soon disappeared under a heap of rotting flesh.


Back at the freight yard, things had got worse! The last remaining Rage zombie had ripped open the gate and was tearing straight for the helicopter, ignoring the bullet impacts of the SWAT sniper. The pilot hesitated a fraction of a second too long and as the machine lifted, the snarling monster smashed through the side windshield. The pilot struggled to maintain control, while thrusting the gnashing teeth and rotting flesh, back out of the window, but eventually succeeded. Wiping the gore from his gloves and peering through the gory streaks on the windshield, the pilot then crabbed the helicopter over to the waiting sniper, who leapt from the shipping container roof, onto the port skid of the helicopter. The pilot was just about the lift clear, when he spied the three surviving police officers, running from the back alley, into the street opposite the yard. Taking an insane risk, he dipped the helicopter, into the tiny space of the garage forecourt, ignoring the debris clanging from the rotor blades and fuselage. The three officers jumped into the open passenger compartment, barely able to grab onto something, before the chopper swept skywards. No-one looked back!


Cast:
Police Officers: Alastair (Late take-over)
SWAT Team: Pete (‘Hondo’ & ‘Alex’, Andy (‘Deke’ & ‘TJ’))
Zombies: Tony (“2s then jokers”!), Dave (“straight 8s”!!)

Rules: Savage Worlds.

Friday 25 July 2008

Field of Glory - Army Lists


With the recent popularity of the new "Field of Glory" ancients rule set, all those dusty little ancient armies seem to be creeping out of the cupboards and boxes! Steve and Pete thought it would be a good idea to try to survey what is out there, just so that any new-comers to the Field and see what they might like to fight, or maybe develop?

So, we have;


Immortal Fire;


  • Alex. Macedonian (Kievan)

  • Early Successor (Kievan)

  • Gallations (Pete)

  • Greeks (Pete)

  • Greco Bachtrian (Kievan)

  • Hellenistic Greek (Kievan)

  • Indo Greek (Kievan)

Rise of Rome;


  • Late Carthaginian (Kievan)

  • Late Macedonian (Kievan)

  • Late Repuplican (Kievan)

  • Parthian (Pete)

  • Pyrrihic (Kievan)

Rome Triumphant;


  • Ancient British (Andy)

  • Anglo Saxon, early (Kievan)

  • Caledonian (Kievan)

  • Frankish, Limigantes, early (Kievan)

  • Pictish (Kievan)

  • Principate Roman (Andy)

  • Scots-Irish, early (Kievan)

Phil T. 26th July 2008

Sunday 13 July 2008

10th July 2008 - Games

A bit of a mixed bag this week. Chris running a Turks vs Russian slaughter, under The Great War.
John and Kevin engaging in an attractive Blitzkrieg Commander, 1939, Germans vs Poles game.
While the rest of the crew lined-up for a Field of Glory, Rome vs Celts/Picts.

Phil T. 13/7/08

Thursday 26 June 2008

WW1 in 20mm


While their subordinates slugged it out in the AWI campaign game, John and Chris, indulged in a spot of 20mm WW1 (using the Great War rules). John's very nice set of 20mm models look excellent........Now Chris, why did we go 28mm, when I can have a whole fleet of 1/72 scale tanks, for the price of one 28mm!?
Just look at the nice vehicles - nice one John!


Phil T


AWI Campaign - British Set Back

British forces seemingly suffered a major set-back today. After pursuing a rebel column to within sight of a fort, the British forces mounted a hasty attack. Initially, the attack went well, with British light infantry forcing the gate. However, as the British main column attempted to reinforce the attack on the gate, it was first stopped in the gateway, then attacked in the flank by a group of rebel riflemen. The British commander rushed forward, to inspire the light troops, now engaged in a life and death struggle inside the fort, but was then trapped inside, as the rebels succeeded in closing the gate. Caught by fire in the flank and rear, the British heavies crowded around the gate, until finally gunned down.
British Columns Arrive in Sight of the Fort
British Light Troops Engage Rebel Cavalry, Both Sides Suffering Losses
British Light Troops Force the Gate
British Light Troops Battle Against the Odds, Inside the Fort
The Main British Heavy Column Receives Surprise Flank Fire
British Heavy Column Trapped at the Gate
British Commander Attempts to Turn the Tide Inside the Fort, but Fails and is Captured
Phil. 26th June 2008