Wargaming from Hertfordshire & Beyond!

Saturday 31 July 2021

Disaster in the Desert

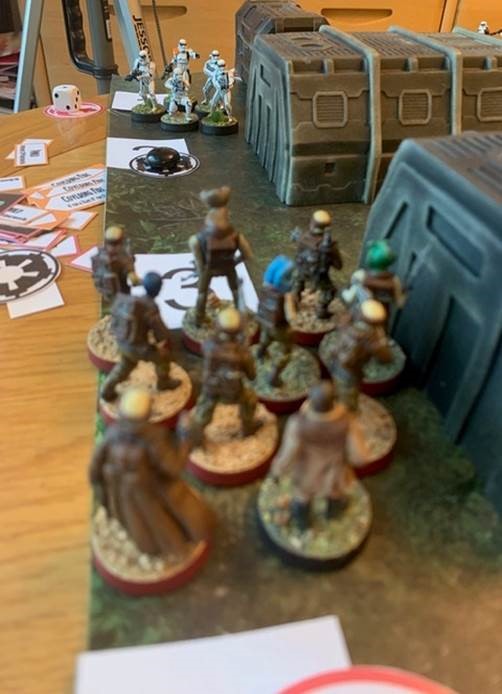
So, our seasoned reporter ventured back to Mesopotamia in the 3rd century AD to witness the superpower of Rome, and the “new kid on the block”, the Sassanid Empire slug it out for domination of the Middle East. Phil and Tony commanded the Romans, Dave and Rob the Sassanids. A nice surprise was the return of Fred who volunteered to draw the Sassanid chits. Was this a good idea?


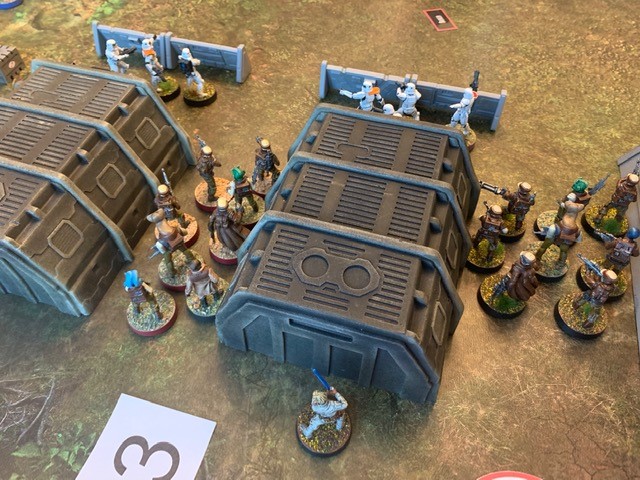
Both sides advanced aggressively. The Romans were in a classical formation with a heavy infantry centre, a cavalry-heavy left wing and a balanced right. The Sassanids favoured their centre and right with the left being held by archers and light cavalry. The raw units of “deep spear” seemed to be holding the camps. The Sassanids soon lost a light cavalry unit, plus took a few disorders on their cavalry and the cataphract unit including the senior General. This seemed to un-nerve them completely, and Fred’s appalling chit-pulling plus the plethora of Saves for the Romans didn’t help the Sassanid mind-set.

By the drinks break Sassanid morale seemed to have collapsed, despite the Romans pointing out that their centre was in a “bit of bother” due to its advance. If the Sassanids could turn into the exposed Roman flanks the day could still be saved.


However no-one had reckoned with Fred’s chit-pulling. The rumour that he was wearing a T-shirt emblazoned with “The Spirit of Greg” was untrue, but his unerring ability to pull crap chits was mightily impressive. The Sassanids failed to land a blow...

and the Roman Legionaries settled down to do what they did best…..kill their enemies.


Rob’s senior General first relocated to his elephants after the Cataphracts were destroyed, and then when they were in turn killed moved on again. Eventually we heard the plaintive cry of “what happens to a General when his command is wiped out”?

The answer was to hand the Romans two more coins!.

With both Sassanid flanks also under heavy pressure and in danger of buckling the Sassanids gave up.

The score when the towel was thrown in was 13-0, but 14-0 was on the cards. The heaviest margin of defeat we have seen in a game of TTS.

 
Afterwards Simon and Fred mused on the evening’s play. Yes the Goddess Fortuna had certainly smiled on the Romans, but the 3rd century Roman army is a mighty, and much under-appreciated army compared to its 1st and 4/5th century counterparts. It still retains good Legionaries and Auxilia, but with decent heavy and light cavalry, plus more missile troops. The “Crisis of the 3rd Century” was more due to calamitous and draining civil wars coupled with the hammer-blows of barbarian invasions in the West and the rise of the Sassanids as an aggressive force in the East, rather than the army being essentially crap!

Simon

Friday 30 July 2021

Star Wars CofC - The Return of the Lardi

Wednesday 28th July saw the 4th game of Star Wars Chain of Command. Finally, the powerful AT-ST made it to the table, although I think the Empire would have preferred to have a Force User. The Scenario was downloaded from the Star Wars CofC Facebook Group.

Scenario

The Rebels have managed to escape the Empire attack on Hoth and have split their surviving forces over several secret locations. The Empire have tracked one group of Rebels to the deserted trading planet of Roth-Erham. The Empire have sent an assault force to attack the Rebel base and capture its fortified bunker to enable them to obtain details of the locations of the other Rebel bases. Phil & Dave again played the mighty Empire and Mal and Steve the plucky Rebels. The game was hosted over Zoom (and reported) by Rob.

Game

The game started well for the Empire. Clever placement of Jump-Off points gave them a deployment position only yards from the Rebel base, which they quickly entered, with a few casualties on the way from Rebels firing from the woods east of the bunker. It was starting to look like this could be a quick Empire victory.


The first squad of Stormtroopers started to advance behind the barracks towards the bunker, whilst a second squad followed close behind.


To stop this advance, the Rebels deployed a squad and senior leader behind the bunker, which advanced on the Stormtroopers and started a firefight. This didn't go well for the Empire and the squad was quickly wiped out.

Meanwhile, the feared AT-ST started to advance down the table, trying to get into a position both to suppress the Rebel fire from the woods and blast open the door to the bunker.


The Rebels deployed an RPS-6 Rocket Launcher Team in the woods, their only defence against the AT-ST. Its first shot hit the advancing AT-ST, forcing it back a few yards, but unfortunately did no real damage.

A squad of Imperial Scout Special Forces and a senior leader deployed east of the rocky plateau and started to move around its north edge to try and flush the Rebels out of the woods.

The Rebels countered by deploying Luke Piewalker and a Mk II Blaster Team in the woods to provide protection from the Scouts, however, both are ineffective against the AT-ST’s armour.

Unfortunately for the Rebels, fire from the AT-ST took out the Rocket Launcher Team, leaving the Rebels defenceless against it. They therefore retreated to the rear of the woods, leaving the AT-ST free to advance towards the bunker.

The Empire advanced a Jump-Off point into the Rebel base and immediately deployed their last Stormtrooper squad.

Luke then took the Rebel squad around the south edge of the bunker to support the first squad, and the firefight against the Stormtroopers intensified. Luke used his force abilities to good effect, allowing him to re-activate one squad’s heavy weapon team to pour devastating fire into the Stormtroopers, who started to take heavy losses.

The Stormtroopers tried to find cover, but were quickly outnumbered by the pursuing Rebels.


Meanwhile the Empire’s Scouts entered the woods and engaged the MK II Blaster Team, whilst the AT-ST started to open fire on the bunker door, scoring 2 of the 3 hits required to breach it.


The Scouts struggled against the significant firepower of the Mk II blaster, taking significant losses.


Back at the barracks, with nowhere to hide, the few remaining Stormtroopers were quickly routed.


This left the Empire with just their AT-ST and a couple of heavily outnumbered Scouts on the table, and their Force Morale reduced to 2, with the Rebels still on 6.

Although the Rebels had no effective weapon against the AT-ST, they could easily finish off the Empire’s Scouts, and capture sufficient Empire Jump-Off points to reduce their FM to zero. Therefore, after over 5 hours of play, a Rebel victory was declared.

Post-Game Analysis

Initially it looked like the Empire’s rapid advance into the Rebel base would achieve a very quick victory. However, the Rebels had several very lucky Command and Attack dice rolls, which slowly started to swing the game their way. Several double 6’s on their Command dice, and Luke’s force power allowing him to re-activate his heavy weapon team, allowed the Rebels to dominate the firefight behind the barracks.

The Empire soon started to run out of Stormtroopers, and with no force user of their own (Darth was busy crushing Rebel resistance elsewhere in the galaxy) their attack quickly stalled.

Although the AT-ST was packed with a formidable array of weapons, it was hard to activate and slow to move, both hampered by poor dice rolls. With better rolls it could have been a game changing weapon.

Both sides need to consider deploying more of their arsenal of vehicles and weapons in future games (pretty please).

The dominance of the Empire has taken a bit of a hit, but the Empire will strike back! Another Star Wars game will be planned for the near future. 

Rob

Saturday 24 July 2021

The Big Cat Hunt - or so the British Thought

After yet another week’s R&R our reporter advanced about 1600 years and 4,300 km west to appear in Normandy in 1944. The British were still battering against the bulk of the German armour around Caen, taking fearsome losses in the process. Would today be any different?

The British entered the fray with a Firefly and M4 to the North, 

and the M10 Achilles and 2nd Sherman M4 to the South.

The Germans moved a MkIV into a wood in the north, whilst the 2nd MkIV crawled cautiously to face the British in the South. 

The mighty Tiger I advanced slowly, belying its “big cat” name and reputation. The umpire mused that its sluggish progress rather reminded him of his own cat’s demeanour.

The tanks began to trade shots, but to little effect. By the traditional “turn 3 drinks break” everything was still intact, thanks to pretty dire dice-rolling. Then Chris’ southern MkIV lost two dice and appeared to be in trouble. Dave went a-hunting with his Sherman as Chris retreated to lick his wounds and try to recover. 

Rob’s Tiger threw caution to the wind and crawled forward hampered by his slow turret. Even then, a flank shot from the Achilles did nothing. The Brits needed to get round Rob’s rear. A nasty prospect indeed! Phil decided to charge out and punch through the German lines. Result, a flank shot from the 2nd MkIV and one “Tommy Cooker” left a blazing wreck.

Back with Dave we witnessed the unusual sight of a Sherman ramming a MkIV. Cue two points of damage to Chris and an abandoned German tank.

In the centre the Firefly and Achilles tried to take on the Tiger. Tony elected to leave the Umpire to roll the “hit dice”, but more poor rolls saw the Firefly destroyed at point blank range by Rob. This left a complete mismatch of the paper-thin side-armour of Achilles vs the frontal armour of the Tiger. More British cries of despair.


With just a solitary M4 left to contest the table vs a Tiger and MkIV, “honest Simon” awarded the victory to the Germans.

I guess Phil, Dave and Tony experienced how 22nd Armoured Brigade felt after facing 101st Heavy Panzer Battalion in Villers Bocage.

Simon

Wednesday 21 July 2021

Caesar's Camp - Le Ferme de Caubert (Part 4)

Today we played the fourth scenario from the Caesars Camp pint sized campaign.

With significant loses from the previous game the Germans were only able to field two sections. The British did well in the patrol phase (managing six free moves to the consternation of the German players) and managed to restrict the Germans to the area around the farm.

The British plan was to advance on the left whilst deploying supporting troops into the wooded area. The British deployed a section on the left and a 2" mortar into the wood. However, plans usually go wrong at first contact as the Germans deployed a sniper who proceeded to shoot up the mortar team. The British deployed a section into the woods to help out the mortar team...


but the Germans deployed a section opposite...

and poured fire into them, eventually pinning them, killing the corporal and routing the mortar team. This was not going to plan for the British.

The British pushed their section on the left forward...

and deployed a second in support, with the Germans deploying their second section behind the copse just infront of the British. 


The second British section swung left to hopefully outflank the Germans...
 
 
but the Germans deployed a light machine gun into the farm that started to chew them up. The British advanced a jump off marker and deployed a second mortar team to smoke the Germans.


The British deployed a Vickers and their Lieutenant into the woods but again luck was with the Germans as they managed to kill the Lieutenant. The British force morale was plummeting at this point. In desparation the British charged the Germans in the copse, with a bloody outcome. The German section was wiped out with only a few British casualties. The British needed to take the farm, so the last section was deployed.

The Germans deployed their infantry gun hoping to rout the section on the left but the British managed to advance two sections to occupy the farm, game over.

The last few turns were very fraught with the British only having three command dice and the Germans pouring fire into the British to try and break their morale.

Friday 16 July 2021

Failure is not an Option - A Star Wars Story

Wednesday 14th & Thursday 15th July saw the 3rd game of Star Wars Chain of Command. Yet again no vehicles made it to the table, although the Rebels had a large static Laser Cannon.

Scenario

The Rebels have acquired the design plans for a powerful new Ion Weapon, capable of disabling the Empire’s Star Destroyers. The key components for this are rare Energy Crystals. Empire spies have reported that these crystals, contained in 4 secure crates, are currently located in a Rebel bunker on the forest moon of Endor. The report also states that the Rebels are preparing to ship the crystals to an unknown destination where the assembly of the weapon will commence. The Empire have a short time window to attack the Rebel base and destroy these crystals before the Rebel transport and its X-Wing escort arrives. As failure to achieve this could render the Empire’s fleet useless, the Emperor has commanded Darth Vader to lead the attack on the base. Failure is not an option! Darth Vader must therefore be deployed on the table at the earliest possible opportunity after the first squad is deployed. There are Rebel non-combatants working at the base, which the Rebel troopers should try and protect, if possible, to avoid “Bad things happening” should the Empire kill them. The crates are all stored (or so the Empire was informed) within a hardened bunker, requiring the Empire to breach the armoured door to gain entry. Each Stormtrooper squad is equipped with two powerful Thermal Detonators to use to destroy the crates. They are fitted with timers to allow the Stormtroopers a chance to escape their devastating effect. The Empire have a spy in the Rebel base who will provide Darth Vader with an aerial photograph of the Rebel base (after the Rebels have deployed any fixed assets) to help the Empire select their support options and plan their assault.

Phil & Dave played the mighty Empire and Mal the plucky Rebels. The game was hosted over Zoom (and reported) by Rob.

Unbeknown to the Empire’s spy, the Rebels had already started to move the crates from the bunker to the landing pad, ready for loading on to the transport. The Rebel technicians had also covered the crates with camo netting to hide them from aerial surveillance.

The spy did however report the presence of the Rebel Laser Cannon on the rocky outcrop. The Empire activated first, deploying a squad of Stormtroopers in the centre woods, and Darth Vader with another squad in the southern woods. The Stormtroopers quickly took out the Laser Cannon team, disabling it before it had chance to fire. Too late, the Rebels deployed a squad of Pathfinders with barricades next to the now defunct Laser Cannon, and another on the Landing Pad loading lift, which they immediately elevated, giving them a good vantage point of the battlefield.

At the first sound of weapon fire, the non-combatants on the base quickly ran for cover. 

Luke Skywalker deployed from the Bunker with a 3rd Pathfinder squad, and took position behind barricades, whilst Han Solo joined the squad on the hill. The Empire were up against a solid line to well protected troops.

The Empire continued to deploy more troops, now trying to advance along the northern edge towards the base.

With only light cover for protection, and Darth Vader forcing them to continue to advance towards the base, they were repeatedly caught in the open. Luke used his 4 command initiatives and 12” command range to good effect, directing concentrated Rebel fire to cut them down. Whilst the Rebels, protected by hard cover, took few hits from return fire.

Even the feared Empire Death Troopers struggled to advance. A Rebel victory seemed all but certain. Then the Empire’s luck changed. Rolling four 6’s, a Random Event occurred – it started raining very heavily, reducing visibility to 18”. This was the break the Empire needed. The reduced visibility allowed them to close on the Rebels without taking heavy fire. The tide had turned. The Empire continued to advance along the north of the map, towards the landing pad, taking positions in the nearby woods. A squad of Stormtroopers made a dash for cover under the landing pad, but failed to make it, taking heavy losses from Rebel fire from above. It was now the turn of the fabled Death Troopers. But before they made their move a 2nd group of Stormtroopers, which had been advancing through the wood behind them, managed a lucky hit on Luke, wounding him and rendering him out of action for the rest of the turn, and also costing the Rebels 2 Force Morale.

At this point the Rebels ended the turn, allowing Luke to re-join the battle, but also allowing the advancing Stormtroopers to open fire at range. The Death Troopers now advanced towards the landing pad, unleashing their devastating firepower on the Rebels above them, pinning them. Taking the advantage, they sprinted towards the Landing Pad, climbed the stairs and attacked the Rebels from behind.


Surprised, pinned, and heavily outgunned, the Rebels broke and fled, leaving two of the valuable crates in the hands of the Empire.

This was the final straw for the Rebels, with their Force Morale now zero, the battle was over.

Post Game Analysis

The game became more of a war of attrition than the expected tactical attack. The Rebels effectively had a killing zone into which they could pour heavy fire from well protected positions. Without any armour to attack with, the Empire’s only choice was to throw men at the Rebels and try and overcome them by force of numbers. This was looking unlikely until a change of fate brought on heavy rain and reduced visibility, giving the Empire much needed cover to allow them to advance without further heavy losses. Although the Rebel losses were relatively low, they had a big effect on their Force Morale. Whereas the Empire’s heavy losses had surprisingly little effect on morale. This resulted in a win for the Empire without them needing to complete the difficult task of breaching the bunker or destroying the crates. The Death Troopers were the Empire’s trump card. Once at close range their firepower becomes devastating – a full squad firing with 18 FP. Being Aggressive and Elite, they are also formidable in close combat. The Rebels can closely match this with a Wookiee squad, but one was not selected for this scenario. Instead, the Rebels hoped their Laser Cannon would have given them an easy victory. But unfortunately it was left unsupported for too long, and its crew was taken out before it could be used.

With Star Wars bringing unfamiliar troop types, weapons, and Force Users to the game, and having no real historical basis, it is not easy to achieve a fully balanced scenario. But in this game, what seemed an almost certain Rebel victory quickly turned into a defeat due to an unpredictable random event. The dominance of the Empire continues to increase. 

Another Star Wars game will be planned for the near future.

Friday 9 July 2021

Rome vs Palmyra, a rematch

After last week’s stunning Palmyran victory our reporter, packed his things and left the local Caravanserai where he had spent an enjoyable week’s R&R whilst waiting for this epic re-match. This time the terrible trio of Rob, Chris and Tony would be trying to avenge their humiliation against a new Roman line-up up Malcolm, Phil and Dave.


The battle started with Malcolm using his stratagem to advance three Roman units to seize ground. It did not go un-noticed that this advance was almost as far as the Roman army managed in the whole of last week’s game.

The Palmyrans advanced all along their front. So far so good. Roman turn one saw the cavalry-heavy right flank sweep forward, and auxilia and light cavalry on the left advance cautiously and the legionaries adopt “Testudo” and start to move forward as well. Malcolm had obviously been reading the rules again!

The Palmyrans “unleashed hell”…..to quote from Chris and the film Gladiator. For the Romans the hell of the arrow-storm proved not quite as bad as Medieval Catholicism would have you believe. Zero damage from lots of arrows expended.

In the face of Dave’s Auxilia Tony seemingly began a tactical withdrawal after some more ineffectual light cavalry archery. Was this the same Tony we know and love, or an impostor?

Chris charged his Cataphracts into Phil’s mounted force and came away licking his wounds. Low Palmyran chits and good save’s seemed the order of the day. In the centre Malcolm’s four legionary units ignored the massed Palmyran archery, which seemed fixated on a unit of Roman light infantry archers hiding in a palm grove. They then hit the Palmyran centre. Light cavalry fled but the cataphracts took disorders as Chris once again reprised his crap chit drawing of last week. Rob sulked.

Back on the Roman right, Chris lost some light cavalry and a cataphract unit, seeing his General wounded in the process. A gaping hole now appeared in the Palmyran line,

which worsened when Malcolm’s legionaries smashed into the Palmyran centre killing the veteran archers, some light cavalry and more cataphracts. Zenobia seemed doomed. With Dave easily holding the Roman left in the face of Tony’s curious tactics,

Phil breaking through and trying to destroy Chris’ remaining Cataphracts and get the General, Malcolm marched on the camp. Rob tried in vain to move his raw Auxilia to defend the army’s baggage. A difficult activation but still only needing to draw a three chit. Chris drew a two and promptly put his head in his hands. Game over.


A stunning Roman Victory 13-1. Sol Invictis had his revenge on Bel. The inquest into the chit pulling led to a search for Greg. It was noted that his Cold War terrain was somewhere in the man-cave. Surely that must have been the problem.

No debate about next week’s location or period. Before that on Sunday we have a return to North Germany circa 1983 for more 1/300 Battlegroup NORTHAG fun. Watch this space.

Simon