Wargaming from Hertfordshire & Beyond!

Wednesday 25 October 2023

Xenos Rampant – Rescue Dr Feilgood from the Bugs!


This was a variant of Scenario Kilo, the ‘VIP Extraction’. Dr Fielgood has been on a stealthy field survey of the bug hive. He had discovered some vital information about bug vulnerabilities. However, he had been spotted and had had to make run for it. Exhausted, alone & afraid, he had taken shelter in a nearby observation tower. The Starship Troopers must extract him!

The Xenomorphs deployed first and the Starship Troopers then deployed from the opposite table edge. The Bugs were the attackers.

Dr Fielgood could join any Starship Trooper squad that contacted the Tower. He would then move with that unit. If that unit were eliminated, or forced to retreat, Dr Fielgood would be dropped where he was (cowering in a fetial ball!). Any other unit could then pick him up, by performing a move action that passed within 1” of the figure. The bugs could open the Tower, by attacking or shooting it, the Tower counting as 5 Strength Points with Armour 4.

We played two ends to this game. Game 1 with Dave leading the Starship Troopers and Rob & Steve leading the bugs. Game 2 with Rob & Steve leading the Starship troopers and Dave leading the bugs.

Game 1: The bugs went wide. One group of drones rushed the tower, while the two other drone swarms went left & right of the tower. The bug young scuttled off down the wadi while the bug Queen backed-up the centre & right flank bug swarms.


On the bug right, the Starship Heavy troopers were slow off the mark, so the drone swarm there managed to scuttle up and crouch on the far side of the hill, ready to spring!

The central drone swarm rushed the back of the tower, clattering into it, but the Starship Trooper Ranger (LI) team, rushed the tower door, bundling Dr Fielgood out, before the bugs could rip the back off.

However, the bugs could sense these Rangers and all 3 drone swarms converged on the Ranger teams behind the tower. Result – Lunch for the bugs & Dr Fielgood cowering alone on the floor! But this then left the Drone swarms vulnerable to the heavy Star Trooper weapons. Two drone swarms were rapidly thinned out, while the 3rd sought shelter between the rock formation, in the centre of the Star Trooper line.

The bug Queen then called one surviving drone to scoop-up Dr Fielgood, while she directed the last full strength drone swarm to distract the Heavy Star Troopers. However, these drones were extremely surprised to be thrown back, in vicious hand-to-hand, with just two heavy Star Troopers.


Having scooped-up Dr Fielgood, this fugitive drone was running for the bug baseline, when accurate, long range heavy Star Trooper fire brought it down, not that far from the bug baseline! The Troopers let out a premature victory cry, because moments later, the bug queen swept-up Dr Fielgood and ignoring galling fire from the Troopers, scurried off the bug baseline. A bug win.

Game 2: Rob reconfigured the Trooper force slightly, dropping one heavy trooper squad, in favour of increasing the squad size of the other two squads, to increase the firepower. Dave went for a tighter bug formation. The bug young swarmed toward the tower, while one drone swarm went to the right and two to the left of the tower.


The Troopers established a strong firebase of heavy Troopers on the hill overlooking the West side of the tower, while the Rangers (LI) rushed for the tower door. The Rangers could hear the bug young scraping at the back of the tower, so sprinted faster. Just a few metres short of the door, they were horrified to be confronted by not one, but two drone swarms!! Rangers for lunch!

Out on the bug right, the single drone swarm sacrificed themselves among some boulders, soaking-up huge amounts of Star Trooper fire and so buying time for the queen to lumber up to the tower and open the side, with two mighty swipes!

A second drone swarm then rushed, from the bug right, into the Trooper fire zone, getting severely battered for it’s troubles. Realising they were getting side-tracked and that the Queen was about to make off with Dr Fielgood, the Trooper elite squad dashed forward, to despatch the surviving drones in hand-to-hand and pursue the Queen.


But unknown to the troopers, the last drone swarm had crept around the central rock formation, to assail the Troopers from the rear and distract them further, while the Queen dragged Dr Fielgood toward the baseline. Despite some fairly accurate fire, the Troopers could not stop the Queen, distracted as they were by also dealing with the last drone swarm. Another bug win and as Dave pointed out, ‘You don’t get money back on the drones, plenty more where they come from’!!

Friday 20 October 2023

The Battle Of Puketutu (Maori Wars)

After a prolonged absence, our stalwart reporter headed to the frontier-land that was North Island New Zealand in the 1840s. With Phil acting as a “dutiful husband” and staying in Hitchin, myself and Tony, played a scenario supplied by Dave, which I think comes from an old copy Wargames Illustrated. Set during 1845, it sees the British and their Maori allies starting to push inland and take on the dominant Maori chiefs Hone Heke and his ally Kawiti. The scenario didn’t supply forces, so I went with those from a Lard Magazine, but used the table layout from the WI article.

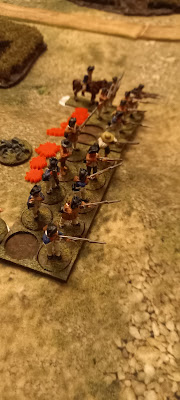
My initial reaction was that the terrain was too open and so it proved. Tony chose the British and I took the Maoris. The Maori dispositions saw some troops deployed in the scrub on one end of the table,

 
with others in the Pa.

It was a short game. Tony quickly moved up his Maori allies and Volunteers, with the latter able to operate in open order. They closed with one Maori unit and blew it away with close-range musket fire, plus judicious use of flags to take a second firing action. They then continued to advance on the second 6-figure skirmish unit who were soon running. Maori morale started to plummet. The Maoris tried to fire on the massed British regulars from a thicket in the centre of the table. They killed several Redcoats and inflicted shock, but the 24 regulars simply turned, presented and shot at close range, killing three including the leader. Maori morale dropped dangerously low. With half his force destroyed or fleeing Hone Heke decided that discretion was the better part of valour and he slipped away from the Pa with his remaining followers leaving the British victorious.

After the game we realised that we hadn’t used some Maori “advantages”, such as cover being one level higher for skirmishers. This might have helped a little, but Tony did roll a lot of 6s! I also noted that a force comprised completely of skirmishers does need very careful thought and handling, something I failed to do! Finally, the terrain does need to be denser, a factor I had suspected before the game.

Simon

Thursday 19 October 2023

Swamp Fox - Game 7

We recently played scenario 7 from the Swamp Fox campaign book by the Too Fat Lardies.

Situation

On the same day as the action at White’s Plantation, a second Rebel patrol under the command of Captain John Melton encountered Loyalist Captain Jesse Barfield’s company at Allston’s Plantation along the Sampit Road. The two forces met in an area where the road was surrounded by swamp.


The Rebel forces had one Secondary Deployment point which is on the road on the Western (left-hand) table edge. The also had one moveable Secondary Deployment Point. The Crown forces had one Secondary Deployment point which is on the road on the Eastern (right-hand) table edge. The also had one moveable Secondary Deployment Point. The Rebel forces were attempting to cross the table and exit via the road on the Eastern (right-hand) table edge, whilst the Crown forces were attempting to prevent this.

The Crown forces advanced their militia down the road. Whilst advancing their deployment point in a flanking manoeuvre to the north.

The Rebels also advanced their militia down the road. Let the battle commence.

The Crown forces deployed some skirmishers in the north hoping to outflank the militia column.


However, the Rebels deployed their own skirmishers and had the luck of the dice, causing significant casualties on the Loyalists,


Eventually pushing them back.

Both the Rebel and Loyalists continued their advance along the road.


With the Rebels deploying skirmishers in the south.

The Loyalist militia formed line and poured fire into the Rebels.


Taking fright, the Rebels taking advantage of some dry ground took cover behind the swamp.

The Loyalist militia advanced into the swamp dispersing the skirmishers hiding there.

In the north the Rebels saw off the last of the Loyalist skirmishers and now looked to help out their brothers in the centre, but luck was not with them, and they spent many a turn polishing their muskets.

The Rebels in the centre managed to get into some semblance of order and formed a firing line.


However, the Loyalists pushed on into the swamp forcing the Rebels to retire. 

The Rebels were now on the back foot with the militia retiring and at this point the game was called as the Rebels were not going to be able to get their force past the Loyalists.


Thursday 5 October 2023

Swamp Fox - Game 6

We recently played scenario 6 from the Swamp Fox campaign book by the Too Fat Lardies.

Situation

By November 1780, Marion was beginning to test the defences of Georgetown with the hope of wearing down the British garrison. On the 15th of that month, a party from his force under Major Hugh Horry encountered a force of Loyalists under Captain James "Otterskin" Lewis of the Georgetown regiment which was busy butchering cattle at the White Plantation by way of feeding the garrison while punishing the White clan for the support for the forces of revolution.

The Loyalist skirmishers were scattered around the plantation with the militia inside the main house. Miss White was entertaining the officers just outside of the main house.

The Rebels entered the table from the left hand edge with some skirmishers managing to get to the edge of the northern field,

where they encountered some Loyalist skirmishers. After a brief firefight, the Loyalists took to their heels.


Meanwhile, near pandemonium was occurring in the plantation houses, with the militia pouring out of the buildings and the offcers running to their respective commands.

The Loyalist skirmishers in the southern enclosure spotted some Rebels advancing in the nearby woods and managed to wound their leader, who in a moment of madness stepped infront of his own men and promptly took a musket ball in the back of the head.


The Loyalists were starting to get their troops into some semblance of order,


when Major Hugh Horry arrived with the Rebel veteran militia.


The veteran militia soon forced the Loyalist militia to retreat from the plantation house,


and turned the bullet ridden house into a blazing wreck. The White family sadly looked on as their home burned.

Taking fire from the veteran militia, the skirmishers in the south decided to retire, but unfortunately they didn't manage to get themselves over the enclosure fence.


However, some friendly militia turned up to help out.


The Loyalists were managing to hold out whilst a group of skirmishers were busily getting one of the wagons to safety. However, nearby musket fire resulted in another building catching fire.


Unfortunately, for the skirmishers in this building, The Tiffin card came up resulting in a chapter end and the building collapsing, killing the sergeant and most of his men.


The Loyalists were managing to push the veteran militia back,


but were taking significant casualties themselves. At this point the Loyalists, having saved one wagon, decided to leave the field, leaving Miss White to look on at what was left of the once beautiful plantation.