Wargaming from Hertfordshire & Beyond!

Saturday 25 February 2023

Thursday Game of To the Strongest

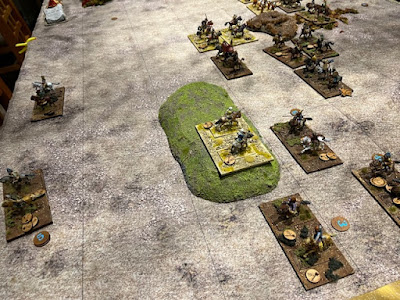
After a week’s well-earned R&R our indefatigable reporter packed his bags and headed back in time to the mid-4th century BC, and the Eastern borders of the late Achaemenid Persian Empire. This certainly isn’t the era of Cyrus, Darius the Great or Xerxes, and a succession of royal nonentities have witnessed a spate of rebellions all over the Empire. In our fictional scenario the Satrap of Margiana has rebelled and has allied himself with the Scythians from across his Northern borders. A Royal Persian army led by Chris was about to face Tony’s literally shiny new Scythians. The Persians don’t have a good track record in battle. Would Chris beat the trend. Eileen came in place of Greg to “influence” the chit pulling and also mock her husbands’s tactics.


With so much light cavalry Tony won the scouting and chose his table edge. Chris deployed with a light cavalry right wing, infantry centre and mixed left.

Tony left his light infantry in the camps, with heavy cavalry left and centre, and light cavalry on his right. So far so good for the Persians.


As both sides “moved to contact” the Persians actually met with success, killing several Scythian light cavalry units and opening a gap on the Scythian right wing. The Persian right also seemed to be holding their opponents in a light cavalry missile battle. The centre-left however was a different story as the lance and bow armed Scythian heavy cavalry charged their opponents. Disruptions were inflicted and the Persian line stalled. It was noted that Tony’s commands seemed to have a certain “flexibility” in their organisation, but we gave him the benefit of the doubt. At that point the reporter left to make the second brew of the day. He returned to see a huge hole in the Persian line where troops had been destroyed and their colleagues swept away in the rout. The Persian General vainly looked for friendly units to join.


There was a moment of amusement and mild consternation when it was observed that one of the clips holding the mat down on the table had somehow attached itself to Tony’s jeans near his groin. How this happened is even now a mystery and the clip is now in therapy. This period also witnessed the only bad language of the contest when Tony pointed out that some Persian archers couldn’t fire and then attempted to do exactly the same in a similar tactical situation. Raised Anglo-Saxon expletives were heard from the umpire at this point.

It didn’t matter though. The Persian right and centre continued to collapse as the Scythians poured missile fire into it. That said the Persian right gamely fought on even capturing a Scythian camp,

but couldn’t quite manoeuvre into position to take a second camp and put an unlikely victory within reach. The Scythians swarmed on taking a Persian camp and finally putting Chris out of his misery. Mrs Banks was less-than-sympathetic.


I think Chris and Tony enjoyed the game. Although the Scythians won a major victory in terms of units killed luck was with them in both missile fire and their defensive chit pulling. They are certainly a mighty army. That said, I did make them “too mighty”. All their troops are double-armed with even the lights having javelin and bow. I mistakenly gave them 5 ammunition i.e. 2 javelin and 3 arrows. Re-reading Even Stronger they should only have had 3 ranged weapons. However what Mr Miller has written has led to more questions which I need to send him! I would also point out that neither Tony nor Chris noticed my error.

Our reporter is taking a few weeks off during March so hopefully someone else will take over his duties.

Simon


Sunday 19 February 2023

Sharp Practice 2 – The Battle of Churros River

Another in our new series of larger games, at Lost Ark, in Stevenage. Thanks to John for providing the 8’x6’ table and being our congenial host & storekeeper.


Scenario: A small force of Spanish Regulars & skirmishers (Dave) were camped at the Convent of Adrados, overlooking the bridge over the river Churros. The Spanish deployment point is in the convent. Three French forces were approaching via 2 parallel roads from the South. Relieving British & Portuguese forces were approaching from the West & North-West respectively.

The Objective for the French was to destroy the bridge (a task roll of 11l, once the Sappers are at the bridge). The Allied task is to stop them & secure the bridge.

An unusually benign sequence of early chit pulling saw the majority of the forces deployed onto the table, with the exception of the French Dragoons, who presumably were still busy scouting somewhere else except the battlefield!

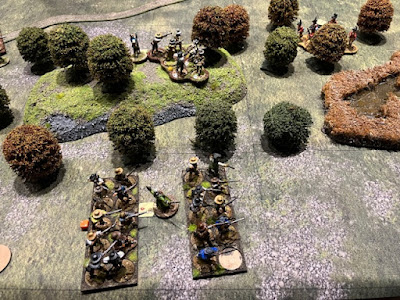
Chris’s Voltigeurs were soon trading fire with Rob’s British Light Infantry skirmishers, around the vineyard, with the French coming off slightly worse, despite having the benefit of cover. Voltigeur Lieutenant Bellevisage was also knocked unconscious by a spent musket ball, at this point, effectively taking Chris’ Voltigeurs out of the fight. To make matters worse, Rob’s two units of British  Line were better able to deploy into a strong firing line, while Chris’ 3 units of line struggled to get themselves untangled from the skirmishers and late arriving cavalry, so Chris’s French Line also started to suffer badly.


Away to the East, Tony’s French column initially made good progress toward the bridge, but was unfortunate to get caught by some gallingly effective long range flanking fire from the Spanish skirmishers on the far side of the river. The engineers also got themselves caught up in this, reducing their progress to a crawl.


Tony was able to deploy his gun and two rounds of Cannister fire was able to drive the Spanish skirmishers away from the river. Sadly for Tony, Dave’s Spanish Line were then in position to laydown long range fire on the deploying Eastern French line. Gaps were being progressively opened up in this French line, while neither the long range French musketry, nor roundshot from the French cannon, was able to make any effective reply.

Phil’s Voltigeurs pushed forward to occupy the central orchard, easily beating Simon’s lead footed Portuguese to the Orchard. A short firefight in the confines of orchard then ensued, with the greater weight of Portuguese musketry convincing the Voltigeurs to retreat to the cover of the Southern orchard wall.

Meanwhile the murderous firefight between Rob’s British and Chris French continued away to the West, but the longer this went on, the more obvious it was that superior British musket drill was going to win-out! (Someone please tell the French players to look at the ‘Pas de Charge’ rule!).

Realising that the chance of victory was slipping away from them, Phil dashed the Dragoon’s forward, to dismount and occupy the Southern end of the bridge. However, Simon’s Portuguese gun had finally managed to plod to within cannister range of the bridge and a well placed blast of cannister, sent the Dragoons fleeing back in disarray (double shock for canister & double shock for flanking fire!!).

The French decided to call it there!?

Friday 17 February 2023

Xenos Rampant Meets Captain America – Scenario K: VIP Extraction

This was the WW2 vintage Captain America, vs, his rival Red Skull, using Xenos Rampant rules. Captain America (aka Rob) brought with him, the Howling Commandos (Elite Inf, Amour Piercing), a 107th Heavy Weapons team (Light Inf, Hvy Wpn) and a 107th Snatch Squad (Light Inf, Increased Squad Size, Armour-Piercing). Red Skull (aka Tony, aided by Chris) brought three Hydra Heavy Infantry teams (HI, Hvy Wpn) and a Hydra Light Infantry section (Increased Squad Size).

Capt America won the toss and placed the VIP alongside the central reinforced courtyard area. Red Skull then elected to deploy along the long table edge, directly opposite the central reinforced wall area.

Capt America bravely elected to send the 107th Snatch Squad forward, to grab the VIP, covered by the 107th Heavy Weapons team, while he stood back slightly to watch. The Howling Commandos went on a wide flanking move / picnic, far to the right.

Red Skull deployed two heavy weapons teams, overlooking the VIP location at long range, while the 3rd HI team lumbered round to occupy a tower overlooking the central courtyard. Meanwhile the Hydra Light Infantry deployed behind some storage tanks, opposite the central courtyard, ready to dash forward, when the right moment arose.

Rob’s 107th Snatch squad grabbed the VIP, but were then rapidly pinned down by fire from Tony’s Hydra Heavy Infantry teams. Rob’s 107th Heavy Weapons team and the Howling Commandos started to pick-off the Hydra Heavy Infantry, but not fast enough, so Captain America dashed forward and started dinging that famous shield off the helmets of a few of the Hydra heavy goons.

Sensing that the firefight was starting to go against them, Red Skull pushed his light infantry team cautiously forward into the street, but they too started to suffer multiple helmet dings from Capt America and casualties from the 107th. The 107th Snatch Squad then also started to withdraw, dragging the VIP with them.

Red Skull then finally decided that perhaps he himself should get his hands dirty! He dashed out, across the road, to the wall of the central courtyard and challenged Captain America. Capt America leapt the barrier and went toe-to-toe, or more shield to fancy glass cube, with Red Skull. Round 1, a draw, one wound each! Both staggered back, snarling at each other.


While the big guys slugged it out, the Hydra heavy goons finally managed to first suppress both 107th GI teams (get closer next time Tony!!), then finally wipe out the Snatch Squad, leaving the VIP cowering alone in the street!

Red skull knew now that it was now or never! He flew at Captain America, only to get a face full of shield and 3 more wounds for his trouble (drat that ‘Assault Doctrine’!!). Hydra then decided to call it a day, leaving Capt America to escort the VIP away and the Howling Commandos to finish their picnic!

Tuesday 14 February 2023

Forbidden Psalm - Medieval Fantasy in a dying world

 Forbidden Psalm is a simple, fast play skirmish game set in a dying post apocalyptic medieval world, or so the description says.  Equally suitable for competitive, co-operative or solo play the game is downloadable from Wargames Vault for a reasonable fee as a miniatures agnostic game so you can play with any five figures you have lying around.  If you don't have any, there are some printable standees for you to use instead.    The game comes with a campaign of ten scenarios involving your party of adventurers carrying out tasks for a mad wizard in exchange for gold.  As the campaign develops your characters get better equipped, more skilled or just horribly killed and replaced by new members.  Hey the world is ending and life is cheap.

The game scenarios are played on 2' square playing surfaces making for a quick intense game that doesn't require hours to play or take up acres of room.  As such its ideal for those with not much time or who are short of space for gaming. 

Players design five characters with the recommendation that you select your miniatures and design the character to match them.  You may make a single figure a spell caster although that will cost you 5 of your starting 50 gold with which you have to equip your party at the start.  Everyone starts with a feat (a special ability they can use) and a flaw (a problem they have to deal with).  The game includes a random name generator which has some 'interesting' options.  I used five of the  twenty four 3d printed figures I got in an advent calendar last Christmas (thanks to the wife!)


Suzi the Doctor, Dagnut the Fire Wizard, Bungle the Wiles, Ranth Toothsayer and Skinny the Knight.  (see what I mean about the names)

The game uses a d20 for all basic tests with generally success needing a roll of 12.  Everything is based on one of four stats (Strength, Toughness, Agility and Presence) which can vary between -3 and +3 depending on your character design choices.  Weapon damage can be anything from d10 to d4 based on the weapon in use so you will need a set of polyhedral dice to play the game (or a suitable app on your phone).

Scenario one (The Mad Wizards Tea) involves the party being tasked to visit some nearby ruins to get some black fungus for him.  Unfortunately it only grows on corpses.  Even more unfortunately there are some ghouls in the ruins that are quite attached to their lunch and don't want it being prodded by adventurers.


A game in progress using some old school Mordheim terrain, state of the art 3d printed miniatures and some strangely modern corpses (which were all I had to hand).

The game, which takes 6 turns, and took about 20 minutes to play.  In solo mode the players figures move and act and then the monsters react using some fairly simple rules.  Despite this two of my adventurers failed to survive the first game, although they did pass their death saves at the end of the game and so will be able to take part in the next game.  With three pieces of Black Fungus in our possession we were able to report success to the mad wizard and will progress to the next game in the campaign.

Suzi the doctor lies unconscious on the ground while Bungle the Wiles fights off a Ghoul.  To be honest it wasn't going brilliantly at this stage

Overall I enjoyed the game and it let me used a few of my fantasy figures on the table.  The game has enough complexity to make it interesting while not being at all hard to learn or play.  As such its a quite a good starter game although the need for polyhedral dice could be an issue for some (although probably not).

The only caution I'd raise is that the layout of the rules is chaotic in natures with fonts, text size, background colour and setting all varying page by page.  This could make it hard to read for some especially if you are borderline dyslexic.  Check the preview on Wargames Vault to get an idea of what I mean.  If these small items are not a barrier for you I think you will enjoy this game.

For further explanation and play though videos search 'Forbidden Psalm' on YouTube.

Chris


Saturday 11 February 2023

Dusting off Altar of Freedom

For the first time in many years our tireless reporter stayed on the same Continent even if he did move 84 years in time from the AWI to the ACW. Having checked through my e-mails we bought 6mm ACW back in 2018, and since then have played 2 games of “Altar of Freedom” (AoF) and one using modified “Blucher”. With many of us having bought and painted armies it seemed a shame to leave them unused in boxes, so I decided to dust-off AoF and give it another go.

The scenario chosen was “Cedar Creek”, a medium-sized scenario which appeared a little less terrain-heavy than many in the scenario books.

The game features an early morning Rebel attack on a widely distributed Yankee force. Chris and Tony tried to co-ordinate the Rebels, with Phil and Greg manfully resisting whilst marshalling the troops. The Yankees deployed first, with Divisions encamped all over the table and Major General Sheridan somewhere off-table, together with 8 vital Priority Points.

The Rebels deployed second into in a long line with their cavalry of the far side of Cedar Creek, threatening one of the Yankee Divisions flanks. The Rebels had effectively a free turn and raced towards the Yankee troops. 


Things didn’t go well for Jonny Reb. The Yankee centre managed to hold a frustratingly unified line, and even got lucky breaking several Confederate units with high dice rolls. 


Phil’s Cavalry Corps soon had the smaller Confederate cavalry command in trouble and as well as breaking a unit cleared the western bank of Cedar Creek of Rebels, leaving the infantry to take the fight to their Confederate counterparts.


Greg managed to form a solid defensive position on the outskirts of Middletown, and gradually the Yankee reinforcements started to enter the line.

When Phil Sheridan arrived on turn four the game turned decisively in the Yankee’s favour, as they now had more Priority Points to spend each turn plus better troops. The rebels tried a final “Rebel Yell” and charged, breaking several Yankee units but lost more of their own in the Northerner’s turn. By the end of turn five it was all over. The Rebel morale broke and Chris and Tony conceded defeat. Sheridan had defeated Early.


At the end everyone thought it had been a good game, and looked nice in 6mm. With two rookie players in the forms of Greg and Chris, and the rest of us not having played for five years it was always going to be a challenge as the core mechanisms of allocating Priority Points and the Turn clock are unique to the game. By the end of turn 3 I think everyone “got it”. Playing at the club all those years ago one of the main problems had been the lengthy set-up time. I could obviously negate this by setting up in advance including labelling everyone’s troops. This had taken me nearly two hours but hey, it’s what retirements is for! The biggest gripe is still the tendency for some “micro-management” of individual Brigades to try and manoeuvre into optimal positions, especially when ½ an inch can mean the difference between using devastating canister or not. A hex mat holds the possibility to improve matters but none of us have a mat with hexes that small. I have thought of some easy improvements. Colour coding the Divisions’ labels with marker pens to help identification, plus making up some small rulers marked with the various permutations of moving and firing, such as were common for DBA back in the day.

I’m pretty sure we will return to the ACW using Altar of Freedom sometime in the near future.

That’s it for this week

Simon

Sunday 5 February 2023

Cold War Commander 2 in 3mm

This was a small trial game of Pendraken’s Cold War Commander 2 rules. Greg fielded 9 stands of T64s, supported by 9 stands of BMPs. For NATO, Simon fielded 3 stands of Leopard 2A1s & Phil 3 stands of Chieftain Mk 9, supported by 3 stands of FV.432s, with a lone stand of CVR(T) Strikers.


Greg’s Soviets opened by rolling the massed T64s, toward the central urban area, with their left flank covered by the BMPs. Initially the Soviets made good progress, but then the Command & Control started to fall apart.

Lead elements of the BMP force first encountered the British Chieftains, before managing to take cover in some woods. Luckily for the Soviets, their entry to the woods also saved them from a US CAS attack, who instead dumped on the Chieftains (NATO command blunder) instead!! However, as the BMPs cautiously emerged from the far side of the woods, they found that the Chieftains had moved off to intercept the T64s and instead spied the supporting British FV.432s, but failing to notice the CVT(T) Strikers behind the 432s! Ineffectual fire from the BMPs rapidly caused the 432s to scuttle for the hills, but this unmasked the Strikers. The Swingfire missiles started to chew their way through the partially hidden BMPs (9 dice!).
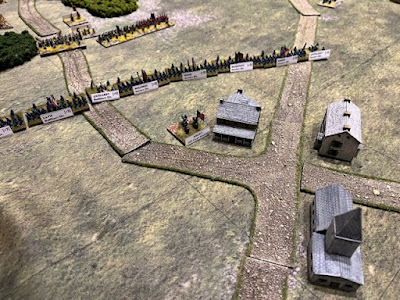
In the main Soviet T64 advance, the T64s started to come into range of the Leopard tanks. Although losses were being sustained, the Soviets were still able to continue their advance (just), even knocking out one Leopard stand. However, as the T64s tried to close the range further, they found the Leopard’s combination of protection & firepower, was just getting too much!

Then, to add insult to injury, the British Chieftains skirted the woods on the Soviet left, opening fire into the Soviet side armour, using their stabilised guns to great effect. This was all too much for the Soviets, so Greg defected!?

Our first experience of Cold War Commander 2 was reasonably positive. The feel of the rules was good and the game had manoeuvre, so often missing from Cold War rules. OK, the writing of the rules could do with some clarification, in places, but the game clicks along. Next time, we might try some artillery and/or air support? Next time, Greg’s Soviets also need more points!

Saturday 4 February 2023

Swamp Fox Game 3 (Reprised)

After witnessing Maori Wars action last Thursday, our man at the front moved back 65 years and several thousand miles East to the American War of Independence and South Carolina in 1780. Tony had suggested playing a game straight out of the TFL’s scenario booklet “The Swamp Fox”, and I chose one, more on the basis of having the necessary terrain than any view as to the merits of the scenario itself.

Chris took the rebels, and I took the Crown forces. Greg was an “interested bystander” with Tony attempting to umpire. The scenario was quite simple. The Loyalists had to retain control of the Inn and break the Rebels morale, the Rebels had to rout two Crown units.

Tony drew the first chit. “Tiffin”. Was this an omen for the rest of the evening. The next turn saw Chris quickly deploy three militia units marching or trotting up the road.

All the models were on foot but apparently were actually mounted. A dastardly Yankee trick. More militia deployed from a second deployment point a third of the way along the southern edge of the table.

A unit of skirmishers supported each of the militia regiments. With only three units deployable at the start of the game the British deployed their Provincial Regulars across the road behind the roadblock, with Ranger Skirmishers in the woods to the south of the inn.

As Chris’ troops trotted up the road my troops opened fire at long range. Whilst pretty ineffective, the sound of musket fore would be alert the reinforcements who could enter from a deployment point in the north east corner of the table. Chris’ southern flank militia started to march along the edge of the table, whilst skirmishers exchanged fire in the woods. The Rebels had the better of things and soon the Loyalist Rangers were thinking better of holding their position and started to pull back.

It began to look like a race between Chris trying to overwhelm the defenders of the inn, and the Crown rushing defenders down the road to help. The centre descended into a prolonged long-range firefight with both sides taking fairly heavy casualties.

Chris’ flank march force managed to turn and start to advance on the inn despite their leader stepping in something unpleasant.

However the Crown forces did manage to place more skirmishers in the outbuilding, and two units of Loyalist Militia did eventually manage to deploy on the edge of the woods from where they fired into Chris’ troops routing a unit and causing the loss of two points of morale. 

With time running out on the proceedings we decided to call it a draw which even I will admit was quite a generous offer by Chris. He was almost certainly closer to achieving his objective than I was, given that he only had to rout two of my units, not actually take the Inn or break my force morale. For the Crown all would have depended on my fairly undamaged reinforcements rolling up Chris’ troops to the south of the Inn, a not impossible task but certainly not easy. As ever Tony’s umpiring had “had its moments”, with changes of opinion as to “who could see whom” and other quirks. He was also confused about the stats of Chris’ forces. The answer was that they were in the Scenario book that he owned all along! If I had known that Chris’ Militia were “no bayonets” I may actually have been a tad more aggressive. However the models had bayonets and nobody knew any better. Next time I’ll check myself, not rely on the umpire and then break the bayonets off the models.

Simon