Wargaming from Hertfordshire & Beyond!

Saturday 22 October 2016

Bolt Action returns to Black Wolf

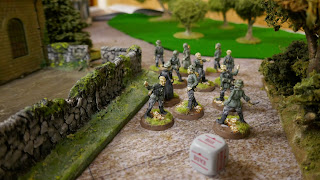
After the recent 'Weird War' appearance of Bolt Action at the club a couple of weeks ago, this latest game was rather more conventional. The game was a meeting engagement, with 3 US Shermans (Tony's models, carefully prepared by Fred) supported by 2 infantry squads vs a Panther and 3 German squads, plus a few extras.
The game opened with both sides bounding forward to cover near the centre of the table and then getting bogged down into a firefight stand off in the middle of the table.

The menacing Panther mowed down a US Bazooka crew who bravely attempted a frontal shot from the hedge line. However, as the Panther had used its 'Ambush' dice, the supporting US Sherman rushed up, on top of the fallen bodies of the bazooka crew, to have a pop at the Panther. These two tanks then proceeded to demonstrate their collective ability to miss the proverbial 'barn door' in a series of missed shot exchanges.

The right hand German infantry squad then attempted to storm the house at the far side of the village, only to get pinned down in the middle of the street.
The Yanks then attempted to flank the Panther to the right, while the left flank German infantry was redeploying to support the centre attack. However, the Germans weren't that easily fooled and rushed back, popping off both panzerfausts and brewing up the flanking Sherman.


Meanwhile, the 3rd Sherman snuck forward and managed to knock out the Panther, unseen from the central hedge line. But their celebrations were short lived as the German Panzershrek redeployed to the edge of the wood and flamed the offending Sherman.


So ended the game. A marginal victory to the Germans and a salutary lesson in not using armour in an OK Coral shoot out mode!


Personally, I prefer Chain of Command for this scale of game, as it offers mechanisms to break these firefight stand-offs and also a bit more period flavour, but each to their own.

Tuesday 18 October 2016

Postcript to the Battle of Ludford Bridge

Following the break in the early string of Yorkist victories, with defeat at the battle of Ludford bridge, there are rumours of dissent within the Yorkist command. Edward claimed that Warwick had sent him out to die, after Warwick apparently ordered him to attack across the bridge, but then failed to fully support him (something about Warwick’s horse not being happy about being on bridges!).
After a furious row with Warwick, Edward stormed to his father’s sickbed, only to find his father dead and Elizabeth Woodville sobbing over the body, still clutching a bottle of Warwick Industries healing potion. “But he only had a bruise after being hit on the head with a longbow shaft”, exclaimed Edward. However, it was later claimed that the potion had somehow reacted with a cut inflicted by a fault in York’s Warwick Industries supplied suit of armour.
Investigations into the allegations of Warwick seeking to extend the war, in order to gain further orders for Warwick Industries, have faltered recently. The investigator was found at the bottom of Warwick castle moat, after apparently making use of the new Warwick Industries iron swim trainer ankle weight accessories unsupervised!

Upon the death of his father, Edward has now assumed the command of York’s Battle and relationships with Warwick were said to be ‘frosty’, especially after Warwick claimed to have found a new claimant to the throne, one apparently still able to ‘fit in his boots’!?

Friday 14 October 2016

Ludford Bridge, 13th Oct 2016

 
The 3rd battle in the ‘To The Strongest’, Wars of the Roses mini campaign and crunch time for the Lancastrian cause. Lose this one and the crown would fall to York!

Well things did not start well for the House of Lancaster. The Lancastrian commander, Percy (Phil) was clearly suffering from something eaten the night before! His whole command was deployed further back than it should have been (York Stratagem card) and worse still, the brand new, expensive cannon had no clear sight of the enemy (waste of 7 points there!).

The Yorkist wings opened the battle, with Baron Greystoke (Mal) and York (Chris) pressing forward strongly. The Lancastrian left looked like crumbling under Greystoke’s onslaught, until some fortunate archery and a flanking charge by Somerset’s (Simon W) knights, rolled up the Yorkist left, demoralising the command.

York’s attack on the Lancastrian right opened well, by driving out some Lancastrian javelin men, hiding in the woods at the bend in the river, then softening up Stanley’s (Simon Q) archers & billmen with some excellent archery. York then pushed his prized continental pike block across the river and deep into the Lancastrian lines. However, soon the pike block was stalled in gruelling melee with Stanley’s cavalry at the rear of the Lancastrian lines. Things could have swayed either way until a group of Stanley’s archers, having emptied their quivers to no effect, fell upon the exposed flank of the pike block. Swinging wildly at the unshielded flank of the pike block, with bow, knife and fist, the pike block was forced almost to the point of breaking and York himself badly wounded and forced from the field, thereby stalling the whole Yorkist left wing.
 

Meanwhile in the centre things had developed. Warwick (Tony) was over-heard whispering in the Yorkist young pretender’s ear, “you go straight over the bridge, we are all right behind you”, and then proceeded to sit with his archers on the river line, just watching the young pretender and his knights swathing through Percy’s men.  In fact, there are rumours that Warwick actually ‘threw’ the battle, due to financial interests in the medieval armaments industry and hence a desire to prolong the war! But, he had clearly failed to tell his young pretender of this plan, who were soon ploughing through a block of Scots spearmen at the very back of the Lancastrian lines! The progress of the Yorkist knights being greatly assisted by Percy’s continued intestinal problems! (or a plague of 1 activation chits!).

But in the end, the mounting casualties from sustaining the relentless Yorkist attacks were beginning to tell and they just ran out of victory medals! So overall, another historical result and another excellent ‘To The Strongest’ game, which remained in the balance almost until the last chit pulled. Onward to Northampton!

Saturday 8 October 2016

Spanish Sharpe Practice 2


This Thursday saw the Spanish guerrillas making an appearance on the table, using the Too Fat Lardies Sharpe Practice 2 rules. We played “sweep the table”, with the French foraging for supplies and the Spanish guerrillas trying to stop them.
 
The French dragoons dashed forward, catching Julian Sanchez’s lancers at the stand. However French dice rolling was not great and the Dragoons lost by 1 and got pushed back. Meanwhile, the French light infantry dashed forward to occupy the central farm (and seize some pigs!). However two groups of Spanish Militia rolled forward and delivered two very effective volleys, driving the French light infantry from the walls. Meanwhile Sanchez’s lancers charged the recoiling Dragoons, routing them.

With the Dragoon’s routed and the Light infantry retiring, the main French column, still labouring at the rear (suffering from some appalling activation chit pulling), decided to about-face and retire. So ended the first Sharpe Practice 2 outing for the Spanish.

Lessons learned: Militia seem too powerful. Yes, they can be hard to manoeuvre and once you start them firing, they won’t stop. However, 10 muskets per group make them quite effective. The French ‘light column’ needs more   leaders. With only 3 leaders, when one is attached to the Dragoons and one to the light infantry, then the 3 groups of regular infantry have to be led by one leader.

Elsewhere in the club, we had Konflikt ’47, which appeared to be receiving a mixed reception. The was also a very pretty WW1 tank game underway.


Sunday 2 October 2016

Glenn’s Last Raid – Savage Worlds Based Zombie Game

The zombie horde had not had an outing at Black Wolf for a while, so time to try out the new Deep Cut mat and a couple of terrain pieces.

The scenario was that one of our Walking Dead style gang, Glenn, had snuck into the city on a solo salvage mission after a cache of guns and ammo hidden in a survivalist’s basement. Glenn has some pretty unique skills in terms of sneaking his way past the Zs, as well as opening locked doors without making a lot of noise! Glenn located the house and recovered the stash, however then things went wrong, as Glenn was ambushed by some thugs with handguns. He took a bullet to the leg, but managed to hobble into a nearby shanty town, pursued by a group of Zs and the thugs. He managed to hide in an old school bus (purchase from a recent holiday) and called for back-up.

So, the scenario was intended to open with a the heroes sneaking out of a nearby subway exit, silently overcome the couple of zombies in the street and undercover of the group’s able sniper, mount an extraction mission to rescue Glenn from the Zombies and the handgun touting thugs.

Well, like all my zombie games, nothing ever goes to plan. No, our heroes emerge from the subway like a horde of Arnold Schwarzeneggers from the film “Commando”. Well, even the Zombies were complaining about the noise! Within a few turns Zombies were streaming onto the street from Zombie Spawn points, attracted by all that gunfire. Soon our heroes were retreating back up the street in a wonderful recreation of the film Zulu, gunning down the oncoming Zombie horde, but not fast enough.

By this time Glenn had had enough and snuck out the back door of the bus and away from the few Zombies left near the bus and the handgun touting thugs. The thugs then simply crept out of the  garage they were hiding in, scooped up the bag of ammo that Glenn had dropped and legged it, happy boys!

So, as usual, not something one expected, but that is half the fun. Besides the new mat and the New York School bus, the game also allowed me to get the new TT Combat ‘Abandoned Apartment’ in the photos.  Nice model, cheap, but nicely done.