Wargaming from Hertfordshire & Beyond!

Friday, 19 August 2022

A very short game

Once again, our intrepid reporter ventured into battle, this time to the North-West of Britannia in AD367. In what has become known as the “Barbarian Conspiracy” the Picts, Saxons and Scotti are all making extensive raids on Britain in what seems a co-ordinated fashion. How these uncivilized brutes are managing this is a mystery. The scene was set near the town of Luguvalium (modern Carlisle), where on officer was returning from an inspection of the Wall defences further East, unaware of a Scotti force waiting in ambush. Our resident bearded, hairy-arsed barbarian aka Tony took the Scotti, with the clean shaven, upstanding Simon leading the forces of civilisation. Scenario was “Raiding a Border Tower” from Two Fat Lardies’ “Dux Britanniarum”.

The essence of the game was for Jovinus, one of the Roman Leaders, plus two of his warrior units to make it down the length of the board to the safety of the fort and the rest of the covering Romano-British under their Lord Fullaufades. The British had a 3D6 head-start down the table, but with rolls totalling only 7” seemed more to be on a pleasant country stroll than a race for safety.

The Scotti got lucky and their Lord’s deployment roll put them almost adjacent to the British. The first token out of the bag saw the Scotti Lord order his warriors to smash into the British. Tony played “Carpe Diem” and “aggressive Charge” cards which meant a successful flank attack with multiple bonuses and a broken British formation. Seventeen dice were rolled as the two raider warrior units, Fergus McDrool the Lord and his Champion Bucan hit the British. Six dead, multiple shocks and a wounded Jovinus was the result.


The British tried to fight back but it was all too little. After the British tried to flee, the Scotti caught them and attacked again. The result was more dead and the British leader captured. Game over. Fullaufades could only look on in despair from the other end of the table. A stunning Scotti victory.

It must be said the randomly determined deployment was bad luck for the British and extremely fortunate for the Scotti. The Scotti cards were also very favourable, and the dice rolls poor for the British and great for the Scotti. However, it was unlikely that even with better dice rolls the British could have escaped for much longer. But to be all over in one turn….

Sunday sees Greg and Simon trying out the draft rules for “Cold War Skirmish” from Ambush Alley, and Chris and Tony honing their Bolt Action skills in readiness for the Lost Ark Competition in September. I wonder who will have a more rewarding gaming experience. Maybe, we shall hear more at 17.00 on Sunday!”

A strange game of “Dux”. I’m pretty sure we played it correctly. Unless I got the deployment wrong, the British seemed doomed from turn 1.

Simon

Sunday, 14 August 2022

Bolt Action at Fort Williams

Sunday afternoon saw Tony and Simon play Bolt Action in the luxury of an air-conditioned conservatory. As Chris had inveigled Tony into entering a Bolt Action competition at Lost Ark, both thought they should know the rules before the big day. “Honest” Simon agreed to help Tony out, if only to confirm his prejudices about the Warlord Games/Osprey bestseller.

Chris had put the American and German lists together, which seemed to consist of an infantry platoon plus some support per side, each reinforced by an armoured car and tank. The scenario seemed to be a “fight to the death” for possession of a small village “somewhere in France”.


Simon pushed his armour up the road from his left flank, moving his infantry slowly across the board. 

Tony moved to intercept the M8 Greyhound with his Puma and Panzerfaust team, only to see the Puma reduced to a burning hulk by the Sherman and the anti-tank team fire and miss, and then be gunned down in the open by the Yank 50cal team.

The Panzerfaust was next to try its luck but fired from outside its maximum range. The shot was returned by multiple tank machine gun fire which decimated the German squad.


Tony was enjoying some success in the centre killing a few GIs, but the American squads hit the deck and survived with monotonous regularity.

A successful American air attack rather took the wind out the Nazi sails as more troops died and multiple pins were deployed. The final action of the day saw the Panzer IV line up the Sherman in its sights only to miss.  Not a good day to be a German, but also we were bored rigid...

I think we got most of the rules right but wouldn’t claim to be knowledgeable. It seemed to play very slowly, and the battlefield seemed very crowded, albeit we probably only had the same figure/support numbers as a game of Chain of Command.

Would I play Bolt Action again? I guess if someone was holding my entire gaming collection hostage and threatening to melt them down unless I gave them a game, I would probably agree to play. Otherwise, I can honestly say that this ruleset did absolutely nothing for me. If every copy was burnt on a pyre I would shed not a single tear.

I wish Chris and Tony well in their ill-judged venture but do doubt their sanity.

Simon

Games Day at Simons

Thursday saw a double-header at Fort Williams, with an ECW game in the broiling heat of the afternoon, and a Sharpe Practice game set during the Indian Mutiny during the evening. Maybe the timings should have been reversed for added climate realism!

The ECW witnessed a second foray with Simon Miller’s “For King and Parliament” (FK&P). This week’s scenario was bigger and more complex, with additional troop and terrain types. The battle of “Lessie’s Moor” was a fictitious scenario written by the author during the development of the rules. Rob was much confused by the Archers-inspired unit names and the setting of “Borsetshire”. I guess having been raised in a grim Northern Mill town, Rob’s exposure to Radio 4s daily tale of honest yeoman farmers in rural England was pretty minimal or non-existent. Dave appeared more knowledgeable.


Anyway, on with the game. Both sides adopted a conventional deployment with an infantry centre and cavalry wings. Following Rob’s initial and ineffectual artillery salvo, Dave’s Royalist cavalry charged hoping to take advantage of Rob’s lack of experience. However, the attack on the Royalist left faltered, leaving one Royalist unit dead and only a disrupted Parliamentarian regiment of horse. The Royalist right had more success charging round the enemy flank but found a determined enemy holding their hedged, defensive positions frustratingly easily.

Back on the left Dave witnessed a second cavalry unit receive an attack from the rear, plus a unit of “commanded shot” ridden down. Ouch! Cue five more Victory medals go the way of Parliament, plus the resultant morale tests further worsened the Royalist position.

Dave’s momentary sense of exultation when a Parliamentary cavalry unit pursued off the board was dashed when a closer reading of the rules revealed that unlike TTS he received no Victory medals.

Things went no better in the centre as desultory musket fire brought several double-disorders and another foot unit broke.

Having inflicted no unit losses and with only three coins left Dave conceded to Rob as it seemed inevitable that a further round of fighting would see the rout of more infantry. A second defeat in a row for Dave, and an ecstatic if somewhat bemused Rob.

Once again FK&P had given us a fun game that seemed to model quite well tactic of the ECW. The mechanics are obviously different to TTS with some nice touches such as the “pursuit” rule. There are still a few things to clarify our understanding of, but we reckon we now have understood most rule mechanics. Next, I need to persuade Mr Banks to complete his Scottish “Montrose” army which is apparently languishing in a box fully painted but unbased. Why he doesn’t finish this but instead is seen painting Goblins and Orcs is beyond the wit of man…

The evening saw a Sharpe Practice scenario loosely based on the second attempt to relieve the British Residency at Lucknow in November 1857. The game was a straight “Encounter” scenario played across a 6 x 4’ table. As the British advanced through the Dilkusha Park to the East of Lucknow, the Mutineers sallied out of the city, across the Grand Ud-Din Haider canal from the direction of a local landmark known as the “Bank’s House” to attack them. Greg and Dave commanded the British, with Tony and Rob taking the Mutineers led by the Ghazi of Kazi.

The British moved off from their two deployment points with Greg taking the HEIC force of Gurkhas and HEIC infantry, and Dave the Regular Army force of rifled musket armed infantry and light troops. The Indian side witnessed the usual chaos of too many troops trying to deploy from two deployment points. We can’t make it too easy for them! Tony took the various Badmash and cavalry in a long detour to the North, leaving Rob to contest the centre and South of the table. Dave pushed his lights into a small wood to threaten the Indian force in the South, leaving his powerful infantry to try and dominate the centre of the table.

Greg’s problems began when Rob managed to manhandle his artillery piece into action. The British were surprised to see the Indian artillery enjoyed “Sharpe Practice” which of course enhanced their effectiveness, and soon troops began to die plus receive multiple shocks.


Tony was struggling to move his Badamash, especially as he tried to send them through a swamp.

Several single inch moves did little to improve his mood, although he brightened up when his cavalry charged home into the unit of Gurkhas. The cavalry won, but it proved a Pyrrhic victory as both units retired heavily depleted.

The centre saw Dave’s musket fire finally force two Sepoy units to retire, but the deadly Indian artillery finally did for Greg’s HEIC troops., with one unit breaking and the other retiring out of the artillery’s firing arc back towards Dave’s regulars.

Although neither sides’ Force Morale broke the umpire decided it was a Mutineer Victory as it was almost impossible for the British to continue their advance as planned. It was noted by Greg that the British Regulars had let the HEIC troops bear the brunt of the fighting and the losses. Dave remained silent on this point…

Sunday apparently sees myself taking on Tony in a game of Bolt Action. Chris has stupidly signed himself and Tony up for a Bolt Action competition in September, and both are in need of some game time. Indeed, Tony claims he has never read the rules. Be prepared for a full de-brief at 17.00 on Sunday!

Simon

Saturday, 6 August 2022

The Battle of Stow-on-the-Wold

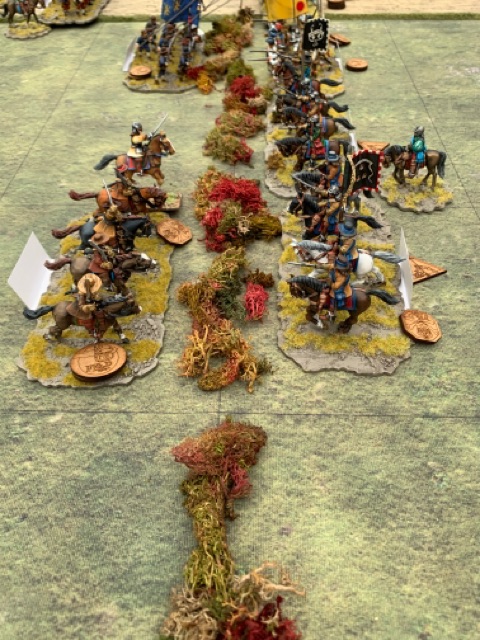
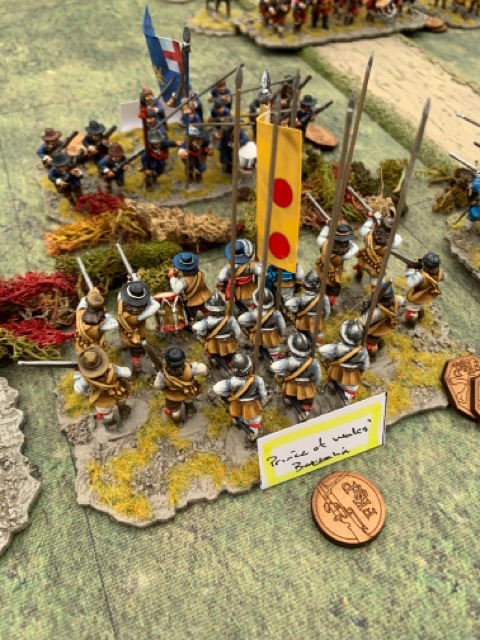
Thursday afternoon saw a run-out of Simon’s shiny new English Civil War armies using Simon Miller’s “For King and Parliament” (FK&P). Despite being released several years ago they haven’t seen much use with our little group of gamers, so this was viewed almost as a play-test. The chosen battle was the historical encounter fought at Stow-on-the-Wold on March 20th 1646. The Battle saw Lord Astley’s smaller Royalist force take on Thomas Morgans Parliamentarians albeit the Royalists held an advantageous uphill position on a low ridgeline. The deployment was as per Mr Miller’s scenario pack for the battle.


Battle commenced with the Parliamentarian right wing cavalry advancing to meet their outnumbered counterparts, albeit the Royalists were supported by small units of “commanded shot”.

Colonel Birch’s Parliamentarian cavalry did the same on the other flank with the infantry advancing slowly in the centre, wary of taking on an opponent with the terrain advantage.

Things didn’t go well for the Parliamentarian right. Despite using “dash” and saving their pistols for combat in the “Swedish style” they barely registered a hit, but soon lost two units. Things were going better for them on the left as they disordered Byron’s horse.

However the latter unit did manage to retreat saving themselves from destruction. The centre saw desultory Musket fire before Birch’s 2nd Parliamentary Foot Regiment charged through their own Forlorn hope to sweep away the Royalist skirmishers. A measly single victory medal was handed over.

The disaster on the Parliamentarian right continued to unfold. Two more cavalry units broke leaving Sir Williams Brereton no choice but to surrender to the victorious Sir William Vaughan. However, the latter was nowhere to be found as the Royalist cavalry were racing across the field under the “pursuit” rule. Nonetheless with the destruction of the Parliamentarian right wing meant that they had lost 10 of their 13 victory medals.

Things were going better on the Parliamentarian left. Despite losing Birch’s 1st regiment of horse Colonel Birch managed to destroy both the opposing units plus their pesky “commanded shot”, with a notably devastating flank attack which saw 10 “attack chits” drawn and 4 hits.

Back in the centre the infantry continued to slug it out at close range. 

The end came when the Marquis of Worcester’s rag-tag musketeer regiment landed a devastating close-range volley into Birch’s 3rd foot regiment and it broke, racing from the field.

The game and ruleset were viewed as a success…if you like ECW! We played it slowly and didn’t think we got anything fundamentally wrong, but may have missed some of the nuances hidden in the various pages of rules. I for one will be re-reading again before we give the rules another outing next Thursday.

If anyone wants to read more Helion produce a rather nice book on the battle tittles “The Last Army” in their “Century of the Soldier” series.

Simon

Sunday, 31 July 2022

Sudan Death in Sharp Practice

Having finally finished the Perry 28mm Sudan figures, I decided to try out the Sharp Practice Sudan conflict adaptations, from the 2021 Too Fat Lardies Special, written by John Savage.

Steve & Rob took the Brits, leaving Dave & Mal to take the Mahdists. This was a rescue mission. The Reverend Godbotherer and his daughter, Felicity, were sheltering in the ruined fort, “protected” by a group of Seamen and a group of Bashi Bazouk Skirmishers (@ Deployment Point 2)!! A British relief column, compromising two groups of British line and a Gardner Gun, entered at DP1.

The Mahdist objective was to capture the Reverend, in order to make an example of him (and do unspeakable things to his daughter!). The Mahdist forces comprised four groups of Beja Spearmen & a group of Beja Skirmishers at DP1 and three groups of Beja Spearmen & another group of Beja Skirmishers, at DP2.

Things started well for the Brits. The column marched on, covered by the Gardner gun, even managing a double move (using 4 flags). The Mahdists deployed into the depression in the South East and the wadi in the North East and watched.

Deciding time was against them, the Mahdist spear groups broke cover, the Southern group headed for the British column and the Northern group for the fort. The British infantry went into line and wheeled to meet the ongoing Mahdists. Their initial volley chewing holes in the leading group of Beja spearmen. In response, the Mahdist leader thoughtfully sent this leading group off to the East, to provide a target for the British infantry, while the remainder rushed into the rough ground to the North West, avoiding the British infantry volley fire and instead risking the rather ineffectual fire of the Gardner Gun.

At the fort, the Sailors rushed to defend the North wall, while the Bashi Bazouks went to the West wall.

The initial British luck then deserted them! A couple of turns on the trot, where all that came out of bag, were really a couple of Mahdist ‘flags’. This enabled the Beja spearmen to close on the British line, as well as the fort, at end of turn.


The British line infantry did manage to halt the Southern charge, but at huge cost! At the fort, the Beja spearmen swarmed over the walls, massacring the British sailors, before engaging and then driving off the Bashi Bazouk, capturing the Reverend and his daughter in the process. At this point the British Major, commanding the column, decided to withdraw. A sad day for British honour.  

Sunday, 24 July 2022

The Americans attempt to push into Germany

After retirement at the end of May our doughty reporter realised that he was missing the cut and thrust of combat so returned “to the colours”. Refreshed from his break and hoping for a journey to warmer climes he was dismayed to find himself in dark, dank Western Europe in February 1945. The allies were starting their push into Germany, and this game saw armour from Combat Command B of General Maurice Rose’s US 3rd Armoured Division trying to take the small town of Elsdorf held by an ersatz Kampfgruppe from Hurst Von Mellenthin’s 9th Panzer Division.

The Americans roared onto the table with A Sherman and Hellcat veering south and another Sherman and a shiny mew M26 Pershing advancing down the centre and in the North. The Germans had cunningly deployed a Hetzer in a wood and quickly moved the Tiger to block the Northern advance. The MkIV seemed to be held in reserve in the centre. Very wise! At this stage all vehicles were on blinds.

Phil’s Northern M4 got a nasty shock when it found itself staring down the barrel of the Tiger I and beat a hasty retreat into cover. Tony’s Hellcat moved into position to try and take on the Hetzer but failed to spot the German tank hunter in the woods and suffered the ignominy of a “first shot first kill” as the Hetzer’s 75mm L/48 barked into action.

The accompanying M4 then fired twice at the Hetzer only to record two misses.

Back in the North it became a game of “big cat hunting”. In the end the Americans broke cover hoping to use their speed to counter the Tiger’s slow turret. A cry of “oh crap” was heard from Dave as he realised the “fast” American vehicle wasn’t a lightly armoured tank destroyer but rather the formidable Pershing with 10 defence and 11 strike dice.

However, the Yanks luck ran out as the Tiger managed a flank shot into the Pershing and a “burning” marker was placed on the table.


Back down south, Tony engaged in a frantic war of manoeuvre with the Hetzer, inflicting some damage but not the killing bow.

Finally, the Hetzer emerged from the catfight bloodied but with a burning M4 in its wake.

That left a solitary M4, the same that had prudently hidden from the Tiger at the start of the game. It started a Keystone Cops style chase around a building with the MkIV but in the end the game was called as the Yanks were beaten. Indeed, the next turn may have seen the destruction of the M4 as the Tiger had an obscured flank shot as per the photo.


The game did reflect reality. The battle of Elsdorf witnessed the combat debut of the M26 Pershing and one was destroyed by a Tiger 1. That said the American gunnery rolls, courtesy of the Umpire was truly pathetic.

 Simon

Thursday, 7 July 2022

Operation Martlet - Table 4 – Striking at St Nicholas

As expected the British pushed deployment points into the orchard area, as well in a flanking position in the cornfields on the Southern table edge. The Germans pressed to get their deployment points into St Nicholas Farm, as well as covering the road.

The British initially deployed their Forward Artillery Observer, with a supporting infantry section, in a flanking position on the Southern table edge. They then deployed two infantry sections into the orchard area, which started working Eastward, supported by a Sherman, just south of the road.

This forced the Germans to deploy an infantry section into the Western edge of St Nicholas farmyard, but after dropping a couple of spotting rounds, the British FAO called a 3” mortar barrage down on the farm. The Germans then revealed a dug-in Mk IV, just South of the road, which immediately hit the Sherman, forcing it to withdraw in shock.


The two British infantry sections were now approaching the farm, through the orchards, so the FAO drew the barrage back toward the South-East, obscuring the Mk IV, clearing the Panzer Grenadier position.


The British Blue section, supported by the recovered Sherman, laid down fire on the Panzer Grenadiers in the farm, while Yellow section eased around the left side of the farm. However, Yellow section quickly discovered another section of Panzer Grenadiers, dig-in at the North-West corner of the farm. The four MG42s of the Germans started to inflict losses on the British infantry, which their return fire just could not counter. To prevent further losses, the British FAO walked the barrage back over the farm area.

Lifting the barrage from the Mk IV allowed the Germans to reveal an IG.18 gun, entrenched next to the Mk IV. Both of these proceeded to engage the infantry section on the Southern table edge, in the hope of neutralising the FAO. Sadly for the Germans, there appeared to be significant quality issues with their HE shells, because although the combined fire of two 75mm guns, was just not inflicting damage fast enough, because the mortar barrage on the farm was starting to inflict intolerable losses on the Panzer Grenadiers in the farm area.

Eventually the German Commander decided that these losses could no longer be sustained and called for withdrawal. However, even this withdrawal did not go well for the Germans, with the platoon leader and two section leaders being captured and only one member of Red section managing to sneak out from under the barrage!!