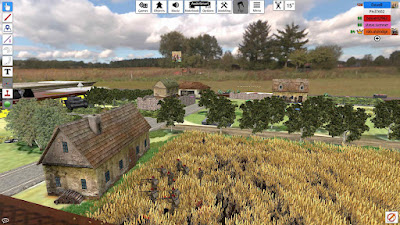
Our first experiment with running a Big Chain of Command
game, at the Lost Ark shop in Stevenage. This enabled up to set-up an 8’x6’
table, pitting a US paratrooper platoon, a British Tank Platoon & a British
Infantry platoon against two German infantry platoons (with support).
The British tank platoon would enter via the road in the
South East corner and needed to exit at least one AFV, over the bridge, on the
eastern edge of the table, while keeping the Germans at least 12” from the
road. The US paratroopers started on the bridge, while the German entry point was
on the track at the centre of the Northern table edge. If the Germans could
prevent this, while at the same time gaining 2 Chain of Command dice, they
would win (time running out!).
The patrol phase went well for the US & German contingents.
The US managed to get a Jump Off Point (JOP) behind the house just to the East
of the bridge & in the woods overlooking the road, SE of the bridge. The
Germans managed to get a JOP right down the bordered field, adjacent to the
road, as well as JOPs near the farm and behind the fields overlooking the
bridge.
The British infantry only managed to get their JOPs, one up
into the field overlooking the farmhouse & the other in the woods just
South of the road.
Turn 1 saw the British tanks roar onto the table, while a British
infantry section deployed into the fields, just to the North of the road, to
cover their advance. The US paras modestly only deploying an LMG and sniper,
into the house.
The Germans responded aggressively, by deploying a section
behind the low walls to the South of the farmhouse, while simultaneously deploying
the FAO, with an LMG team, in the bordered field, right down next to the road.
The US paras then revealed an entrenched section, in the
woods, to the SE of the bridge. These opened up with murderous long range fire
on the FAO & supporting LMG team, eventually resulting the loss of both the
FAO & LMG team.
On the East of the table, the German section was suffering
from fire from the Brits in the field, but also the US sniper, in the house
near the bridge. However, the German platoon leader deployed here and started
to restore some order. So much so, that casualties in the British infantry
caused them to deploy a further section here.
But the continued focus of the British infantry on the farm
area, was leaving their tanks exposed. Panzershrek teams were sneaking down and
ambushing the tanks on the road. One was soon burning, while another had somehow
survived two ambushes!
The US paras decided it was time to help out. They threatened
an advance toward the German JOP in the South, while deploying a rifle team
& bazooka, in the North, to try to flank the German positions. The advance
of the rifle team in the North was rapidly checked by the deployment of first a
Stug IIIG, which opened fire on the house, while an infantry section deployed
across the advance line of the US paras, forcing them to deploy smoke & retire.
Further South, to counter the threat to their Southern-most
JOP, the Germans deployed a Section into the bordered field next to the road.
However, this rapidly started to lose the long range firefight with the
entrenched US paras in the wood. Soon these were broken & running.
Seeing that the British infantry appeared too distracted to
cover his tanks, the British Tank platoon leader decided to press on with his
two remaining tanks. However, time was running out. The Germans were rolling
more 5s and soon had further Chain of Command dice, enabling them to launch
further ambushes on the exposed British armour, but also end the game.
A classic case on not maintaining focus on the objective,
but all agreed it was a great venue & we would be returning.