Wargaming from Hertfordshire & Beyond!
Showing posts with label Battlegroup. Show all posts

Saturday, 21 January 2023

Battlegroup, North Africa, 1941


 A 15mm 1941 Western Desert game, between Tony (Afrika Korps) and Chris (British). Tony got off to a great start, rolling 11 units for the initial deployment and a great first round orders total, enabling the Afrika Korps to rush the platoon of Panzer IIIs to the North of the central walled orchard and the platoon of Panzer IIs, between the orchard and the solitary dwelling.


Chris’s British only managed to deploy a meagre 3 units! A 2 pounder deploying on the hill overlooking the orchard, a single load of lorried infantry on the road, while a single Vickers Mk IV roared off to contest the orchard.

This game looked like it was going to be over before it started! However, the Afrika Korps’ luck not so much changed, but more turned into a Greg sized luck blackhole!!


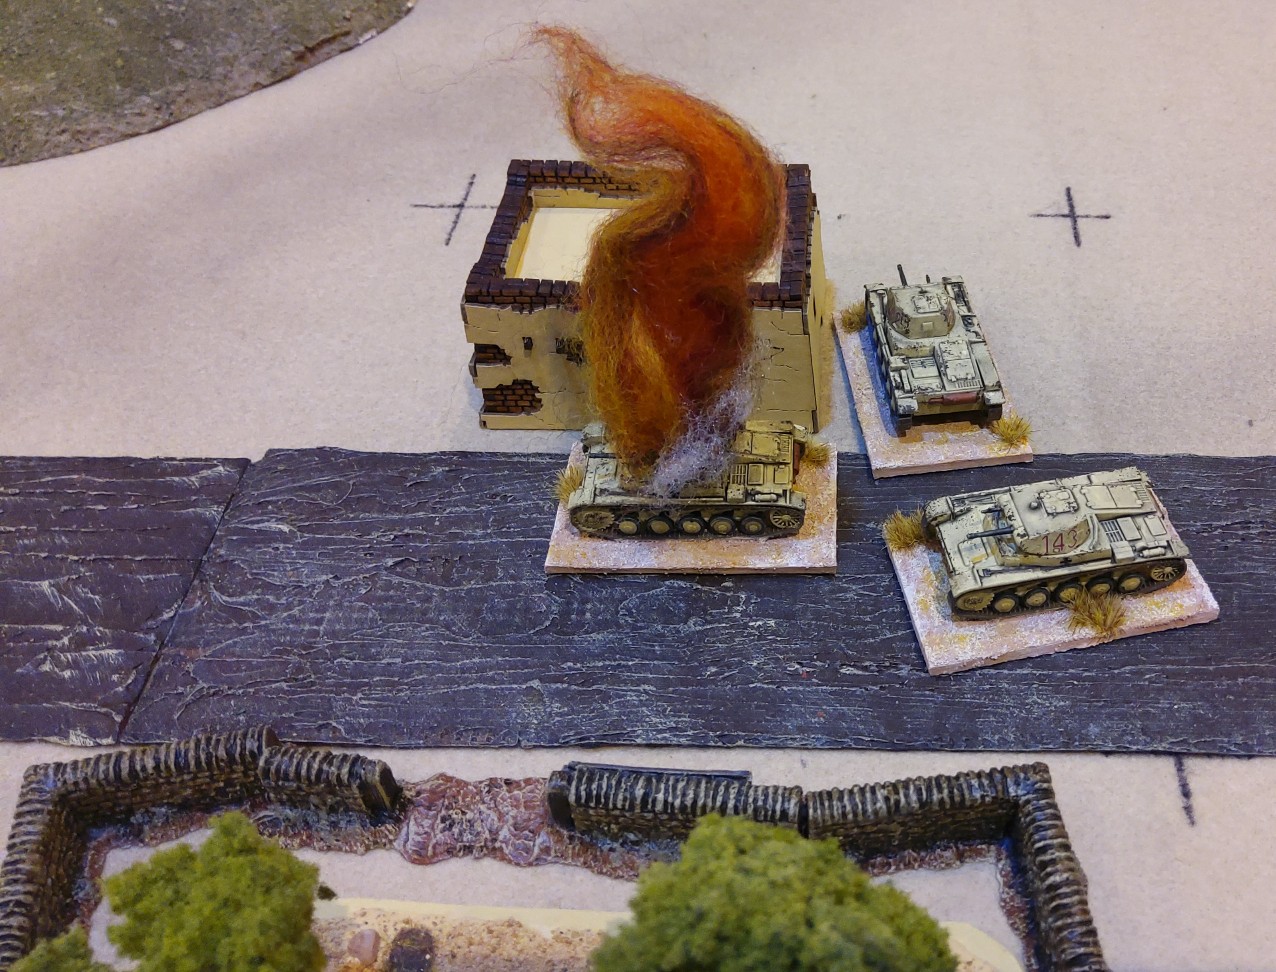
While the Afrika Korps managed to get few orders, the British managed to accumulate a steady progression of decent order rolls & reinforcements, managing to reinforce the single 2 pounder A/T gun with a second 2 pounder A/T gun & an A13 cruiser, then 2 more A13s. Soon 2 of the 3 Panzer IIs were burning.


More trouble then arrived for the Germans. While their Panzer IIIs dithered over orders, a platoon of Honey tanks rounded the hill, to engage them. Initially German gunnery was good, but something was horribly wrong with their shells, most shattering on the frontal armour of the M3s. The volume of return fire convinced one Panzer III crew to abandon, while the other two were giving it very serious consideration!


In the centre, the sole surviving Panzer II decided to attack! Caught by surprise, by this very aggressive move, the A13 gunners could not get a bead on the plucky Panzer II, while the 2 Pounders simply missed!

The Panzer II rampaged over the hill, getting amongst the lorry mounted British infantry, but all it seemed able to do, was punch holes in the canvas backs of the lorries!! While the Panzer II crew frantically tried to find the fault with the vaunted May Luck, the left-most 2 pounder pivoted around and brewed up the Panzer II. This was the last straw for Tony’s Afrika Korps!! He went in search of his four leaf, rabbit’s foot!?

Friday, 30 December 2022

Poland 1939

Full of Christmas spirit our reporter headed East and back six years to Poland in 1939. I dusted off an old “Battlegroup Blitzkrieg” scenario, amended it slightly and served it up for the delectation of Greg and Tony. The game was based on a historical Polish counter-attack at Tomaszow Lubelski which saw the elite Warsaw Armoured Motorized Brigade reinforced by the 1st Light Battalion attacking the troops of the German 4th Light Division. Greg took the armour-heavy Poles and Tony and dug-in Germans. In defiance of the cost-of-living crisis Tony supplied some truly excellent Marks and Spencer mince pies, and I provided warming hot drinks. I wasn’t going to have the heating costing me money!

Tony dug in two sections of infantry covering the centre and north of the table, with a PAK 36 emplaced also covering the exposed centre.

Greg rolled his orders dice and got off to an awful start for the Poles. A double one for orders. Indeed, the opening moves saw a total of five double ones rolled and other low scores which rather stymied the Polish attack. At one stage it looked as if the Germans may begin a counter-attack against the numerically inferior Polish forces on-table. Things picked up marginally for the Poles when their pre-planned 105mm artillery strikes the German positions killing most of an Mg34 team and pinning other troops. Greg’s frustration with the orders finally reached breaking point and he refused to use the allotted blue Peter Pig dice and changed two red dice. The result was 10 orders plus officers...

The main Polish attack seemed to be through the rough ground along the north edge of the table, and the similar terrain to the south.


Tony played a canny game of using suppressing fire to pin units and force Greg to draw chits to re-activate them, thus degrading force morale. However, Greg got lucky drawing several “air attack” and “breakdown” chits rather than “numbers”. But soon blazing Polish tankettes and an armoured car also littered the table,


only killing one PzII in reply.

Greg’s chit count mounted as he continued to un-pin units, and Tony now started to use a mixture of suppression fire and direct fire to kill units. One Polish infantry team routed when it was pinned and then failed its morale check.

Greg was sure the Poles were doomed, but gallantly pressed on. His armour and infantry managed to wipe a German dug-in infantry section, and the Vickers Es also knocked out a second Panzer II and the heroically annoying Sdkfz222 armoured car.


Artillery fire finally killed the Mg34 team who had hung-on grimly since being decimated in turn three, and a lunatic bayonet charge across open ground saw the Poles wipe out Tony’s platoon command unit and break the German morale. A close run thing as Greg was also close to breaking point.

Both Greg and Tony declared it a “good game”, and said they enjoyed it. As with most BG “Blitzkrieg” games this was a real “combined arms” encounter, and not the seeming tank-fest of the later years of WW2. The tanks don’t dominate, artillery is important but not battle-winning and the infantry have a real role to play. The game could easily have gone the other way if Greg had drawn “numbered” chits early in the game, but he didn’t! That’s one of the fun or frustrating aspects of “Battlegroup”, depending on your point of view. As ever we found a few oddities in the rules. The German 50mm mortar at one stage seemed a battle-winning weapon, and the rules and data cards had different interpretations of their use and effectiveness. I was also baffled by the potency of the Polish Vickers E’s 47mm gun. Knowing that it was a short, low-velocity gun, and to quote Osprey’s Polish Armour of the Blitzkrieg, the Poles found “the performance...disappointing”, I was amazed to find it has the same anti-armour performance as the high velocity 37mm Bofors the Poles selected for their own 7TP design. I also see that in BG Blitzkrieg the 7TP costs less than the Vickers E. Something is definitely not right here!

Saturday afternoon sees our reporter packed off to sunnier climes in Southern Italy during the 3rd Servile War for a large game of TTS.I can’t wait!

Simon

Tuesday, 20 December 2022

France 1940 - The allies counter-attack

On a bitterly cold Sunday morning our reporter arrived in an unfamiliar location. The Lost Ark Game shop in deepest Stevenage. Taking advantage of an offer from John Leggett to come in and use their 8 x 6’ table, I had arranged a Battlegroup Blitzkrieg game set in June 1940 near Abbeville, on the River Somme. Unlike most France 1940 games, this would not see rampaging grey Panzers, but rather an attack by gaudily camouflaged French armour supported by a more soberly painted British force. The scenario saw the French 2nd DCR supported by the 11th Hussars and Queens’ Bays trying to fight through the German 57th Infantry Division to capture the bridges over the Somme and hopefully counter-attack the German forces to the west of the Dunkirk salient. The terrain was taken from Google Earth and was as representative as I could make it, with a flat rolling centre and the small villages of St Maxent, Warcheville and Onicourt lying on the flanks. Chris and Greg took the infantry heavy and well dug-in Germans, with Phil taking the French and Tony the British. The ORBATs had been slightly “tweaked” from history in order to help with game balance.


The game started with Tony moving his armour up the road towards Warcheville.

His infantry commander debussed into a house no doubt to reconnoitre. Disaster. It was booby-trapped and the resultant explosion saw one dead and a “pin”. Chris’ dug-in PAK36 and Pzjager I both opened up at long range and unsurprisingly missed. Phil, suffering from poor command and control moved his mechanised infantry up the road from St Maxent, and his mighty CharBs rolled across the open fields south-west of the village.

Greg’s dug-in ’88 opened fire and missed, but his 105mm howitzers put their PRTP to good use in inflicting pins on the carrier.


Turn 2 saw Phil’s CharBs pour suppressing howitzer fire onto the ’88 position, and Greg regretting not using his surplus orders from turn one to put units on “opportunity fire”. On the allied left Tony kept up his relentless advance in true cavalry style. As he manoeuvred two A9s across a ploughed field there was a loud explosion. He had driven straight into a minefield. Cue one dead tank, and the other sitting immobile and exposed.


Turn three saw the allies launch a co-ordinated, planned artillery barrage across the German line. The main results were a dead Mg34 team and a loader team but the German BR chits were starting to accumulate. Tony also continued to pour more armour up the road and through the fields, headed by light Vickers MkVIs. Chris responded by charging a MkVI with his infantry and despatching it with anti-tank grenades. It was all getting very bloody and messy. Things became even bloodier when up the road charged the British infantry platoon in their light trucks. The bemused German infantry poured fire into the convoy and soon all three trucks were ablaze with their infantry crouching beside them seeking cover.

Back with the French Phil had managed to swing some of his H39s into action and together with the remaining infantry they began to wear the Germans down.


Chris too was suffering on the German left and as his Stug and Pzjager I continued to fire ineffectually they both succumbed to the mighty 2pdrs of the British armour. His senior leader was also forced to flee when his Horch staff car was destroyed by a rampaging MkVI.


Both German forces were nearing exhaustion. The French were still in good shape but the British too had taken quite a battering thanks to the lunatic infantry platoon. However, they still had plenty of armour and off-table artillery support. Greg finally got lucky as his ’88 killed two Char Bs in a single turn but both German forces both broke, leaving the table to the allies. Greg’s second to last token was an “air attack” but even this only resulted on a rather ineffective Me109 strafing attack. Where were the Stukas when you needed them!

The game had lasted 6 turns and 4 hours, including a lunch break which saw the Banks and Tony disappear for a noodle-based lunch. History had been rewritten as back in 1940 the Germans had held the Allies. Even then it had been a close-run-think with the Allies running out of impetus and ideas, plus poor co-ordination and mechanical breakdowns. With this latter point in mind I now realise that In hindsight I forgot the “unreliable” rule that applied to the British A9s and A13s, and Tony who also possessed a copy of “Blitzkrieg” either hadn’t read the rule or “conveniently” forgot it!. If Chris had drawn any BR1 chits he could have played them on Tony’s armour as “breakdowns”. It may have made a slight difference.

Many thanks go to John and Lost Ark for hosting us again and supplying tea and coffer plus warmth. We will be back!

Simon

Monday, 19 September 2022

Battlegroup Match Report

Whilst Tony’s Pacific Australians fought French, German Volksturm and US Paras at Lost Ark, myself and Greg maintained some modicum of sanity by playing a “Battlegroup Blitzkrieg” game set in France 1940. Those who went on the Ardennes trip before the Pandemic may recall the trip to the village of Stonne.

Here French and Germans fought a series of vicious actions to control the hilltop vantage point, and unlike much of 1940 the Germans didn’t have everything all their own way. So unlike the proceedings at Lost Ark we kept standards up and played a game set during French counter-attack early on the morning of May 16th. I took the French and Greg the Germans of 10th Panzer and IR Grossdeutschland.

The Germans started with some units in possession of the village, and the French all entered from their table edge. Despite decent firepower, command and control was going to be the main French problem with only two officers, and lots of units as each infantry section comprised two teams. However, things started well for the French with a lucky mortar barrage that killed the PAK36 and its towing vehicle, meaning Greg drew two BR chits. The French moved their light armour up the left flank


infantry through the fields on the right and pushed one Char B up the road. The Germans responded with their armoured platoon moving to meet the H39s

infantry occupying houses and the lone Panzerjager I bravely taking on the mighty CharB.

Greg scored a hit on the Char B but needing a double six rolled an eleven. The dice gods were not with him.

Greg’s luck got even worse when his artillery strike onto the French positions was diverted back onto his own troops. The result was only one “pin“, but things were definitely not going the way of the Wehrmacht. The French infantry tried fire and close assault, with their VB sections “pinning” the German troops leaving the rifle team to close-assault. However, the élan of the “inferior” French failed and soon two rifle teams were “pinned” in the open. These are not the infantry of 1914! Frustrated by the lack of “punch” of the Panzer III vs the front of a H39, Greg decided to gamble all on a flank charge. It was almost as if Tony was in the room. The H39s, hampered by the “one man turret” rule, failed to react and soon a H39 was ablaze, and the others in danger.

A German artillery strike then caused infantry casualties plus destroying several Laffly trucks.

The French continued to fight on, destroying a Panzer III

but when the two infantry teams who had failed to charge were finally wiped out by rifle and MG34 fire it was all over. The French morale collapsed and Stonne was left to the Germans.


Both of us agreed it had been a fun game, played out in just less than two hours. It was fairly small given it was using 20mm figures on a 6 x 4’ table. I had learnt the lesson from our last late-war game where I packed too much stuff onto the table leaving the attacker with no manoeuvre room. Unlike late-war Battlegroup games which tend to be armour/artillery battles, this proved to be a real combined-arms encounter, with the infantry playing a crucial rule. Even the role of the French transport lorries was important. Normally lorries are rushed back off the table, but with so few orders available for the combat troops I left them on-table and had to draw chits when two were destroyed. The “campaign specific” Battlegroup rules for the French armour worked well. For 1940 they are tough armour-wise, but the “one man turret” rule that gave a spotting penalty proved quite an historically accurate handicap.

I may be inspired now to build a full Char B platoon plus acquire some R35s. Why didn’t I buy the ones Greg pointed out to me on the Bring-and-Buy at Colours last week? An opportunity missed!

Simon

Sunday, 22 July 2018

The Tip: Oosterbeek 20.9.44

Words and pictures by Fred.

A couple of lads from our local club came over to my house last month to play another Market Garden scenario that I put together based on the attack by KG Bruhns and KG Krafft (9th SS Panzer Division) on the tip of the Oosterbeek perimeter after the collapse of 4th Parachute Brigade's position at Wolfheze during the evening of 19 September 1944. The British fell back overnight into a defensive position held by 21st Independent Parachute Company, 7th KOSB and 1st Reconnaisance Squadron. Dave and Simon (SiWi on this forum) took the paras, and myself the Germans.

Each side had 900 points using the lists in BG Overlord and MG, with all the latter's campaign-specific rules applying. Although the British set up first, we simulated the chaotic, swirling nature of this battle by dicing for initiative to decide who went first in each turn. The German objective was to destroy the British as a fighting force by reducing their BR to zero. The British objective was to survive by reducing the German BR to zero or still have un-pinned units on the board when the game finished. British units that retreated from the table were treated as destroyed for the purposes of BR.

As a special scenario rule, we modelled the benefits that the Germans obtained from the RAF's forlorn attempts to re-supply the paras as the perimeter started to shrink. On a roll of 6 at beginning of each of their turns, the British would place a supply counter at a randomly generated point on the table. Some of these were outside the British deployment zone, others within it. Capturing such counters was the only way the British could re-supply their units during the game. If they did so, their BR also increased by 1D3. If the Germans captured one, the British BR would be reduced by 1D3.

In the end, we played 11 cracking turns.

As the German player, I stuck closely to the historical orbat for these KGs using information from Kampfraum Arnhem, Market Garden Then and Now and It Never Snows in September. The board lay-out was modelled very closely on two excellent maps in KA and T&N respectively. The British won initiative and were able to put a large number of their units on ambush fire.

The Germans started cautiously by pushing an infantry platoon forward under the cover of a hedgerow. One of the surprising revelations of my research was the amount of high hedges, foliage and woodland in the area. The road in this picture went leftwards towards the famous railway crossing where jeeps of the 1st Reconnaissance Squadron had been ambushed previously.


The British deployed cleverly, with an outer crust based in these ruined buildings on the outskirts of Oosterbeek.


An adjacent line of foxholes along this lateral road was to prove very difficult to eliminate.


The British defensive lines also had good depth.


Two 6 pounder ATGs were deployed in positions with arcs of fire covering the more obvious German avenues of advance.


Sources suggest that the 9th SS Panzer Division had a couple of Jagdpz IV L48 SPGs. I haven't painted the ones that I have made yet so I fielded Stug IVs instead as the closest proxy for historical veracity. These were pushed forward carefully to avoid the ATGs.


The British enjoyed good luck with the first supply drop, which fell within their lines and was easily picked up, boosting their BR.


Panzer Grenadiers advanced behind the cover of the Stug IVs.


Their comrades continued to inch forward along the hedgerow.


To their left, other Grenadiers infiltrated a building that promised to be a good position of cover for the rest of the advance.


Instead, and for the rest of the game, it became a magnet for well-placed British fire, causing multiple casualties. The Germans had a dilemma - if they vacated the building, it would leave their left flank open. If they stayed there, they died.


Another supply drop landed within the British deployment zone, boosting their BR further. Things had got off to a slow start for the Germans!


Fortunes gradually turned and the build up of German forces persuaded the British to abandon the first line of buildings and retreat into the nearby woods. The Germans had placed a PRT in the centre of these houses and the paras saw little point hanging around.


An overhead shot shows the state of play after the first few turns.


As a reward for eliminating one squad of paras, the Germans saw the British draw a breakdown chit which was immediately placed on one of the Stug IVs. Luckily, the Germans had had the foresight to bring a repair vehicle with them.


Another Stug IV entered the fray.


The paras continued to pull back slowly rather than get hoovered up by the more heavily armed (and armoured) German attackers, trading space for casualties.


As the Germans were lured forwards, a salvo of artillery fire landed in the midst of their troops courtesy of XXX Corps on the other side of the Lower Rijn. Sneaky!


Having cleared the first line of buildings, with the paras falling back, the Germans applied their coup de grace in the form of a platoon of armoured Panzer Grenadiers. The first Hanomag barrelled down the road towards Osterbeek and unloaded its passengers, who immediately close assaulted and eliminated a nearby house containing some troublesome paras. It then transpired that it was sitting on a British PRT, which soon attracted more artillery fire. Miraculously, the Hanomag survived the first salvo.


On the German right, Grenadiers supported by armour had managed to get round the British flank.


The British had pulled back to form a hedgehog position around the central road.


The Grenadiers pressed on with the support of a 250/9 and started to roll up the British defences.


Two more Hanomags entered the board and launched a frontal assault on the British positions around the crucial cross roads, which was a key objective for both sides.


The battle swung back and forth as both sides saw both good and bad luck. One Stug, having been repaired after a breakdown, then struck a mine and was knocked out. A second received another breakdown counter and was left immobilised. The German Forward HQ (a somewhat anachronistic Panzer IIIK) saw fit to move up and direct the attack.


This German MMG team was able to get round the British flank completely and threaten the British rear positions.


Their comrades continued to pour forward.


The climax of the game saw Grenadiers close assault and capture the cross roads.


The British were clever in pulling back to deeper prepared positions rather than risk their more lightly-armed units being wiped out in an uneven battle. As a Hanomag pushed forward to force the issue, one of their 6 pounders opened fire...


...and knocked it out.


This was a fitting end to a most enjoyable game played in great spirit. We had previously questioned whether Arnhem is truly a good situation for gaming. Previous scenarios had seen the British get absolutely walloped in a serious mismatch. Our game was nicely balanced and went to the wire. We called it a draw: the British were closer to their breaking point (33/54 compared to 24/56) but the Germans had not achieved the scenario victory conditions. The British were not destroyed and had retained their tactical cohestion. The trick seems to be to build in a narrative around the battle with difficult objectives for the Germans, and plenty of cover for the British.

Our next game will involve the British attempts to break into Arnhem in the early hours following the first landings, so the roles will be reversed.