Wargaming from Hertfordshire & Beyond!
Showing posts with label Caesar's Camp. Show all posts

Friday, 11 March 2022

Chain of Command, Caesar's Camp, Scenario 5 - End of Campaign

Lt. Davies eyed up the Chateau with some suspicion. The platoon had been here before and had taken heavy losses in trying to take the Chateau before. The platoon had arrived, down to two reduced strength sections. However, HQ had allocated almost another platoon of infantry for this second attempt, along with a FO & Mortar Battery and a Vickers MMG.

Just as in the last attempt, the Platoon deployed yellow section into the Northern woods, just West of the road, along with the FO. Blue section deployed onto the road, to provide covering fire on the Chateau, once Jerry stuck his head up.

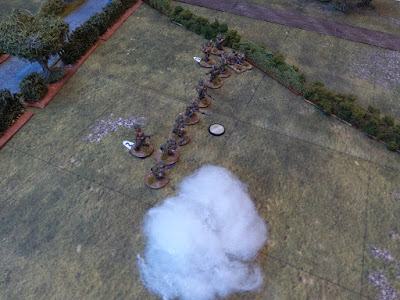
But, just like last time, Jerry deployed a section behind the hedgerow overlooking the Northern woods. Yellow section probed carefully Westward, coming under fire from the German section. Yellow section went to ground and called for support. Red section deployed behind yellow section, in the Northern woods. A short range fire fight resulted in casualties to both sides, but being outnumbered, the Germans withdrew to the woods to the North of the Chateau.

Jerry then stuck his head out of the Chateau and started harassing fire on the Northern wood. The FO responded to this, by calling up for a 3” mortar barrage on the Chateau, with the spotting round dropping right down the chimney!

Deciding this was the moment to push forward, Lt Davies called for Sgt Mallom to start to flank the Chateau from the North-East, reinforcing the push with green section. Meeting some stubborn resistance from the Germans in the woods North of the Chateau, the FO walked the mortar barrage Northward, onto the woods, where the Germans were hiding. Recognising the risk of his pinned down troops in the North being overrun, Lt. Aldtrik revealed the LMG team, dug-in, just North of the wood, but decided to send out Sgt Steinfen to take charge, while he himself stayed in the Chateau!


Encountering this extra fire, the British advance drifted left, toward the Chateau, but just as red section reached the hedge overlooking the Chateau, the Germans revealed an IG.18 infantry gun, concealed behind the hedge, immediately in front of the Chateau. Once again, the British advance went to ground.

Lt. Davies called for the FO to walk the barrage Southward, to try to suppress the IG.18, while he himself deployed with the Vickers MMG and purple infantry section, on the far side of the road, at the end of the track leading to the Chateau. The Vickers MMG soon began chattering, bullets pinging off the gun shield on the IG.18.

Realising that the now exposed IG.18 crew could be quickly wiped out, the German yellow section, hiding in trenches just to the South of the track, opened fire on the Vickers MMG.

Sadly for the Germans, the long range firefight between the Vickers MMG and it’s supporting infantry section and the German yellow section, in it’s protective trenches, did not go well. Before long, yellow section was reduced to only the NCO and the IG.18 gun team was wiped out. British casualties were one crewman from the MMG team one rifleman from the supporting purple infantry section! (so much for good German dice rolling!)

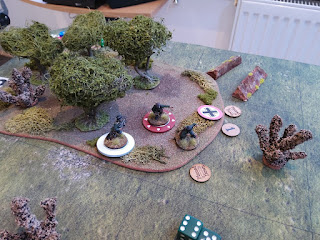

Now, all the British fire turned on the Chateau itself. With it’s LMG team deployed in the slit trenches, to the North of the Chateau, the garrisoning infantry section could only really deploy 4 riflemen in the upper story windows. Despite the cover from the thick chateau walls and obscuration from the British barrage smoke, the volume of British fire was causing too much attrition. Down to 2 riflemen, Lt. Aldtrik chanced a look out of the windows, only to receive a glancing blow, from a ricocheting bullet, knocking him unconscious (and driving the German Force Morale to zero!).

Saturday, 29 January 2022

Caesar's Camp, Scenario 6: Counter Attack at Villers


The Stuka raid had left two buildings in Villers in ruins and burning, but also channelled the British patrols into the West side of Villers. As a consequence, the Germans appeared to get the upper hand in the patrolling, exposing a path around the East side of the village. The British only managing to gain one small lodgement Jump Off Point, to the West side of the road, in the centre of the village.

The Germans soon pressed red section around the South East side of the church, flanking the entire village. The German sniper also took up a commanding position, in the church tower, soon reporting the presence of a British infantry section in the farm house, near the central cross roads.

While the German red section pressed on to the SW, the Germans reinforced with green section and wheeled in an IG.18 gun, to start dislodging the British infantry in the farm house. After a few rounds, the farm house structure was threatening to collapse, forcing the British blue section out into the street, where they were forced to take tactical cover behind the hedgerow. 


The Germans then deployed yellow section, in the copse to the North of the church, to try to dislodge the British red section, located behind the hedgerow, in front of the farmhouse. However, the British then revealed a Vickers MMG, in the upper story of a building further down the street, which engaged the German yellow section, rapidly causing two causing two casualties in the German yellow section.


Meanwhile the Germans deployed blue section to the NE of the village, with the intention to infiltrate the village from the East, but they appear to have become disorientated in the smoke, from the earlier Stuka raid and thus did very little! The German green section, deploying to the East of the church, then appeared to indulge in a little marching practice, wandering up and down the street, presumably looking for a press photographer?


At this point, Platoon Sergeant Hugh G. E. Balles decided to take matters into his own hands. Calling forth red section, he leapt over the hedge and led red section on a mad dash for the church. Once inside, he set the bren gun onto the German yellow section, behind the church, wiping out the remaining LMG team and wounding the section leader. At the same time he ordered the rifle team up into the church tower, to capture the sniper, who then seems to have accidently fallen from the tower, with a hand-grenade in his pocket, down onto the IG.18 gun below! An award of a VC has been applied for, for Sgt Balles for this heroic action! (The Germans subsequently claimed that 3 double 6s on the trot, was against the Geneva Convention!)

What appears to have happened next is a bit unclear. It is thought that the German red section, still in the smoke from the burning building, at the South end of the village, appear to have mistaken the firing from the church, as yellow and green sections seizing the farmhouse. They then attempted to storm the building where the Vickers MMG was located, only to find the ground floor garrisoned by 8 pioneers, from the Norfolks. In the ensuing vicious hand-to-hand combat, the entire German red section was wiped out, from the loss of 3 pioneers and 2 Vickers crew members. The dying words of the German platoon sergeant Beschwörer were reported as, “Well that was a lot tougher than expected!”.

At this point, the German platoon leader Altrich (still not yet deployed) decided to call for a withdrawal.


Thursday, 20 January 2022

Caesar's Camp - The Chateau on the Hill (Part 5)

Today we played the fifth scenario from the Caesars Camp pint sized campaign.


This was going to be a difficult game for the British, with lots of open ground to cross to get to the Chateau.

Under cover of a 3” mortar barrage on the chateau, the British first deployed Yellow section opposite the chateau, on overwatch, covering the chateau and the woods to the north,

while Red section started to advance toward the wood to the NE of the chateau.

The Germans responded by deploying Red section in the edge of the woods facing the British Red section and Yellow section in support, behind the hedge, to their rear. To neutralise this threat, the British FAO started to walk the barrage onto the German positions, while the infantry advanced. 


However, suddenly the barrage ceased and the Germans opened intensive and effective fire on both Red & Yellow sections. Both these sections started to take significant losses, so the British tried to lay smoke, to cover a move Southward by Yellow section.


Realising the initiative was slipping away, the British deployed Blue section, on the track leading to the SE side of the Chateau, covered by the Vickers HMG. 

The Germans responded by deploying the IG 18, 

along with a supporting infantry section, 

engaging Blue section in the open. After sustaining losses, Blue section was forced to retire, leaving Red and Yellow sections to retreat under cover of more smoke.

A good tractical game played by the Germans, causing very high casualties on the British, resulting in the C.O. dying in mysterious circumstances.

Wednesday, 21 July 2021

Caesar's Camp - Le Ferme de Caubert (Part 4)

Today we played the fourth scenario from the Caesars Camp pint sized campaign.

With significant loses from the previous game the Germans were only able to field two sections. The British did well in the patrol phase (managing six free moves to the consternation of the German players) and managed to restrict the Germans to the area around the farm.

The British plan was to advance on the left whilst deploying supporting troops into the wooded area. The British deployed a section on the left and a 2" mortar into the wood. However, plans usually go wrong at first contact as the Germans deployed a sniper who proceeded to shoot up the mortar team. The British deployed a section into the woods to help out the mortar team...


but the Germans deployed a section opposite...

and poured fire into them, eventually pinning them, killing the corporal and routing the mortar team. This was not going to plan for the British.

The British pushed their section on the left forward...

and deployed a second in support, with the Germans deploying their second section behind the copse just infront of the British. 


The second British section swung left to hopefully outflank the Germans...
 
 
but the Germans deployed a light machine gun into the farm that started to chew them up. The British advanced a jump off marker and deployed a second mortar team to smoke the Germans.


The British deployed a Vickers and their Lieutenant into the woods but again luck was with the Germans as they managed to kill the Lieutenant. The British force morale was plummeting at this point. In desparation the British charged the Germans in the copse, with a bloody outcome. The German section was wiped out with only a few British casualties. The British needed to take the farm, so the last section was deployed.

The Germans deployed their infantry gun hoping to rout the section on the left but the British managed to advance two sections to occupy the farm, game over.

The last few turns were very fraught with the British only having three command dice and the Germans pouring fire into the British to try and break their morale.