Wargaming from Hertfordshire & Beyond!
Showing posts with label For King and Parliament. Show all posts

Saturday, 20 April 2024

ECW What if Game!

After a long absence my war reporter has returned for duty...

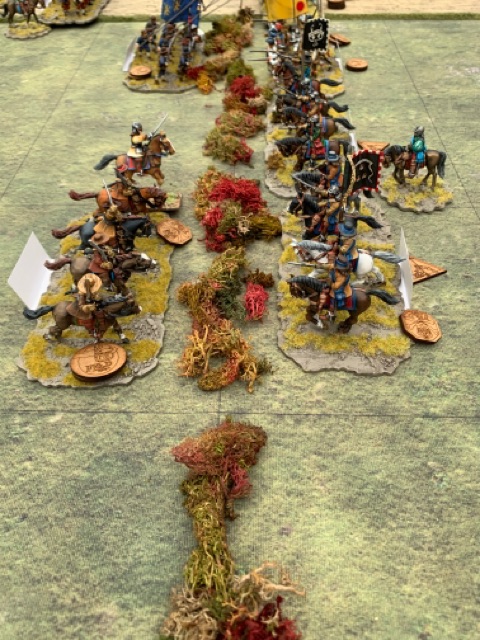
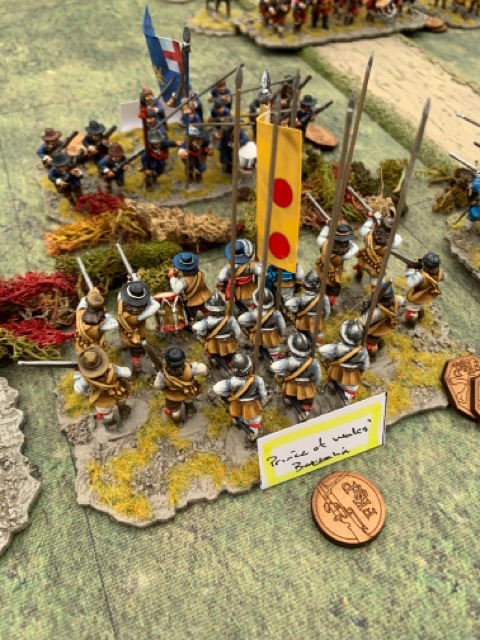
Last night Festung Williams witnessed a run-out of Simon Miller’s “For King and Parliament” (FK&P) rules, with Chris taking on Tony. The scenario was one I had found in a Partizan Press booklet, and was a “what if” game set in 1659, after the death of Cromwell. It sees General Monck marching down from Scotland as he actually did, but this time General Lambert’s army stands and fights rather than deserting en masse! Chris took the role of Monck and Tony played Lambert.

It was fairly small game with only 9-10 units per side plus officers, but with an additional two units of the London Trained Bands watching from the flanks to see if they should join in, and if so supporting whom. This would be decided by drawing cards. 

The dispositions were pretty classical, with cavalry on the flanks, infantry in the centre and the artillery pieces ineffectually blasting away supporting the infantry. Tony had slightly more units, but several of his were “untried” which meant their true status would only be revealed when they entered the fray.

For Tony’s sake I won’t narrate a blow-by-blow account of the game. Chris swiftly destroyed Tony’s right wing cavalry and one infantry unit. The Force was definitely with Chris as he inflicted multiple hits and managed multiple saves, whilst Tony’s chit drawing was truly lamentable. Even the FK&P pursuit rule which normally sees victorious cavalry racing off the table to pillage the enemy baggage train didn’t deter Chris as his pursuits miraculously took him straight into more of Tony’s demoralised troops. The final act saw a unit of Chris’ cavalry overrun Tony’s artillery and claim victory. The restoration of Charles II could now happen, and there would be no disruption to the timeline of recorded history.

I hope everyone enjoyed it. The rules play much as TTS but with some subtle differences. I had given several of the officers “special traits/abilities” which in the heat of battle Tony forgot about. I had kept it pretty simple and there are more “special” rules and unit types to add, which will give added period feel. It was nice to get my troops on the table including the resin Gallia buildings which I think have their 40th birthday this year!

Simon

Friday, 16 June 2023

Dave's Double Disaster

Thursday June 15th 2023 was, to quote FDR, “a day that will live in infamy” for Dave. He ventured from his northern lair to have a double-header of games, the afternoon being a “For King and Parliament” ECW game against myself, and the evening being a Sharp Practice AWI game also featuring Chris and Greg.

The ECW game used the first scenario from “Marlowe to Maidenhythe” fictional campaign book, with Dave taking the dastardly Parliamentarians and myself the dashing Royalists. Due to the authors table lay-out being a rather odd 6 x 5 or 12 x 10 grids we omitted both baselines and hence most troops deployed off-table. The Parliamentarians deployed with their cavalry force on their left wing, and their infantry in a maze of hedges centre and right. The more numerous Royalist cavalry were split between the flanks with the infantry to push up the centre against the enemy infantry behind the hedges.


The Royalists advanced with both cavalry wings,

but the infantry held back. Clearly they didn’t fancy attacking the pike-heavy enemy behind the hedgerows. Dave’s forces stood on the defensive but soon found their ability to manoeuvre against the developing Royalist attack compromised by the terrain. The Royalists quickly managed a cavalry flank attack on an exposed infantry regiment and it broke and fled. Shame that the Royalist cavalry then turned and raced towards the Parliamentarian table edge in search of the baggage train. On the Royalist right wing things were more even as three Royalist “Swedish” units took on two Parliamentarian “Dutch” units.


Both sides eventually lost a unit but Dave’s “gallant Commanding General” Sir Christopher Grey was mortally wounded when he drew a one for “officer wounded” and then a ten” for “effect of the wound”. This one action meant his left wing was now out of command. From then on it was just a matter of time. The Royalist foot took heart at the sight of the cavalry’s exploits and finally advanced in line towards the enemy position.

The Royalist cavalry moved to threaten the Parliamentarian flanks and the response exposed their infantry to withering flanking fire. Suddenly the Royalist cavalry charged back onto the table straight into the rear of luckless Parliamentarian infantry. The battle was decided when the Royalist commander Sir John Boulters turned his rather tardy cuirassier regiment and managed a flank charge into the remaining Parliamentarian left wing cavalry unit.


We both think we got most of the rules right despite not having played them for maybe nine months or more. They seem to give a good, fun ECW battle. The Parliamentarians were “up against” it from the beginning partly due to the scenario deployment, and hardly laid a glove on the Royalists. Maybe Scenario two will be different?

The AWI game was based on a “Sharpe Practice 1” scenario called “Tarleton’s Quarter”, which Dave adapted for use with SP2. The game saw Dave and Greg take the British and Loyalists who were tasked with raiding a farm, which was defended by Chris and myself with a force of defending local partisans and a force of Continental troops marching to help them. The British and Loyalists advanced rapidly onto the table with the British regulars marching straight up the road towards the centre of the farmstead, with other troops fanning out to burn crops and outflank the rebels. Chris gamely advanced his militia to meet the regulars knowing that they were all there was to defend the farm. There was no sign of the Continental troops. Chris managed to form his troops into a ragged firing line facing Dave’s regulars. Dave decided against using cold steel and instead fired, with little effect. Chris replied and we found that his musketballs were nuclear tipped. Carnage ensued. The battle continued until with four flags Chris managed a second volley of 20 dice. This did for the British who with leaders down started to pull back and take hits to their morale.

The British flanks began to threaten the Rebels,

but they in turn found Continental troops and more rebel skirmishers starting to arrive to fight them.


More nuclear-tipped dice from Chris saw the regulars break and the two units of Continental light infantry skirmishers pour fire into Greg’s Provincial Regulars, who in turn pulled back.

With the British mission obviously a failure Dave and Greg retired from the field leaving the victorious rebels to scour the field for souvenirs.

Although it galls me to admit it, the game was won by Chris’ militia with their near miraculous musketry. The two British regular units were hors de combat before any other British units were able to lay a glove on any Rebels, and that proved the pattern of the evening. Chris dice will be subjected to “drugs testing” as their performance was outstanding but as they are owned by “honest Simon” I am sure they are “clean”.

I think that will do for today.

Simon

Sunday, 14 August 2022

Games Day at Simons

Thursday saw a double-header at Fort Williams, with an ECW game in the broiling heat of the afternoon, and a Sharpe Practice game set during the Indian Mutiny during the evening. Maybe the timings should have been reversed for added climate realism!

The ECW witnessed a second foray with Simon Miller’s “For King and Parliament” (FK&P). This week’s scenario was bigger and more complex, with additional troop and terrain types. The battle of “Lessie’s Moor” was a fictitious scenario written by the author during the development of the rules. Rob was much confused by the Archers-inspired unit names and the setting of “Borsetshire”. I guess having been raised in a grim Northern Mill town, Rob’s exposure to Radio 4s daily tale of honest yeoman farmers in rural England was pretty minimal or non-existent. Dave appeared more knowledgeable.


Anyway, on with the game. Both sides adopted a conventional deployment with an infantry centre and cavalry wings. Following Rob’s initial and ineffectual artillery salvo, Dave’s Royalist cavalry charged hoping to take advantage of Rob’s lack of experience. However, the attack on the Royalist left faltered, leaving one Royalist unit dead and only a disrupted Parliamentarian regiment of horse. The Royalist right had more success charging round the enemy flank but found a determined enemy holding their hedged, defensive positions frustratingly easily.

Back on the left Dave witnessed a second cavalry unit receive an attack from the rear, plus a unit of “commanded shot” ridden down. Ouch! Cue five more Victory medals go the way of Parliament, plus the resultant morale tests further worsened the Royalist position.

Dave’s momentary sense of exultation when a Parliamentary cavalry unit pursued off the board was dashed when a closer reading of the rules revealed that unlike TTS he received no Victory medals.

Things went no better in the centre as desultory musket fire brought several double-disorders and another foot unit broke.

Having inflicted no unit losses and with only three coins left Dave conceded to Rob as it seemed inevitable that a further round of fighting would see the rout of more infantry. A second defeat in a row for Dave, and an ecstatic if somewhat bemused Rob.

Once again FK&P had given us a fun game that seemed to model quite well tactic of the ECW. The mechanics are obviously different to TTS with some nice touches such as the “pursuit” rule. There are still a few things to clarify our understanding of, but we reckon we now have understood most rule mechanics. Next, I need to persuade Mr Banks to complete his Scottish “Montrose” army which is apparently languishing in a box fully painted but unbased. Why he doesn’t finish this but instead is seen painting Goblins and Orcs is beyond the wit of man…

The evening saw a Sharpe Practice scenario loosely based on the second attempt to relieve the British Residency at Lucknow in November 1857. The game was a straight “Encounter” scenario played across a 6 x 4’ table. As the British advanced through the Dilkusha Park to the East of Lucknow, the Mutineers sallied out of the city, across the Grand Ud-Din Haider canal from the direction of a local landmark known as the “Bank’s House” to attack them. Greg and Dave commanded the British, with Tony and Rob taking the Mutineers led by the Ghazi of Kazi.

The British moved off from their two deployment points with Greg taking the HEIC force of Gurkhas and HEIC infantry, and Dave the Regular Army force of rifled musket armed infantry and light troops. The Indian side witnessed the usual chaos of too many troops trying to deploy from two deployment points. We can’t make it too easy for them! Tony took the various Badmash and cavalry in a long detour to the North, leaving Rob to contest the centre and South of the table. Dave pushed his lights into a small wood to threaten the Indian force in the South, leaving his powerful infantry to try and dominate the centre of the table.

Greg’s problems began when Rob managed to manhandle his artillery piece into action. The British were surprised to see the Indian artillery enjoyed “Sharpe Practice” which of course enhanced their effectiveness, and soon troops began to die plus receive multiple shocks.


Tony was struggling to move his Badamash, especially as he tried to send them through a swamp.

Several single inch moves did little to improve his mood, although he brightened up when his cavalry charged home into the unit of Gurkhas. The cavalry won, but it proved a Pyrrhic victory as both units retired heavily depleted.

The centre saw Dave’s musket fire finally force two Sepoy units to retire, but the deadly Indian artillery finally did for Greg’s HEIC troops., with one unit breaking and the other retiring out of the artillery’s firing arc back towards Dave’s regulars.

Although neither sides’ Force Morale broke the umpire decided it was a Mutineer Victory as it was almost impossible for the British to continue their advance as planned. It was noted by Greg that the British Regulars had let the HEIC troops bear the brunt of the fighting and the losses. Dave remained silent on this point…

Sunday apparently sees myself taking on Tony in a game of Bolt Action. Chris has stupidly signed himself and Tony up for a Bolt Action competition in September, and both are in need of some game time. Indeed, Tony claims he has never read the rules. Be prepared for a full de-brief at 17.00 on Sunday!

Simon

Saturday, 6 August 2022

The Battle of Stow-on-the-Wold

Thursday afternoon saw a run-out of Simon’s shiny new English Civil War armies using Simon Miller’s “For King and Parliament” (FK&P). Despite being released several years ago they haven’t seen much use with our little group of gamers, so this was viewed almost as a play-test. The chosen battle was the historical encounter fought at Stow-on-the-Wold on March 20th 1646. The Battle saw Lord Astley’s smaller Royalist force take on Thomas Morgans Parliamentarians albeit the Royalists held an advantageous uphill position on a low ridgeline. The deployment was as per Mr Miller’s scenario pack for the battle.


Battle commenced with the Parliamentarian right wing cavalry advancing to meet their outnumbered counterparts, albeit the Royalists were supported by small units of “commanded shot”.

Colonel Birch’s Parliamentarian cavalry did the same on the other flank with the infantry advancing slowly in the centre, wary of taking on an opponent with the terrain advantage.

Things didn’t go well for the Parliamentarian right. Despite using “dash” and saving their pistols for combat in the “Swedish style” they barely registered a hit, but soon lost two units. Things were going better for them on the left as they disordered Byron’s horse.

However the latter unit did manage to retreat saving themselves from destruction. The centre saw desultory Musket fire before Birch’s 2nd Parliamentary Foot Regiment charged through their own Forlorn hope to sweep away the Royalist skirmishers. A measly single victory medal was handed over.

The disaster on the Parliamentarian right continued to unfold. Two more cavalry units broke leaving Sir Williams Brereton no choice but to surrender to the victorious Sir William Vaughan. However, the latter was nowhere to be found as the Royalist cavalry were racing across the field under the “pursuit” rule. Nonetheless with the destruction of the Parliamentarian right wing meant that they had lost 10 of their 13 victory medals.

Things were going better on the Parliamentarian left. Despite losing Birch’s 1st regiment of horse Colonel Birch managed to destroy both the opposing units plus their pesky “commanded shot”, with a notably devastating flank attack which saw 10 “attack chits” drawn and 4 hits.

Back in the centre the infantry continued to slug it out at close range. 

The end came when the Marquis of Worcester’s rag-tag musketeer regiment landed a devastating close-range volley into Birch’s 3rd foot regiment and it broke, racing from the field.

The game and ruleset were viewed as a success…if you like ECW! We played it slowly and didn’t think we got anything fundamentally wrong, but may have missed some of the nuances hidden in the various pages of rules. I for one will be re-reading again before we give the rules another outing next Thursday.

If anyone wants to read more Helion produce a rather nice book on the battle tittles “The Last Army” in their “Century of the Soldier” series.

Simon

Friday, 30 August 2019

Battle of Montgomery 1644 – For King and Parliament

Dave and Tony played a game of For King and Parliament (FK&P), sort of umpired by myself (when not making tea and coffee).  We used the scenario of the Battle of Montgomery 1644, which is straight out of the rulebook and I think it worked very well.

The scenario saw Tony’s initially smaller Parliamentary force facing Dave’s Royalists with some Parliamentary foraging cavalry due to return to the field of battle sometime in the game.
Initially the battle was a clash of cavalry, with the infantry surprisingly slow to get off the mark.  Units were lost but Dave, with superior numbers seemed to be winning the day. With Tony sitting between Eileen and Greg his chit drawing went downhill fast and matters seemed to be getting a tad sticky. But he held on.


Dave’s infantry finally got moving and began to put pressure on Tony’s line……
Turn 6…..the Parliamentarian foragers finally return and are now flanking the Royalist infantry.  Oh dear! Tony manages two attacks into the rear of Royalist infantry regiments but on draws of 10 chits each manages a paltry 2 disorders. However this is beginning to have an effect, and with Greg and Eileen gone Tony’s musketry chit-drawing improves immeasurably. Dave loses two infantry regiments plus his Forlorn Hopes and is in big trouble.

With Dave down to one Victory Medal and several units on double disorders we called it a day and a Parliamentarian victory.

So, what did we think? We got through 10 turns in two and a half hours. With one query about the direction pursuers have to go we had no issues with the rules. It was a lot faster than the game three weeks ago, and we had introduced slightly more complexity. All in all a satisfactory evening’s gaming.

Yesterday Mr Miller published another smallish ECW scenario of the 1646 battle of Stow-on-the-Wold in his TTS/FK&P newsletter. I think you will be seeing this re-played in the near future.

Friday, 2 August 2019

1st Bishop's War - For King and Parliament


Dave and Tony (English Royalist) vs Chris and Rob (Covenanter), in a scenario set during the Bishop’s War.


With two commands per side Chris decided to take the Covenanter Cavalry leaving Rob the Covenanter foot. In one of the most bizarre set ups I have seen Mr Banks elected to set up facing a series of hedges. His “poorly mounted” Scottish horse were going to try to charge across Aintree-style jumps or the Badminton Horse Trial field. This was not going to end well…


As expected Tony took the battle to Rob. Rob’s response saw him pull a “1”. In fact rumour has it that Rob pulled three “1s” in successive turns. We looked for Greg but couldn’t find him anywhere…..


On the Covenanter left flank Chris’ bold… or stupid… gamble failed. Dave’s infantry easily repulsed him and Chris’s command began to waver.


Tony attacked Rob and finally turned his flank. Not a good thing to happen to you in FK&P. Rob visibly winced when Tony announced that he would be drawing 10 “to hit” chits. Goodbye Scottish Covenanter infantry regiment.


Things were looking grim for the godly Covenanters. Chris began to pull back even as Rob attempted a spirited counter-attack and one of his infantry regiments broke the Royalist line and even managed to turn to attack the Royalist rear. Two of Tony’s cavalry regiments pursued off-table but eventually would return.

With the Covenanters only having 2-3 victory medals remaining plus a Colonel dead so command becoming problematic, we decided to call it a day and a hard-fort Royalist victory.