Wargaming from Hertfordshire & Beyond!

Sunday, 23 March 2025


The penultimate game in our Wars of the Roses campaign was based on the action fought at Ferrybridge the day before the decisive battle of Towton.   Our game was fought between Richard Duke of York (Tony) and Edmund Duke of Somerset (Rick)  

Despite a historical victory at 2nd St. Albans Queen Margaret’s victorious army found the gates of London closed to them.  In the face of converging Yorkist forces under the command of Edward Earl of March and the Earl of Warwick, Margaret was forced to retreat North.

As the Lancastrians crossed the river Aire en route for York they made a half-hearted job of destroying the bridge at Ferrybridge. After a fierce fight Warwick captured and repaired the bridge.

The following morning the Lancastrians attacked Warwick’s bridgehead.  To steady his troops Warwick killed his horse in their view demonstrating his readiness to fight and die.  Despite this Warwick was forced to withdrew across the bridge and rejoin the main Yorkist army under the command of Edward Earl of March. 

Remember this game is not intended as an historical replay. The aim is simply to kill as many of the enemy as possible.  This is the second of our historical “grudge” matches and each unit destroyed will attract an additional campaign victory point. 

Confident following his victories at Blore Heath and Mortimer’s Cross, Somerset (Rick) stuck with his proven recipe for success and fielded an unchanged army.  The Duke of York (Tony) refined the aggressive strategy he had adopted at Wakefield by further optimising his army for hand-to-hand combat and favouring bills and heavy knights over missile weapons.

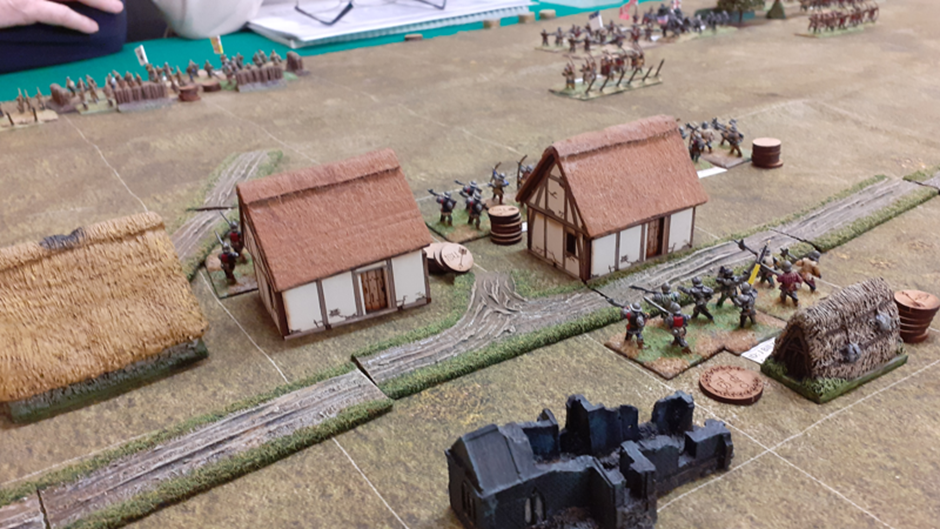
 The main feature of the battlefield was the river Aire separating the two armies.  On the day of battle the river was icy and fast flowing and so was deemed doubly difficult to cross.  A low ridge dominated the ground on the Yorkist right facing woods lining the river on the opposite bank.  Small woods dotted the landscape on the other flank.

 Despite Somerset’s (Rick’s) advantage in light troops the Lancastrians lost the scouting and were forced to start the set up process.   Somerset (Rick) decided to set up on the South side of the battlefield, deploying his retinue troops in the centre of the field opposite the bridge.  His centre was  under the command of Baron Hungerford (Rick) and Lord Audley. 

 Tony responded with a mixed force of shire levy holding the hills on his right centre and heavy infantry covering the road and the left centre The centre of the Yorkist army was under the personal command of the Duke of York (Tony) supported by John Fogge of Ashford. 

 Somerset (Rick) then deployed his left wing consisting of retinue and Welsh longbowmen with a stiffening of retinue bills and armoured men-at-arms.  This wing was commanded by the Duke of Somerset (Adrian) and sir John Roddam

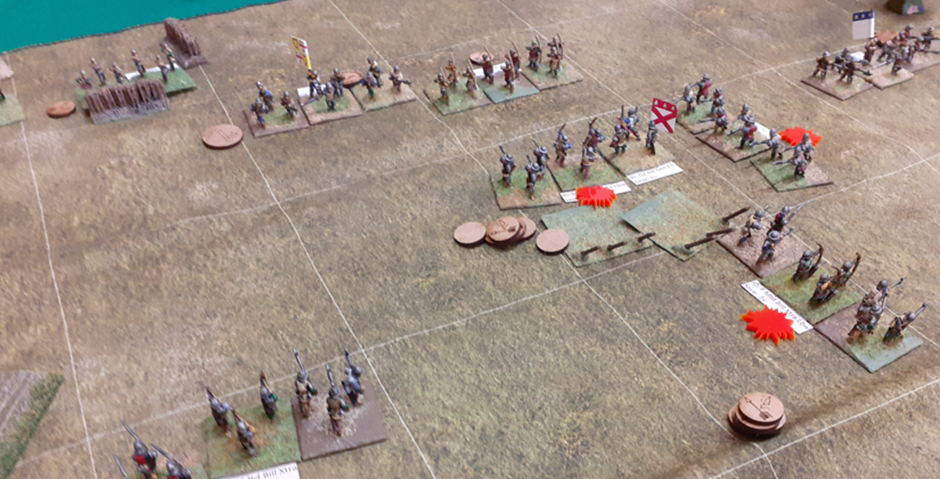
York (Tony) faced off against this force with his retinue longbows and his shire levy bills.  The Yorkists deployed in defensive positions on the low ridge on the right of the army.  Thomas Lord Stanley (David) and sir John Melton were in command

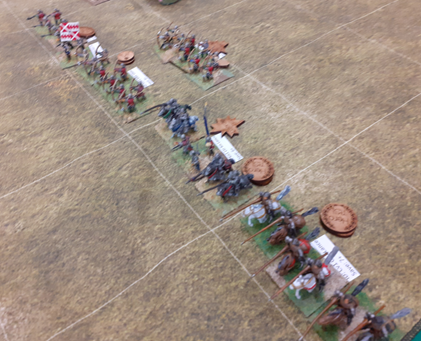
Somerset (Rick) completed his set up by deploying his mounted troops and his kerns on the open Eastern side of the battlefield.  This battle was under the command of the Earl of Wiltshire (Doug) and Sir Thomas Whittingham.

 Completing the set up York (Tony) deployed his left wing consisting of his mounted knights and veteran billmen under the command of Edward Neville, Baron Abergavenny (Paul) and Baron Cobham.

Unknown to the Yorkists a unit of kerns had become separated from the rest of the Lancastrian army.   This unit would arrive at a random location on the board edge.

The Yorkists meanwhile had successfully infiltrated a spy into the body guard of a Lancastrian general with instructions to strike in the heat of battle.

With the set up complete it looked like the decisive battle would be fought on the Eastern, open side of the battlefield.

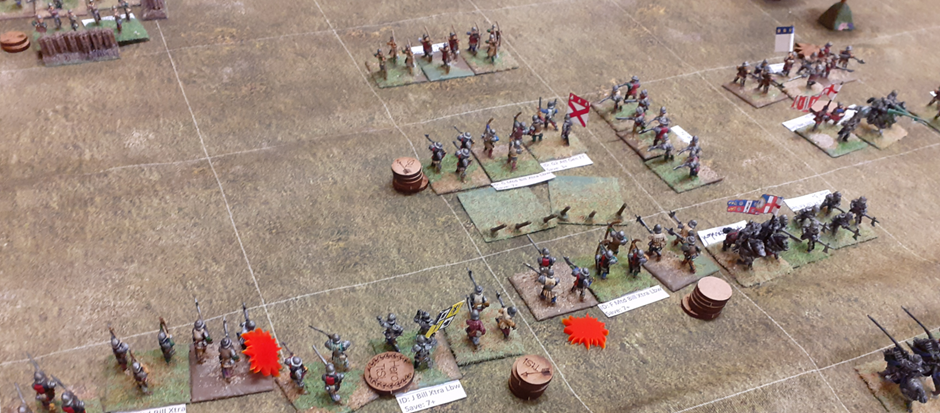
As battle commenced the Yorkist centre and left advance aggressively toward the river Aire. In contrast the Yorkist right stood firm defending their ridge.


In reply the Lancastrian left wing advanced to take advantage of the cover provided by the woods lining the river Aire

Slow to move off the Lancastrian centre (Rick) stood, awaiting developments at the bridge. On their right the Earl of Wiltshire (Doug) advanced his battle in good order covering the possible Yorkist crossing points


The Duke of Somerset (Adrian) on the left of the Lancastrian line pressed forward moving into the cover offered by the woods and bringing the Yorkist right under fire.

Inspired by his fellow generals Baron Hungerford (Rick), in the centre of the Lancastrian line, now stepped forward into longbow range.

Seizing his opportunity The Duke of York (Tony) unleashed a barrage of arrows putting an end to the leading Lancastrian billmen. 


Responding almost immediately Hungerford’s (Rick’s) longbows swept away the Yorkist billmen on the opposite side of the Aire.

Not to be outdone the Duke of Somerset’s (Adrian’s) wing, now in a favourable firing position, showered the Yorkist right wing with deadly fire wiping out the longbows on the extreme right, spreading disorder throughout the Yorkist ranks and forcing the entire wing to retire behind the cover of the ridge.


 As death came calling the Earl of Wiltshire (Doug) edged forward to challenge the resolutely advancing Yorkist left.

 Despite his infantry being stalled on the banks of the Aire Baron Abergavenny (Paul) boldly charged his cavalry across the river driving back the Irish kerns, shattering the Northern Border Staves and wounding the Earl of Wiltshire in the ensuing melee. Carpe diem! The Yorkist assassin struck but failed in his attempt to finish off the Earl of Wiltshire (Doug).

Pinned by the knights to his front Baron Abergavenny (Paul) now found himself outflanked by Sir Thomas Whittingham and his Currours.

Back on the Lancastrian left, having neutralised the immediate threat to his front, the Duke of Somerset (Adrian) decided to cross the Aire but not before despatching a unit of archers to forestall the threatened Yorkist assault in the centre. Fortune favours the brave and as Somerset (Adrian) successfully crossed the river in force the missing kerns appeared on the extreme right of the Lancastrian line.

The Yorkists preparing to cross the Aire in the centre of the battlefield now came under sustained missile fire.  Calamity! The Duke of York (Tony) was struck down by a lucky arrow.

On the Yorkist left the intensity of the battle raged unchecked as Baron Abergavenny’s (Paul’s) knights were struck in flank by Sir Thomas Whittingham’s Currors and swept from the field losing the army standard in the process.   Pressing their advantage the Lancastrian bodyguard, on the extreme right of the line, charged into the Yorkist Currors only to be devastated by a ferocious counterattack.  The Kerns, sheltering in the woods, on seeing this fled in panic.

On the opposite flank Lord Stanley’s (David’s) shire levy billmen turned to their flank driving off the troublesome Kerns from the table but inadvertently exposed their flank to missile fire from the main body of the Duke of Somerset’s (Adrian’s) troops.

Back on the Lancastrian right, the Yorkist bodyguard now aggressively charged into the Lancastrian Currors only to see their target evade away and be hit themselves by counterattacking Lancastrian knights who made short work of them.  Bravely leading the charge from the front, the Earl of Wiltshire (Doug) received yet another wound and was forced to leave the battlefield.

As these events played out on the Lancastrian right, the exchange of arrows continued across the bridge in the centre of the field but this time lady luck favoured the Yorkists as Baron Hungerford (Rick) was struck down by an arrow in the throat.

The Yorkist centre now started to cross the river.  In a cruel twist of fate the Lancastrians counterattacked only to be cut down and destroyed losing their army standard.

With the loss of this unit the Lancastrian army broke and “sauve qui peut” fled the field.  Another Yorkist victory!

The Yorkists have won six battles and the Lancastrians only two.  The Lancastrians are now battling for pride and the title of Kingmaker.  

The next battle will be Towton between Edward Earl of March (David) and Henry VI (Adrian).

Wednesday, 19 March 2025

WW1 Chain of Command, “The Patrol”


As we only had Steve and Mal today, I took the opportunity to retry WW1 Chain of Command, using the “Cocking Up the Mud & the Blood” supplement.

Steve took the Canadian platoon and Mal took the German platoon. (Note, this was the first outing for my WW1 Germans, so I hoped things would go well for them?)

Without specific objectives, the Patrol Phase was a bit of a ‘land grab’. The Canadians managed to secure a Jump Off point in the ruined house in the SW and another in some shell holes, just South of  the old trenches. The 3rd JOP was pushed East along the board edge, past the belt of barbed wire.

The Germans managed to secure a JOP behind some roadside earth banks, just North of the old trenches and another in the ruined Chateaux, out to the North East. The 3rd German JOP was also pushed along a board edge, but to the North West, but not close enough to the ruined wood in the NW. This almost proved pivotal?


The Canadians opened by deploying Red section in the ruined house, on Overwatch. The Germans responded by deploying their red section, behind the earth bank, just North of the old trenches. Thus opened a long range firefight.

In order to try to break the stalemate, the Germans deployed Yellow section from the board edge JOP in the North, but instead of going tactical, then making a dash for the woods, Yellow section decided to join the long range firefight against the house!?

In response, the Canadians deployed Blue section in the shell holes to the South of the old trenches. With Red section in hard cover, working the German Red section behind the earth bank (soft cover) and Blue section working the German Yellow section, in the open, things were not looking good for the Germans?! Yellow section was quickly pinned down and after Red section lost their 3rd MG08/15 loader, nobody else wanted to join poor old Hans on the LMG!

However, the Canadians then got cocky! They pushed the Yellow section bombers forward into the trenches and the Green section rifle bombers, wide on the Canadian right flank.

The Germans deployed Blue section into the ruined Chateaux, to counter the flanking move by the Canadian rifle bombers and Green section moved up to support Red section in the centre, in tackling the close range threat from the Canadian Yellow section.

The German musketry then kicked-in! The Canadian Green section was quickly pinned down and reduced to lobbing the odd rifle grenade at poor Hans. The Canadian Yellow section was reduced to 2 men and then routed. The Lieutenant called the survivors over to the ruined house, but the pitiless Germans mowed them down before they could reach the walls (-4 points of force Morale)!

Canadian force morale crumbled, just when it looked like a slightly rash German deployment had been their undoing!

WW1 Chain of Command is different to WW2. No rolling 20 dice for a Panzer Grenadier section. This is steadier stuff. It still turned out to be a long range firefight, but this was fairly open terrain and the ‘Patrol’ scenario does lack objectives, which tends to discourage movement from cover. A firm reminder that a good scenario needs objectives and probably even a WW1 table needs some LOS blockers!!  Anyway, WW1 CofC will return, especially as there are bigger toys to play with!!

Wednesday, 26 February 2025

Strength & Honour, Scenario 2 - Silarus River

Another post with a difference....a cartoon strip. Today's game was Strength & Honour on Tabletop Simulator. Rob has done a sterling job robbing the image files for this and creating the table bits. Rather than an textural After Action Report with pictures, this is pictures with a few words. 

The graphics does not do justice to the originals (a limitation of Powerpoint JPEG exports), but you can get the gist.


Saturday, 22 February 2025

Sharp Practice – War of 1812, ST. LAWRENCE RIVER, SCENARIO SIX: DEFEND THE FORT

United States Forces (Dave)

  • Captain McLintock – Status II with Two Groups of 8 Regular Infantry
  •  Sergeant Davison - Status I with One Groups of 8 Regular Infantry
  • Captain Bush – Status II with Two Groups of 6 Rifle Regiment
  • Lieutenant Clinton – Status I with One Group of 10 U.S. Volunteers in line (Musket armed)
  • Lieutenant Masters - Status I with One Group of 6 Woodsmen

British Forces (Rob & Steve)

  • Captain McGarrigle – Status II + Sergeant Burt – Status I, with Three Groups of 8 British Regulars
  • Captain Corburn – Status II, with One Group of 10 Select Embodied Militia
  • Lieutenant Walliams – Status I, with One Group of 6 British Light Infantry
  • Lieutenant Mitchell – Status I, with One Group of Artillery crew and a light gun

The British started on a Force Morale of 6, which could be increased by 2, if the supply train reaches the fort. The US started in 10.

The Americans win by capturing the British Primary Deployment point, or driving the British Force Morale to zero.


The British opened with a bold deployment, marching the Regulars out of the fort, toward the US riflemen, appearing in the woods to the North-West of the fort. However, after marching the British Regulars out, in column, they then formed line, at which point Captain McGarrigle’s command chit appeared to disappear from the bag, forcing the British Regulars to creep forward on end of turn flags!
The American rifle fire rapidly started to open holes in the British line, but as the British line crept ever closer, the US riflemen resorted to tap loading their rifles, so close were their red coated opponents!
The British pushed their 4lb gun out of the North side of the fort, in an attempt to disrupt the US Riflemen, but the US responded by deploying their woodsmen skirmishers, to snipe at the gun crew.

In turn the British were obliged to deploy the militia on the fort palisade, to engage the US woodsmen. But, just as the British fire started to have some effect, the US deployed a militia unit, to threaten the fort more directly and the gun & militia were forced to switch targets.

Over on the US right, the main US Regulars had been forced to march around their own advance guard, tramping through slowly through the woods to the West of the ‘T’ junction. However, as the US line started to wheel around, the British light infantry appeared behind their right flank, wounding the US Commander and inflicting significant Shock on the US Line.

The US responded by rushing the Woodsmen across the road, to tackle the new threat of the British lights.

While all this drama was happening back in the woods, the main British line, still exposed in the open, was starting to crumble in the face of sustained US rifle & musket fire. First the left of the British Line was driven back, then the centre and finally the line formation was broken apart. This onslaught on the British Force morale, just ate through their meagre starting position, so British morale collapsed!

Saturday, 15 February 2025


The seventh game in our Wars of the Roses campaign was the second battle of St. Albans between the Yorkist Earl of Warwick (Paul) and the Lancastrian Earl of Northumberland (Doug/Reg). 

With Edward Earl of March delayed in the Welsh Borders at Mortimers Cross, the Yorkist defence of London fell to the Earl of Warwick. Ranged against him was a Lancastrian army raised in the North of England by Queen Margaret. The Northerners moved swiftly South pillaging as they went.

Warwick took up a position north of St Albans where he set up several fixed defences along the line of an ancient earthwork known as Beech Bottom Dyke. 

The day of the battle (17th February 1461) dawned cold and damp.  Moving via Dunstable Margaret bypassed Warwick's fixed positions and attacked St Albans from the West.

By late afternoon, the Lancastrians were attacking north-east out of St Albans to engage the Yorkist centre and right. 

As dusk set in (which would have been in the very early evening on a February day with poor weather), Warwick realised that his men were outnumbered and increasingly demoralised. He withdrew with his remaining forces.

Remember this game is not intended as an historical replay. The aim is simply to kill as many of the enemy as possible.  This was the first of our historical “grudge” matches and each unit destroyed will attract an additional campaign victory point. 

The players are now becoming more experienced with their chosen units nevertheless for this battle Paul chose to drop his artillery and, in their place, invested in additional cavalry units.  In contrast Doug/Reg stuck with their previous army featuring large numbers of units double armed with bills and longbows.

The main feature of the battlefield was the town of St Albans on the Lancastrian left flank.  The rest of the field was flat and featureless with a small wood between the Yorkist centre and left deployment areas.  

 Despite Paul’s extra cavalry the Lancastrians had a small scouting advantage nevertheless a poor chit draw saw the Yorkists seize the initiative and the Lancastrians were forced to begin the set up.

The Lancastrians decided to set up on the South side of the battlefield.  They started by deploying their right wing.  This wing consisted of Shire Levy stiffened by a few retinue troops and Welsh mercenaries under the command of Baron Clifford (Doug) and Sir Christopher Curwen.

Paul responded by setting up his Shire Levy on the opposite flank.  The task of these units appeared to be to defend the Yorkist camps from behind strong palisades.  They were supported by a unit of Burgundian hand gunners and were under the command of Baron Hastings (David) and Baron Ogle

The Lancastrians now deployed the first of their camps and placed a force of mounted retinue infantry into St. Albans.  This wing was under the command of William Tailboy (Mal) and Ralph Percy

Paul proceeded to set out his left wing.  The extreme left of his line was held by a strong cavalry force and to their right were retinue longbows backed up with a unit of veteran billmen.  This wing was under the command of Sir Thomas Neville (Tony) and Sir John Conyer.  

Both armies now deployed their centres.  The Lancastrians placed their second camp next to their first, the whole surrounded by palisade walls and garrisoned by Irish Kerns.  The Lancastrian cavalry were arrayed in strength behind a line of retinue and veteran billmen.  The centre was commanded by the Earl of Northumberland (Adrian) and Sir Richard Percy. 

Finally, Paul set out the Yorkist centre.  A deep formation of mounted and foot knights were supported on their right by retinue bill and mounted archers behind stakes.  The Yorkist centre was commanded by the Earl of Warwick (Paul) and Sir John Clinton.

The Lancastrians agreed that the Yorkist right flank was probably a holding force designed to draw Lancastrian troops to their doom as they engaged at a disadvantage across the palisades.  It was agreed that the left wing would incline to their right throwing their weight into a combined attack against the Yorkist centre.

The Yorkists appeared to initially plan a defensive strategy weakening the Lancastrian close combat units as they advanced through the Yorkist arrow storm

The battle began with William Tailboy (Mal) moving smartly North East out of St. Albans to engage the archers stationed ahead of the Yorkist centre.

The Lancastrian centre, under the Earl of Northumberland (Adrian) moved forward in support. Their right, Lord Clifford (Doug) began his long march into bowshot.

The Yorkist line also advanced conforming with their leading elements

As the Lancastrian left wing continued to press forward a unit of Irish Kerns which had become lost on it’s approach to the battlefield made an appearance on the Yorkist right flank. 

After much debate it was agreed that they should appear as close to St. Albans as possible.

The Lancastrian line continued to advance moving into longbow range. The Yorkists opened fire, showering the Lancastrians with arrows.  Despite their superior firepower the Yorkist fire was generally ineffectual but did succeed in  disordering the left of the Lancastrian line as it emerged from St. Albans .


The Lancastrian left now attacked the Yorkist archers but to no avail as they struggled to engage past the archers’ stakes.  In the  centre Warwick (Paul) now advanced to menace Tailboy’s (Mal’s) left flank only to be met by Northumberland’s (Adrian’s) advancing centre. 

The Lancastrian right flank (Doug) engaged the Yorkists by fire spreading disorder through the Yorkist ranks and destroying a unit of Yorkist bills.

Back on the Lancastrian left the Yorkist archers withdrew, closely pursued by Tailboy’s (Mal’s) billmen.

Hasting’s handgunners (David) sallied forth from the safety of their palisaded camp engaging the extreme right of the Lancastrian line and forcing the late arriving Kerns to retire into the shelter of St. Albans

The Earl of Warwick (Paul) continued to press forward in the centre of the battlefield turning to threaten the exposed flank of Tailboy’s (Mal’s) impetuous charge. A desperate struggle developed in the centre of the battlefield and despite Tailboy sustaining a light wound neither side was able to gain an advantage. 

In the Yorkist centre Northumberland (Adrian) charged forward against Warwick’s (Paul’s) knights, losing both his body guard knights and his Northern border horse in the maelstrom.  Despite these setbacks Northumberland (Adrian) engineered a flank attack against the rampaging Yorkist knights destroying them and capturing the Yorkist army standard.  Things were beginning to look sticky for the Yorkists.

despite his advantage in firepower Sir Thomas Neville (Tony), on the Yorkist left, was making little progress.  In an attempt to break the deadlock Sir Thomas (Tony) extended his cavalry to the left threatening a charge against the Lancastrian line.

Neville’s (Tony’s) cavalry contacted the Lancastrian line to little effect but at last his archers succeeded in destroying a Lancastrian unit.

Back in the centre Warwick (Paul) and his rampaging bodyguard were struck in the flank by Northumberland’s (Adrian’s) Lancastrian knights.

The Yorkist shire levy under Baron Hastings (David) now sallied forth from their camp striking the Lancastrian right and causing a general panic as three Lancastrian units fled the field.

With the Lancastrian centre shattered the battle was declared a Yorkist victory.

With only two games left, the campaign is a Yorkist victory.  The Yorkists have won five battles and the Lancastrians only two.  The Lancastrians are now battling for pride and the title of Kingmaker.   With extra points to be won in the final two battles it’s still an open field.

The next battle will be Ferrybridge between The Duke of Somerset (Rick) and Richard Duke  of York (Tony).