Wargaming from Hertfordshire & Beyond!

Saturday, 29 January 2022

Caesar's Camp, Scenario 6: Counter Attack at Villers


The Stuka raid had left two buildings in Villers in ruins and burning, but also channelled the British patrols into the West side of Villers. As a consequence, the Germans appeared to get the upper hand in the patrolling, exposing a path around the East side of the village. The British only managing to gain one small lodgement Jump Off Point, to the West side of the road, in the centre of the village.

The Germans soon pressed red section around the South East side of the church, flanking the entire village. The German sniper also took up a commanding position, in the church tower, soon reporting the presence of a British infantry section in the farm house, near the central cross roads.

While the German red section pressed on to the SW, the Germans reinforced with green section and wheeled in an IG.18 gun, to start dislodging the British infantry in the farm house. After a few rounds, the farm house structure was threatening to collapse, forcing the British blue section out into the street, where they were forced to take tactical cover behind the hedgerow. 


The Germans then deployed yellow section, in the copse to the North of the church, to try to dislodge the British red section, located behind the hedgerow, in front of the farmhouse. However, the British then revealed a Vickers MMG, in the upper story of a building further down the street, which engaged the German yellow section, rapidly causing two causing two casualties in the German yellow section.


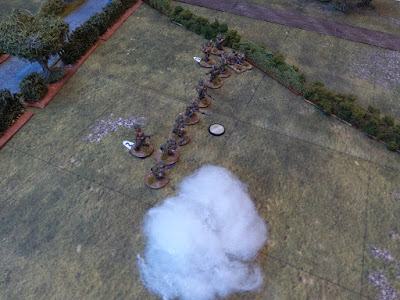
Meanwhile the Germans deployed blue section to the NE of the village, with the intention to infiltrate the village from the East, but they appear to have become disorientated in the smoke, from the earlier Stuka raid and thus did very little! The German green section, deploying to the East of the church, then appeared to indulge in a little marching practice, wandering up and down the street, presumably looking for a press photographer?


At this point, Platoon Sergeant Hugh G. E. Balles decided to take matters into his own hands. Calling forth red section, he leapt over the hedge and led red section on a mad dash for the church. Once inside, he set the bren gun onto the German yellow section, behind the church, wiping out the remaining LMG team and wounding the section leader. At the same time he ordered the rifle team up into the church tower, to capture the sniper, who then seems to have accidently fallen from the tower, with a hand-grenade in his pocket, down onto the IG.18 gun below! An award of a VC has been applied for, for Sgt Balles for this heroic action! (The Germans subsequently claimed that 3 double 6s on the trot, was against the Geneva Convention!)

What appears to have happened next is a bit unclear. It is thought that the German red section, still in the smoke from the burning building, at the South end of the village, appear to have mistaken the firing from the church, as yellow and green sections seizing the farmhouse. They then attempted to storm the building where the Vickers MMG was located, only to find the ground floor garrisoned by 8 pioneers, from the Norfolks. In the ensuing vicious hand-to-hand combat, the entire German red section was wiped out, from the loss of 3 pioneers and 2 Vickers crew members. The dying words of the German platoon sergeant Beschwörer were reported as, “Well that was a lot tougher than expected!”.

At this point, the German platoon leader Altrich (still not yet deployed) decided to call for a withdrawal.


Saturday, 22 January 2022

A Bit of Bother in Berlin

After a well-earned Christmas break, and having shed the excess weight associated with mild over-indulgence, our indefatigable reporter was back on the road. This time his assignment was Berlin in the early 1980s. The Balloon had gone up and the Red Machine was on the march. For the beleaguered Allied forces in Berlin, this meant big trouble, even if it did mean the British could put to the test their natty “Berlin Brigade” urban camouflage scheme!

The British decided to try and hide their Striker in the Churchyard covering as much of the table as possible, positioning their MILAN team and other LAW-equipped infantry in the houses. The mighty Chieftain lurked menacingly in the rear. GSFG roared on with the T72 platoon taking the more open Northern route, the BRM and a BTR advancing cautiously to the south and the 2nd BTR parading up the road. Apparent madness!

The Russians got lucky. The tank platoon commander spotted the Swingfire-equipped Striker, and opened fire. A hit! This was never going to end well. 125mm smooth bore vs the 8- tonne Striker. The inevitable result was the addition of a plume of oily smoke marker to the table.

The Brits responded by moving the Chieftain to face the MBT threat. The Chieftain’s engine managed to not break down and it crawled into position behind a house facing the T72s. 

The still-jubilant Soviet T72 platoon commander became the next fireball.

In the centre, the MILAN team were having a real problem acquiring any targets, much to Rob’s frustration. Where is the much anticipated MIRA sight the crew could be heard asking? Euromissile were probably running late with the development programme. How typical!

Tony pushed on in the South, taking the Churchyard and managing to outflank the outnumbered British units.

His infantry de-bussed from the BTR-60 and deployed with their RPG-7 along a hedge facing the Chieftain’s side-armour.

The result was another dead Berlin Garrison vehicle.

With the British down to two infantry elements and light armour...

the Umpire declared it a Soviet victory. The road into West Berlin was open.


This was the first run-out of the Joe Legan’s “Cold War Tanker” modifications for WAT. Probably still a work-in-progress but worth the $1 expended on them. At only 5 pages they provide some nice ideas, particularly about introducing infantry and ATGMs, and should provide the basis for a “Black Wolf” homebrew set that match how we think WWIII would have played out. Assuming the various ex-missile engineers can ever agree on how their favourite bits of kit would have really fared on the battlefield!

Simon

Thursday, 20 January 2022

Caesar's Camp - The Chateau on the Hill (Part 5)

Today we played the fifth scenario from the Caesars Camp pint sized campaign.


This was going to be a difficult game for the British, with lots of open ground to cross to get to the Chateau.

Under cover of a 3” mortar barrage on the chateau, the British first deployed Yellow section opposite the chateau, on overwatch, covering the chateau and the woods to the north,

while Red section started to advance toward the wood to the NE of the chateau.

The Germans responded by deploying Red section in the edge of the woods facing the British Red section and Yellow section in support, behind the hedge, to their rear. To neutralise this threat, the British FAO started to walk the barrage onto the German positions, while the infantry advanced. 


However, suddenly the barrage ceased and the Germans opened intensive and effective fire on both Red & Yellow sections. Both these sections started to take significant losses, so the British tried to lay smoke, to cover a move Southward by Yellow section.


Realising the initiative was slipping away, the British deployed Blue section, on the track leading to the SE side of the Chateau, covered by the Vickers HMG. 

The Germans responded by deploying the IG 18, 

along with a supporting infantry section, 

engaging Blue section in the open. After sustaining losses, Blue section was forced to retire, leaving Red and Yellow sections to retreat under cover of more smoke.

A good tractical game played by the Germans, causing very high casualties on the British, resulting in the C.O. dying in mysterious circumstances.

Sunday, 16 January 2022

Villiers Bretonneux III

In the latest Too Fat Lardies special there was an article on WW1 What a Tanker which peaked Phil’s interest as he had accumulated a nice collection of relevant tanks. And so it came to be that we played a game pitting MkIVs against A7Vs.

The scenario was a simple one with the Germans mounting an armoured assault toward Villers-Bretonneaux. The objective was for the Germans to get one or more A7V off the Western table edge.
Terrain Notes: The woods in this scenario were treated as ‘mud’, as regards tank movement, but did block LOS. Same for the ruins WW1 tanks have nothing like the power of WW2 tanks, so pushing through trees or rubble is a risky processes!


Both sides advanced attempting to uncover the opposition blinds.


A pair of MkIVs headed towards the north of the factory whilst Rob’s MkIV slowly advanced around the woods…


Whilst two A7Vs trundled along the road. All was going well so far for both sides, with no breakdowns.


Simon ended up playing a game of cat and mouse with Tony’s female MkIV. Resulting in Tony slowly losing command dice.


Tony’s male MkIV decided to take on the two A7Vs on the road.


Rob’s advance ground to a halt when a lucky shot from Dave’s A7V blew him to bits.


Chris tried to advance but a double one meant that the engine had expired. Now he was just a very large pillbox. Sportingly, Tony let Rob have his male MkIV which was probably a bad move as another lucky shot, this time from Chris, blew up this tank. All was left was Tony in his female MkIV which was rapidly running out of command dice.


As Tony was down to two dice the game was called at this point. A good fun game, where people were adding the “Wild Dice” to give extra strike dice. It was commented that we should do that when playing early WW2 games. Thoughts for future games are a bit more LOS clutter, some smaller objectives, i.e., MG nests, etc and maybe some random elements, e.g., field guns.

Thursday, 13 January 2022

Operation Martlet in the Digital Age

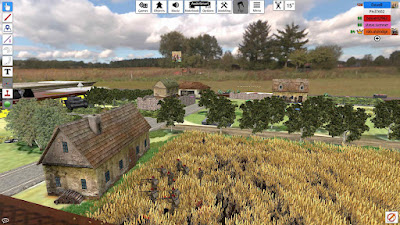
Having tried out Command and Colours using Tabletop Simulator we thought we would be a bit more adventurous and try a game of Chain of Command, having found the setup for the Too Fat Lardies Operation Martlet pint sized campaign on Steam.

https://steamcommunity.com/sharedfiles/filedetails/?id=2080803354

The British objective was to get at least one team to exit the right hand side of the table.
The patrol phase took longer than was usual for a physical game due to a bit of difficulty in measuring distances and the markers sometimes wouldn’t sit on top of terrain. However, we persevered and the British managed to get jump off points advanced along the bottom edge of the table with a solitary point in the cornfield near the road.


The British were hoping that they could use their jump off points at the bottom edge of the table as their main point of advance and deployed accordingly. The Germans had other ideas and deployed a section into the orchard which the British shot up, wiping out a team. The Germans sent in reinforcements, thus preventing the British from advancing.

The Germans also deployed a section into the farmhouse. It was easier to line the figures up outside the building otherwise it would have been difficult to know what was inside. Also sometimes the figure placing misbehaved and we ended up with “figure stacking”.

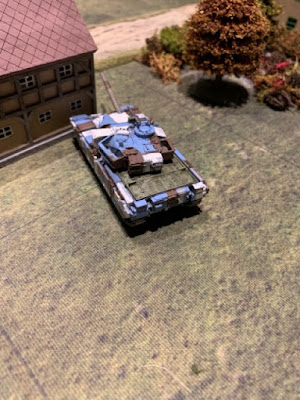
With a Mexican stand-off at the bottom of the table the British switched their line of advance to the cornfield with their last section. This section came under fire from the Panzer IV but managed to continue their advance...

And find cover behind the building.

To provide support to the Panzer the Germans moved an MG42 team up to the hedge next to the crossroads, but immediately came under Bren fire, wiping them out. Things were now looking very sticky for the Germans, especially as the Panzer failed to activate while the British continued their advance to the table edge, thus completing their objective.

Interesting game with a few minor issues with moving figures but by the end we were getting the hang of the system.