Wargaming from Hertfordshire & Beyond!

Friday, 6 July 2018

WW1 Chain of Command - Black Wolf 5th July

Last night saw several games played in a hot and humid Hitchin Scout Hut.

In one corner we had a very nice looking 6mm ECW “For King and Parliament” game.  Proof, if proof were needed that 6mm is the way to go!

Near the toilets we had a 15mm American War of Independence Black Powder game, which almost had as much fencing as one of Tony's games!

Behind them was another 15mm game……..Ancients using the Aurelian rules.

Craftily sited near the storage locker and open door for maximum breeze benefit were Messrs Banks and May, playing ACW “Sharpe Practice “. Nice looking terrain, even if one could not quite see the cloth underneath! From what I can deduce Chris’ Union troops got a beating at the hands of Tony’s Rebels.

We suspect that the morale of Chris’ Union troops was made more brittle by a lack of painting attention being lavished on them. There were claims by some that they had painted more colours on 6mm ACW figures!!!

The final game of the evening saw a CofC WW1 game courtesy of Phil….and Dave.  Dave and I took the Germans, Phil and Malcolm took the Canadians.

Set sometime in 1918, the game saw an A7V broken down in a ruined village between the two sets of rear area trenches .The mission for both sides was to secure the tank.


Despite a less than optimal patrol phase the Germans managed to infiltrate a section, including an LMG, into the village and hunker down among the ruins.  The Canadians managed to move two of their sections into a hand grenading position but suffered high casualties due to accurate German rifle fire. However, overall German progress was slow, due the barrage which prevented extra troops getting onto the table.
A grim war of attrition followed with fairly ineffectual Canadian grenade and rifle fire being met by a more effective German response.  An “end of turn” proved pretty decisive .Not only did it end the barrage, allowing unimpeded German entrance to the table, including the armoured car, but the “double turn” allowed even more lead to be poured into the Canadian positions. Ultimately the Canadians decided to charge the ruined building. Carnage! Both sections virtually wiped out……as was the Canadian morale!

The German Feldwebel ( Senior Leader) was awarded the Iron Cross 1st class both for his heroic leadership in taking over the 2nd section after its Gefreiter (Junior Leader) was cut down by Canadian fire, but he achieved his mission and recovered the A7V. This is quite valuable to the Germans as only 20 were produced.***

Friday, 29 June 2018

Operation Garden Panzer - Day 1

Black Wolf - Operation Market Panzer
The following short reports summarise the epic Black Wolf boys trip to the Panzer Museum in Munster, German. The trip covered 1375 miles, taking in the Market Garden corridor, the excellent Overloon museum, on to the Panzer museum in Munster, then back via the Mohne dam, to the fortress at Eben Emael and home via the Musée du Corps de Cavalerie in Jandrain-Jandrenouille in Belgium. 


Day 1: Market Garden Corridor: After a morning Eurotunnel crossing we drove up to the starting point of Market Garden, Joe’s bridge just North of Grote, then on toward Eindhoven, via the CWGC cemetery at Valkenswaard, then a swing around Eindhoven, through the 101st drop zone and back into Eindhoven.


Operation Garden Panzer - Day 2

Day 2: After a diversion to the really excellent museum at Overloon, it was up the 30 Corp corridor into Arnhem.


After a stop at Arnhem bridge, it was on to the Airborne museum at Hartenstein and the CWGC cemetery at Oosterbeek.


Then it was a 4.5 hour drive to Munster, before consuming 16 beers in the Grenadier Hotel honesty bar and bed!

Operation Market Panzer - Day 3


Day 3: A tour of the Panzer Museum at Munster. The museum is a bit like Bovington used to be like, before the revamp. However, it does have a really impressive collection of armour, particularly around post WW2 German army. The Panzer 38(T) and Panzer I tanks were a ‘must see’ and the full scale plastic Tiger 1, a really impressive replica.


After lunch in a café over the road, it was the epic drive back to Maastricht, but we decided to break the journey at the famous Mohne dam, of the dambuster fame.


Operation Market Panzer - Day 4


Day 4: Eben Emael: An excellent tour of the extensive underground of the Eben Emael fort, including a chilling view of just what a 50kg shaped charge can do!

A quick tour of the upper works and then it was on to Musée du Corps de Cavalerie in Jandrain-Jandrenouille, where Richard gave us a really good tour of this small, but well equipped museum about the little publicised 1940 tank battle at Hannut.


Finally it was home, but not before an exciting diversion via P&O ferries, after Eurotunnel decided to have a power cut!?

Friday, 15 June 2018

To the Strongest, Wars of the Roses Campaign, Northampton


To reflect history, the Lancastrians were on the defensive for this battle. After wandering in, sans army list, Warwick (Tony) eventually managed to assemble a "Yorkish"(sic) army, which was mostly in accordance with the army list and only a few points over the 210 point target! Pretty good for Aussie maths and organisation!
The Lancastrian force, -24 points for being on the defensive, but with a stream/ defensive ditch to defend, awaited. Buckingham (Simon) to the right, Shewsbury (Phil) to the left and Lord Grey (Greg) in the centre.

The Yorkist army had a cunning plan however!  While the Earl of March (Chris) provided a pinning/distraction on the left flank, Warwick's (Tony) force of bow and bills advanced on the right, as a covering force (to soak up the Lancastrian arrow storm!) and enable Fauconberg's (Dave) breakthrough force of foot knights, following close behind, to get into a position to assault the far left of the Lancastrian line.

Despite a slow start (a quick series of '1' activation chits), the Yorkist plan was starting to work and the Lancastrian forces were just not redeploying quickly enough to counter the threat. However, despite losing a couple of bow units, Shewsbury managed to get a couple of veteran bill units in to hold the line against the Yorkist foot knights and billmen, battling hard to cross the ditch. It looked as if the Lancastrian line might just hold long enough for reinforcements from the other flank to arrive, but suddenly disaster struck!

First a Yorkish Hoblier unit surged around the Lancastrian right and started to threaten Shewsbury's rear. Then a unit of Lancastrian bow simply withdrew from the defence line, allowing two units of Yorkist foot knights to cross the ditch. Dastardly treachery at work!

Lancastrian morale crashed, both on and off the table and the Yorkist leaders, gloating over a victory so cheaply and treacherously bought, rubbed thier hands in glea! Better luck for Lancaster in Wakefield.

Friday, 8 June 2018

Sharp Practice 2 - Peninsula

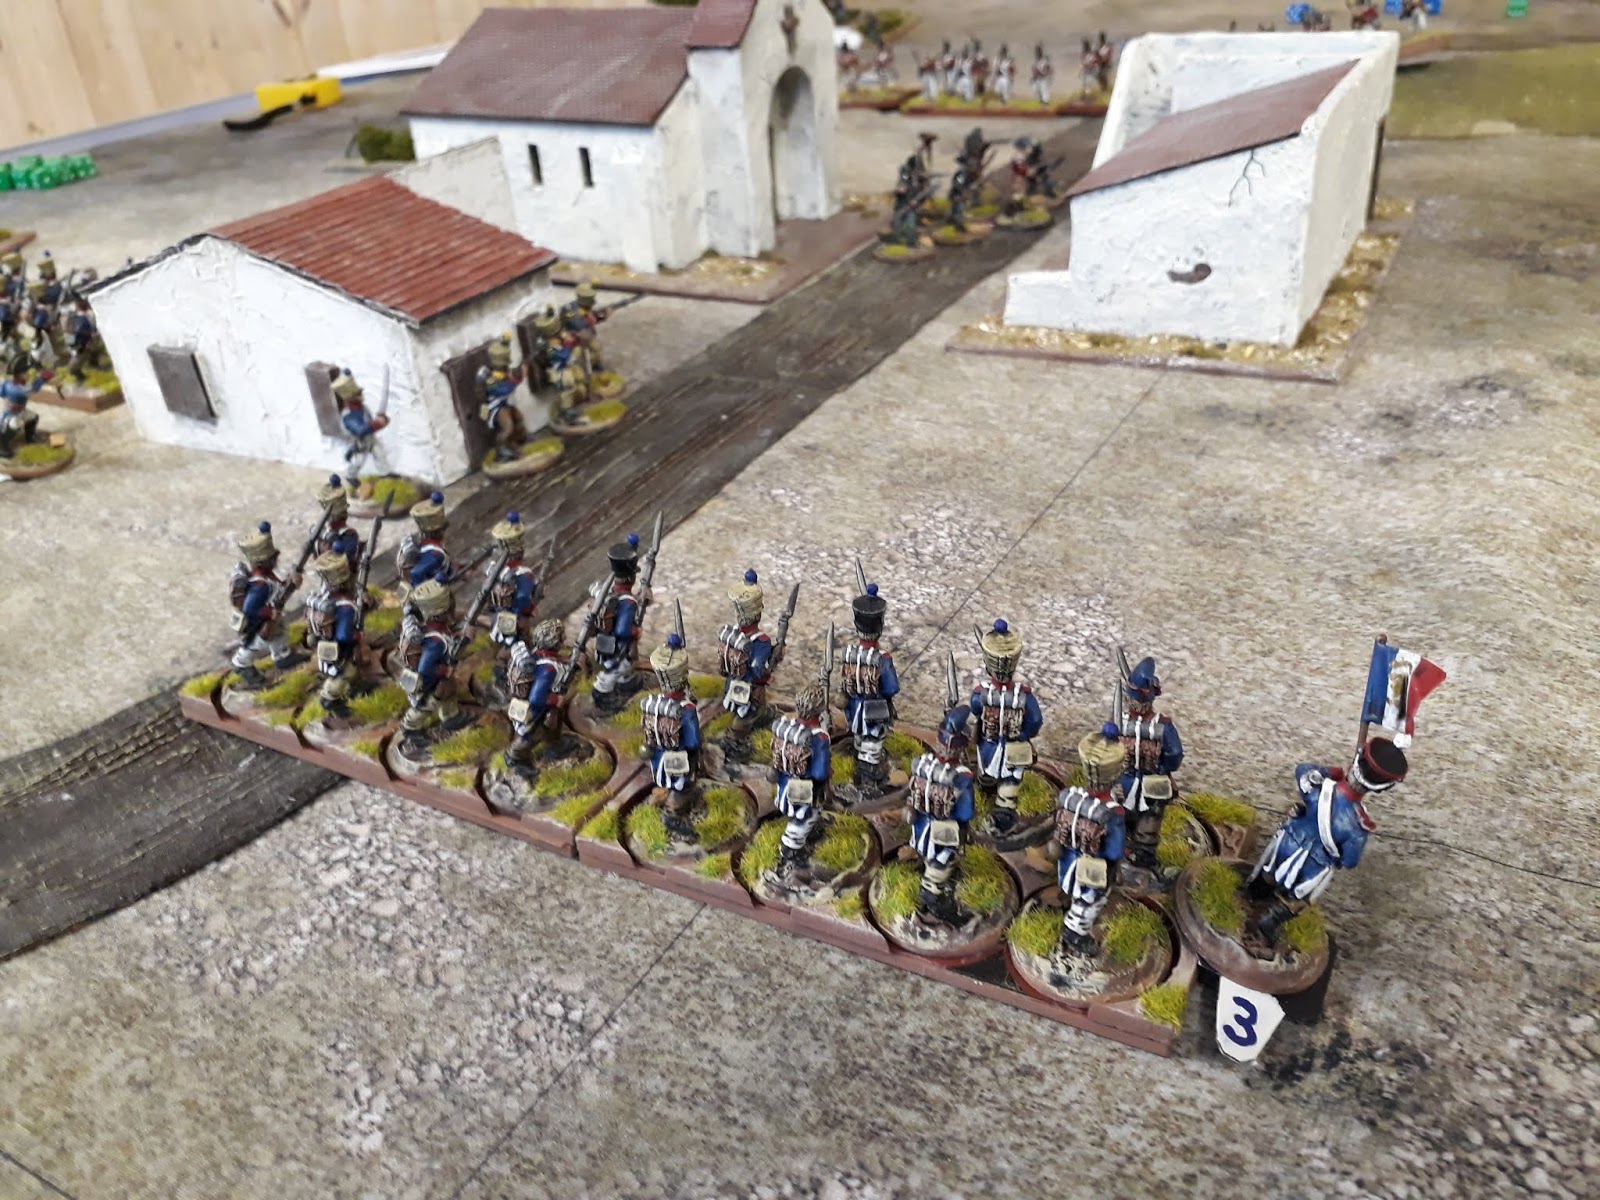
Sharpe Practice 2: Peninsular, 1812. Agents on both sides had identified that a local priest had knowledge vital to both sides and so both the French and the British despatched small forces to bring back the Spanish holy man.

The British managed to steal a march on the French, as the French commanders (all 5 of them!) appeared to argue over precedence on the entry road (plus Phil kept drawing Tiffin chits!)! Fortunately the French Voltigeurs had slipped forward to seize the vineyard to the rear of the church and also the house of the French end of the village. The Voltigeurs, now hidden in the vineyard, were delighted when Major Blunder led his British Line troops too far forward, exposing his flank to the French light troops (that will teach Phil to perform a 3 flag interrupt and then roll an 18 for movement!!).

Despite Lt. Dick Blunt leading a group of riflemen around the left flank of these French light troops, they continued to do significant damage to the exposed flank of the British line. This was further compounded by the arrival of a French gun. This discharged two rounds of canister into the thinning British line, which quickly fell back, breaking formation.

Meanwhile the second group of British riflemen had dashed into the church and grabbed the priest. However, as they made a dash for the safety of the British line, the French Voltigeurs in the edge of the village, opened up on them, successfully pinning them down (too much shock to run anywhere!).


By now Major Blunder had dashed to the right hand end of the British infantry line, to rally the broken troops there. However, just as he started to restore some order, units of French line infantry arrived and delivered a telling volley, sending the right of the British line tumbling from the table, Major Blunder being swept along with them! Major Leroux (Greg) was most pleased with the outcome.

On the other side of the hall there was a se ond run-out of "For King and Parliament”, using a scenario set in the 1650 Dunbar campaign. A large but inexperienced Scottish army facing a smaller, veteran English New Model force.