Wargaming from Hertfordshire & Beyond!

Friday, 27 August 2021

Meales Onwheals exacts his revenge

After his well earned week’s R&R our reporter headed North West from the Syrian Desert to Britannia. As it was August he retained his Summer attire only to find he was going North, to the dank, dark misery that constituted Caledonia with its barbarous populous. This wasn’t going to be fun! Planning on both sides had proved problematic, with the Roman in particular struggling with “click and drag”. The Barbarian “illegal” deployment was most generously permitted by the Romans, who hoped it wasn’t a gentlemanly decision they came to regret...


The Romans set to at once. Their left flank promptly stopped with a failed move. The centre and right advanced cautiously leaving a field of fire for the stationary artillery. Was this a mistake? The Barbarians poured forward with warband heavy right and centre

and their pesky chariots and some more warband on their left.

The Roman plan seemed to be to hold the left and centre, expecting the right to turn the Caledonian left. Unfortunately the Roman cavalry and Auxilia didn’t seem to have read their orders. Indeed a Barbarian chariot unit darted forward and despatched javelins killing a veteran cavalry unit. This definitely wasn’t in the Roman plan. Fred generously gave an explanation of the rules which allowed the Barbarians to charge through the gap, and two moves later chariots had taken a Roman camp. 5-0 to the Barbarians. 

A cry of “Don’t Panic Optio Hortensis” went up from the Roman line and they seemed to steady. Indeed multiple disorders were inflicted on the Warbands in the centre but the killing blows were frustratingly elusive. 

Most worryingly the Roman Senior Commander was beginning to doubt his subordinate’s loyalty to the Empire. Everyone knew of his Batavian heritage, and recalled the great revolt of 69-70AD!

The Caledonian right wing with its array of light troops peppered the Auxilia and Legionaries with missile fire from the cover of the trees and eventually turned the flank. All was hopefully going to be saved on the Roman right where they disordered a deep warband and then lined up a flank attack by Auxilia. A “one” called the umpire. “General Re-roll” was the call. ”A second one” cried Phil. Greg and Dave cackled grimly like the witches from Macbeth...how Caledonian.

The largely passive and ineffectual Roman artillery died after a chariot attack from the rear. No great loss but another victory medal went north. The slogging match in the centre continued with double-disordered warbands retreating and rallying in a most frustrating manner. Eventually a centre warband did die which brought some vain hope for the Romans, but other kills were elusive. 

The Barbarian lights killed the Auxilia on the Roman left, forcing a retreat towards the camps with an exposed flank.

On the Roman right they finally killed a warband plus the annoying General, but the medal count still favoured the Barbarians.

“Death of Glory” was the cry from the Roman lines. Unfortunately it meant more dead Legionaries as their attack on the disordered fanatics failed and they were charged in the rear by chariots.

The final straw for the Romans was when light chariots charged an Auxiliary unit in the flank, resulting in a disorder which allowed a frontal attack by the other light chariot unit. Result one dead Auxilia unit. Meales Onwheals in his light chariots 3 Romans Nil.


After nearly two-and-a-half hours of combat the game was called, ending in a fairly convincing Caledonian Victory. The Romans could bemoan their chit pulling, but once again they were made to remember that Hadrian’s Wall was built for a reason. To go North of it is bl**dy dangerous for Romans. Plus, is there anything of real value North of it?

Simon

Wednesday, 25 August 2021

Meales Onwheals goes raiding again

With a large force to feed Meales Onwheals decided that it was time to steal supplies from the Romans again. Although he was sure that the Romans would do their best to prevent this.

Leggit deployed his two groups of warriors into the cornfield with Meales Onwheals hovering in the background in his chariots. The Romans deployed a large formation of Auxilia in opposition, with some supporting slingers.

Grin Gupdrear and his levy watched the impending action with baited breath.

The Auxila charged in

Quickly routing one group of warriors and then the next. Where was Meales Onwheals when he was needed? Apparently spending time unbogging his chariots or at least that is what it seemed like.

After watching their friends get chewed up the levy attacked, managing to rout one Auxilia unit.


Reinforced by the third group of Auxila returning, after having chased off Meales Onwheals, the Auxilia fought on tenaciously and managed to push the levy back. The British morale was now very low and wouldn't take much to force them from the field of battle.


Finally, Meales Onwheals turned up and attacked the Auxilia in the rear.

However, it was all a little too late to help as the other Auxiliaries attacked the levy and pushed the British morale to zero. Game over.

Another good game of Infamy Infamy, but the British had poor luck in that Meales Onwheals spent most of the game inactive. If he had attacked earlier then it would likely have been a different ending as most of the Auxilia units were down to half strength by the end.

Friday, 20 August 2021

Star Wars CofC – “Luke to the Rescue”, or, “The Empire Springs its Trap”

Scenario

Having been frozen in Carbonite on Cloud City by Darth Vader, Han Solo was handed over to Boba Fett for delivery to Jabba the Hutt. The Empire have tracked Han Solo to a small desert village on Tatooine where the handover to Jabba is taking place. As the Emperor still wants to capture Luke to turn him to the Dark Side, the Empire is planning a trap. They have leaked the handover location to the Rebels, assuming Luke will lead any rescue attempt, and have secretly deployed troops in the village, with the main force, led by Darth Vader, waiting for the arrival of the Rebel rescue force. Jabba has come with his own personal protection, including Lookouts. They will protect Jabba with their lives.


Special Rules

Luke Skywalker: Luke must be captured ALIVE. All other Rebels may be killed; Han Solo in particular. A single Leader kill (Hit roll of 1), or wound (Hit roll of 2 or 3), will render Luke stunned and he can no longer activate for the rest of the turn. Once stunned he can be captured by the Empire, and must be carried/escorted back to the Empire’s Initial Deployment Point. Luke can be healed back to consciousness by a Medical Droid, but if he was stunned by a Leader “kill”, he will act as a Junior Leader, and cannot run, for the rest of the game. The Empire do not take a morale test for killing a Medical Droid (because they don’t care).

Han Solo: Once Han is reached by the Rebels, a lone Jabba will hand him over without further resistance.

Han must be unfrozen before he can be moved. This requires completion of a Task Roll of 6. After he is unfrozen, he must be escorted back to the Rebel initial deployment point. He will be temporarily blind for 6 game phases. Whilst in this condition he cannot run or take any action other than movement. He will count as a man when calculating the effect of shock. He cannot be killed until all members of the squad/team escorting him have been killed; they will protect him with their lives. After 6 game phases his sight will be restored and he will become a Senior Leader, and operate normally.

Jabba the Hutt: Jabba’s bodyguards will protect him with their lives. No hits will be allocated to Jabba whilst a bodyguard is alive.

Boba Fett: Boba Fett will attempt to flee when alerted by the Lookouts. If attacked he will fight back. (He is very heavily armed, so this is not advised.)

Victory Conditions

To win a victory the Empire must capture Luke Skywalker, and either recover him back to their Initial Deployment Point, or drive the Rebels off the field by reducing their Force Morale to zero. To win a victory the Rebels must recover Han Solo back to their Initial Deployment Point, or drive the Empire off the field by reducing their Force Morale to zero.

Force Support

The Rebels had 11 support points, and selected a special forces Pathfinder Squad, an Adjutant, a Medical Droid, and the newly acquired X-34 Landspeeder to aid the quick recovery of Han. Their starting Force Morale was 8. The Empire had 10 support points, and selected their special forces Death Trooper Squad and an E-Web Tripod Mounted Blaster. Their starting Force Morale was 10.

The Patrol Phase

The Patrol Phase was adapted to include Patrol Markers for Jabba as well as the Empire & Rebels. This was to avoid both sides ending up with Jump-Off Points in the village. The Rebels had 2 free moves before the Patrol Phase started. At the end of the Patrol Phase the Rebels & Empire both placed three Jump-Off Points. The Rebels had one in and one behind the palm trees in the north, and 1 behind the northern hill/dune. The Empire had one behind the cacti in the south, and one behind the southern hill/dune, and one on their baseline. The Empire also had one Jump-Off Point hidden in the southern Desert Houses (unbeknown to the Rebels). This could be used to deploy one squad or two teams. This was the Empire’s planned ambush. The Empire squad/team hidden in the house had observed that Jabba had a Lookout stationed behind each set of barricades. The remainder of Jabba’s force was already deployed inside the central Desert House containing his Initial Deployment Point. They would remain there until alerted by the Lookouts. Jabba did not place any other Jump-Off Points. The Rebels activated first.

Game

The Rebels luckily started with a double activation, so deployed their elite Pathfinder Squad and Luke into the palm trees, and then advanced towards the village, quickly (but not silently) taking out both lookouts. Alerted by this, Boba Fett fled the scene, as he was no longer being paid, and Jabba’s remaining guards ran out of the ruined house to investigate. The Rebels squad and Luke continued to advance towards the northern house, where they had concluded Han was located. Luke plus his rifle team entered the house, killing Jabba’s personal bodyguard, whilst the heavy weapon team waited outside as protection. Jabba quickly surrendered Han, deciding to wait and see what would happen next. The Empire then quickly deployed their similarly elite Death Troopers, who had been hiding in the southern house, and they advanced towards the action. The trap was sprung! Luckily, the Empire also got a double activation, so they quickly closed on the Rebels. Concentrating on trying to un-freeze Han, Luke sent his rifle team out to join the battle outside, and hand to hand combat commenced. With 2 elite teams of Special Forces going head-to-head, this wasn’t going to end well, and it didn’t. Both sides took heavy losses, with the Pathfinder leader being wounded and rendered unconscious, whilst the remainder of his squad was forced to retreat, leaving him behind. 


The Death Troopers then followed up and opened fire, wiping out the remaining Pathfinders and capturing the still unconscious leader. Whilst this was going on, Jabba’s two remaining guards entered by the east door and attacked Luke. Luke used his lightsabre to quickly dispatch them, but took a light wound in the process, luckily not enough to stun him. 


He then finally managed to complete the un-freezing of Han.


Meanwhile, outside the village, both sides continued to deploy troops. The Rebels deployed a Senior Leader and a squad of Troopers into the palm trees, while the Empire deployed Darth Vader, a squad of Stormtroopers, and the E-Web Blaster in the cacti, and a Rocket Launcher on the NW corner of the southern hill, the latter two both covering the approach to the village from the north east, expecting the imminent arrival of the Landspeeder. The Empire then advanced their Stormtroopers and Darth Vader into the central outcrop of rocks, to threaten the Rebel Troopers.


The Rebels deployed a second squad of Troopers behind the northern hill to provide much needed support.


Having seen their Special Forces squad destroyed, the Rebels retreated out of sight to the back of the palm trees, to wait for their reinforcements to catch up. This allowed the Empire, with a double activation, to advance into the village, and take position behind the barricades, covering both the palm trees, and the western door to the house containing Luke. The accumulated Rebel losses and wounds had now reduced their morale down to 4, and with the Empire still on 10, the Rebels were getting close to losing. With the southern exit from the house now clear, Luke escorted the still blind Han off the Western edge of the board and made a dash into the nearby ravine, while his squads of Troopers started to retreat back to their Jump-Off Points. 


This ended the game, with neither force having fully achieved their objectives.

The mission will continue in the next game, with the Rebels trying to rescue Luke & Han who are hiding somewhere in the ravine, while the Empire are still under orders to capture Luke and bring him to the Emperor. The ravine is a dangerous place. Home to bands of Tusken Raiders, who hide in the upper walls of the ravine and will snipe down at anyone foolish enough to enter. 


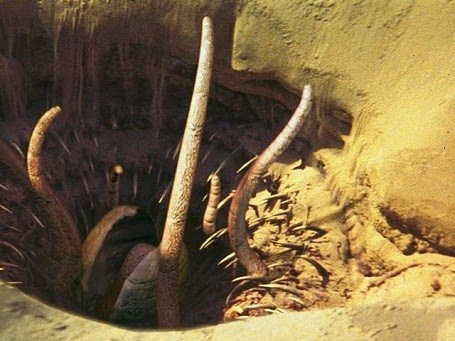
Caves in the lower walls are lairs of various dangerous and hungry beasts. Whilst the floor is pitted with Sand Worm nests, waiting for any potential food to wander too close.


Jabba, is still angry at losing Han. Will he hire more bounty hunters, including the deadly Boba Fett, to recapture Han?


Standby for the next thrilling instalment.

Friday, 13 August 2021

Dave becomes the new Greg

For the third week in a row our reporter stared across a sandy battlefield. This time he had returned to Eastern Syria in the 3rd century AD, to witness a re-run of the battle from two weeks ago as the Sassanids once more took on the Romans. Would the Romans, now led by Dave assisted by Chris once again crush the Sassanids headed by Phil, aided by Tony and Fred.


The Sassanids set up with “heavy” cavalry heavy flanks, the infantry in the centre strengthened by the elephants ,cataphracts and notably some light cavalry. The Romans went “traditional”. The Legionary core in the centre with cavalry and lighter troops holding the flanks.

The Sassanids went first and took attack to the Romans. Even their spearmen, who normally hang back moved forward quite aggressively. The Romans moved forward albeit not quite so quickly. Turn two saw the first problem for the Romans when a unit of veteran Legionaries died under a blizzard of arrows from the light cavalry. Good chit-pulling for the Sassanids matched by abysmal saves for the Romans. The General was also wounded and had to move units. Dave’s groans were loud, and the Roman collective morale plummeted. Desultory combat on the flanks brought little result, and so it seemed the centre would be the decisive combat zone.

Turn two saw a Sassanid light cavalry unit charge through the gap in the Roman line and take the camp. Three coins changed hands. Sassanids 5, Romans 0. The Roman catapult artillery on their left “unleashed hell” but to little effect, and then died themselves. 7-0. On the Sassanid left the massed archers took up a defensive position behind the marsh from where they could pour fire into the Roman right flank. At first they made no impact but eventually did kill a light javelin unit. 8-0.

Back in the centre Chris, the Roman commander decided caution was the best approach. Legionaries pulled back to defend the second camp and another unit turned to try and re-take the captured camp. Disaster. Phil’s elephants caught them from the rear, and destroyed them with their three attacks. 10-0.


On the Roman right Dave charged his veteran cavalry into the Sassanids, but only succeeded in disordering his own unit. Events took an even worse turn when his bow-armed light cavalry were destroyed. 11-0.


In the centre the Sassanid infantry trudged forward through the huge hole in the virtually non-existent Roman central command. Would theirs’ be a rare moment of victory?


All eyes turned to the Roman left. Tony had pinned the Roman cavalry, and now the light cavalry and cataphracts simultaneously attacked one of the Roman units from flank and rear. This was going to hurt.

Cue one dead Roman unit. 13-0 and complete victory for the Sassanids. The Sassanid spear had been denied their “moment in the Sun"...well at least figuratively if not literally!


Our regular reporter will be taking a well-earned break next week. With the club re-opening we will see if this heralds a new dawn for a gaming. Or maybe a mini COVID outbreak amongst the wargaming community. At least Dave will be safe!

Simon

Thursday, 12 August 2021

Last Chance for Capitaine Opless

Capitaine Opless has obtained information pertaining to the British supplying muskets to the Spanish Guerrillas and has been ordered to put a stop to it. This could be his last chance at gaining success or else being demoted to the regimental supply officer.

The Royal Navy has landed a stock of muskets for the Spanish Resistance movement. The British enter at Deployment Point B1, with a handcart loaded with the muskets. The objective is to get the muskets off the table, at the Secondary Deployment point A2, in Spanish hands. The handcart moves with 2D6, discarding the lower dice, on either road or on open ground. It may move on either the main British Leader [1] activation, or during Tiffin. The hand cart may only cross the river at the ford and may not enter Broken Ground, cross a wall or enter woods. Crossing the ford takes a full turn.

Spanish allies deploy at Deployment Point A2 and also have a wagon, to transfer the muskets into. The cart moves with 2D6, either on the Spanish Leader [4] activation or during Tiffin. The wagon may only cross the river at the ford and may not enter Broken Ground, cross a wall or enter woods. Crossing the ford counts as a Major Obstacle (2D6, discard higher).

The muskets may be transferred from the handcart to the wagon with a Task of 8.

The main French infantry column (4 x Line Infantry) deploy on the main French Deployment Point F1. The French skirmishers and Dragoons crossed the river higher up stream and therefore deploy onto the Secondary Deployment Point F2.

The river is fordable. It counts as a Major Obstacle (Roll 2D6, discard the higher) and will break formations. The ford is considered a Minor Obstacle for foot or mounted troops.

At the end of turn 1 all the available forces had managed to deploy from their respective deployment points. 


It was now a race to see if the French could get to the ford to prevent the transfer of the muskets.


Capitaine Opless forced marched his column to beat the British to the junction at the ford

and managed to form line and pour fire into the British Marines. This wasn’t looking so good now for the British but they managed to return fire, along with some support from some Naval skirmishers. Living up to his name Capitaine Opless was knocked out and soon his unit was in disarray, having to fall back dragging his body with them. Lt Bruinnez was left holding on as best he could until a stray musket ball took him out. Disaster for the French was looming.


On the other flank things were going only marginally better with the Voltigeurs engaging the Spanish militia, wounding their leader, and the Dragoons racing towards the building to try and save Capitaine Opless’s mistress. However the Spanish skirmishers had managed to get to the orchard at the same time as the Dragoons, forcing them to dismount.


Lt Piquer with the second French line had managed to drive off the Naval skirmishers and advanced towards the British line. The British Marines were in disarray when Lt Piquer ordered his unit to open fire, causing severe casualties. 

This wasn’t looking great for the British although they had managed to transfer the muskets to the Spanish. Could they get them to safety?


Meanwhile Capitaine Opless had recovered but was barged down by his troops as they enthusiastically attempted to get back into the action. Well named that man.

The Dragoons and Spanish skirmishers maintained delusory fire but as usual the only luck the French had was bad as their leader Sgt Cul de Cheval went down wounded by being shot in the ass by his own men, swiftly followed by the Dragoons running out of ammo. Sensing some sort of victory the Militia charged out of the woods...

only to be stopped in their tracks by fire from the Voltigeurs which managed to push them back into the woods.

Unable to fire back effectively the British Marines succumbed to the fire from Lt Piquer’s unit with one group routing off the table. Unfortunately they took both Lt Piles and Sgt Able with them, causing their morale to plummet to one. Suddenly it was looking as if the French might snatch victory.

The Voltigeurs managed to push back the militia but unfortunately the British morale stubbornly remained at one. It was up to Lt Piquer, who now fired on the last remaining British group of Marines.

Dice were rolled and for a change the French luck was in as the British were forced from the table and morale reduced to zero.

Another hard fought game that was initially looking good for the French, swung away from them but came back at the end thanks to Lt Piquer. Capitaine Opless lived up to his name once again with his honour only being saved by his subordinates.